Time to sew the front pockets of my stretch denim jeans muslin.
Getting Started
I decided to use my serger to finish the seams that aren’t enclosed or flat-felled. This is primarily the outside seam of the jeans, as well as the pocket bags and fly shield pieces.
I knew the serger was due for cleaning and oiling, and I’m extremely glad I took the time to do it. As I was vaccuming out the lint from the serger, I found a sewing pin in the feed mechanism. It was a basting pin left over from my last T-shirt project. This could have seriously damaged the serger if I had not discovered it first. The accepted wisdom is that pins and a serger are a bad combination, and I definitely have learned my lesson.
I have the sewing machine and the serger arranged in a “Dual-barrel” setup.
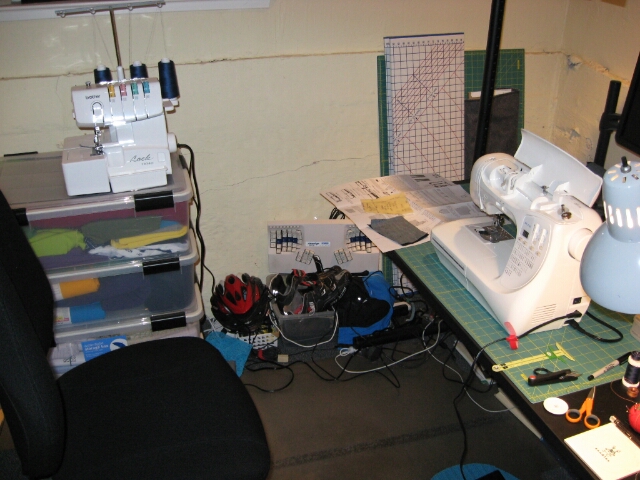
Because there’s not enough space on my desk, I situated the serger on top of the stack of plastic bins holding my fabric stash. This works – barely – but the top of plastic box is not the most stable place for the serger. Perhaps I need to think about a second folding table for the times when I want to run more than one machine simultaneously.
Another related problem is also caused by lack of space. The pattern instructions constantly switch between regular seaming and topstitching. Each time requires a thread change if all you have is a single machine. That is a real hassle.
I don’t have space to store a second sewing machine, and I also don’t want to become one of those people who collects sewing machines for a hobby. I’ll buy a new machine as an upgrade, or to get a new feature, such as coverstitch, that I need for projects. But I don’t think avoiding thread changes, by itself, justifies care and feeding of a new, or new-to-me sewing machine. Maybe if I make jeans constantly. But then I would probably think about upgrading my current machine altogether.
I’m also keeping note of construction details on the pattern directions themselves, adding notes in pencil. I started doing this to keep track of the thread changes. But I’m also adding missing details and clarifications, such as stitch length and where I can optimize out a thread change by combining steps.
I’m using approximately 8 stitches per inch (3.1mm) setting for both seaming and topstitching. In my Home Economics course in sewing in high school back in the ’80s, I was taught to use stitches per inch with the sewing machines we had at the time (a sage-green mechanical Singer with stich-per-inch numbers on the control lever).
My modern machine (a Brother PC–210) has a slider for stitch length with no numbered markings on it at all.

To set stitch length, I always have to make a test stitch, and count the number of stitches per inch. So stitches-per-inch is my preferred unit even though everyone uses stitch length in millimeters nowadays. (To me this is the greatest flaw in an otherwise very pleasant machine.) At some point I plan to put a sticker on the slider and mark some stitch length settings with a Sharpie.
Pockets
I’m pleased with the way the pockets turned out.
Coin Pockets
Without thinking, I cut two coin pockets, but I only needed one. I did the topstitching on both, but I had to be careful to choose the right-hand side piece when assembling the pockets. I also pressed and topstitched the back pocket pieces at the same time as the coin pocket to avoid a thread change. I didn’t actually attach the back pockets, but I suspect I could have done so to get all the pocket construction done at the start.
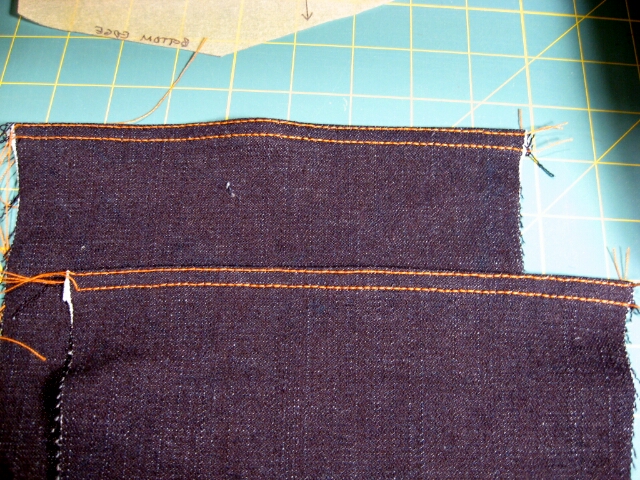
Back pockets.
Stretch Denim Sucks, Part 2: The tops of the back and coin pockets went wavy and stretched out when I topstitched the top finishing stitches, much like some knits do when sewn on a conventional machine (You can see the waviness in the photo above). I decreased the presser foot pressure a bit to try to alleviate the issue. Otherwise, the fabric has been stable enough for regular seaming and stitching.
When it came to attaching the coin pockets to the front pocket facing, I didn’t know what to do to end the topstitching on the coin pocket. Backstitching is a no-no with topstitching thread, because the end result looks really ugly. And I couldn’t adjust the machine’s settings for a lockstitch mid-sewing. So I left a thread tail and used a tapestry needle to push the threads to the wrong side, where I knotted them. That worked nicely.

Topstitching the coin pocket to the front pocket facing.

Front pocket facing, after attaching coin pocket and serging inside edges.
Pocket Bags
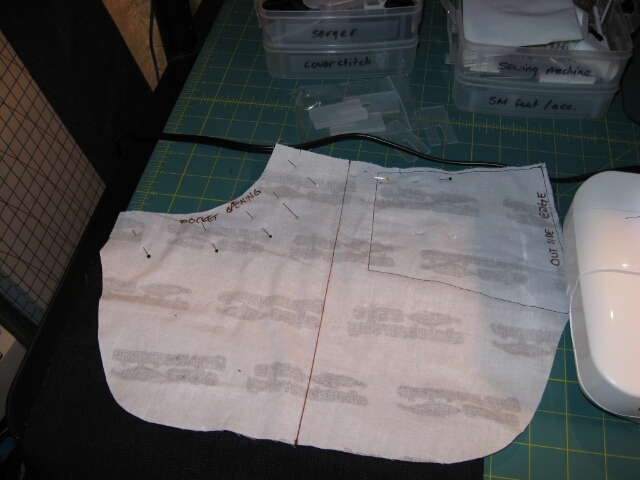
One gotcha with the pocket bags concerns the definition of “inside” of the lining. The instructions aren’t exactly clear that what they call the WRONG side of the lining is actually what you want on the inside of the pocket bags when they are finished. To me, that’s the RIGHT side of the lining and I think the pattern instructions are confusing and misleading on that point. I followed the photos for correct in-out orientation at the MPB sew-along.
I had to remember to topstitch the pocket bags shut, as well as serging them. I thought I could get away with just serging, but noticed the instructions in the pattern and in the MPB sew-along said to do both and so I had to back up and do this.
For the understitching where the pocket bag meets the pocket openings, I tried using a triple zig-zag as suggested in Nancy Zieman’s book. The machine bent the needle and the entire machine locked up with strange clacking/scraping noises. I went into damage/rescue mode, changed to a standard needle/standard fabric to verify there was no lasting machine damage, then resumed with a new denim needle and a straight stitch.

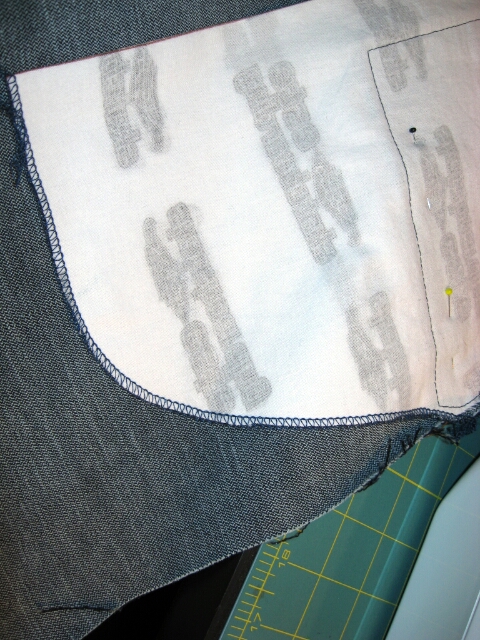
Pocket edge after understitching the pocket bags and topstitching on top.
Outside seam
Serging the outside seam was the most challenging bit, which was a surprise to me. If you’re not cutting with the blade it’s too easy for the serger to miss, especially at points where there are several layers of fabric such as where the pockets meet the side seams.. I tried to re-serge in a few places where the serging didn’t catch the first time. The result looks messy – but not messier than the inside of a pair of Levi’s jeans.

Back Pocket Detail
My machine has no programmable embroidery capability. In fact, I chose my machine (the Brother PC–210) over its more well-known big brother (the PC–420) because I didn’t need all the fancy stitches. But it does have a small selection of decorative stitches that I might be able to use to put together a pocket design.
I spent some time with Autodesk Sketchbook Ink on my tablet, drawing some prospective designs for pocket topstitching. Most lack inspiration, but hopefully I’ll come up with something.
Other News
I have ordered a replacement cover stitch machine from Ken’s Sewing Center and it is on its way. The order was put on hold for address verification. I had to call them and change the order to have the machine shipped to my home address, rather than work. More on the coverstitch machine after it arrives.
I had the same confusion about the wrong side pocket lining with this pattern. I don’t know if it is just this pattern where they call it that, or if it is some standard sewing terminology that the pocket lining is wrong side, or what.
I’m surprised your machine doesn’t have a numerical stitch length. I was thinking of using 3mm for inner stitching, 4mm for topstitching (something I read somewhere).
This is the first time I have really done topstitching. Previously I just used the same thread on top and in the bobbin. Hopefully I won’t get them mixed up, accidentally not topstitching in one place or another.
Good luck!
I think 3mm for inner stitching, 4mm for topstitching would work just great.
The lack of numerical stitch length on my machine is just really odd. I suppose it might be an issue only for an OCD geek like me who hears something like “set a 3.0mm stitch length” and must set that EXACT same setting on my machine.
As evident from the thread tension test sample, I’m using the same type of thread in top and bobbin. I got this advice from the MPB sewalong, since that is what Peter was using when he made the sample pair of jeans for the sewalong.