Hello everyone!
As we are now well into the back half of July, and I’m still at the muslin stage of my pants project, I’ve decided to abandon the idea of competing in the Pattern Review Mini-Wardrobe contest.
Ideally, all the muslin work would have been completed before July 1, leaving me to focus just on creating the final garments. To get the pants pattern to a point where I’m happy with it, I have to do more muslins. It would be sad to investment enormous time and effort into something that doesn’t fit, just to meet an arbitrary deadline.
And this month has been bad for me in terms of free time, with a big deadline to meet at work. I already have enough stress from job-related deadlines, I don’t need self-imposed deadlines for sewing projects as well.
So out the contest goes.
The Project Expands
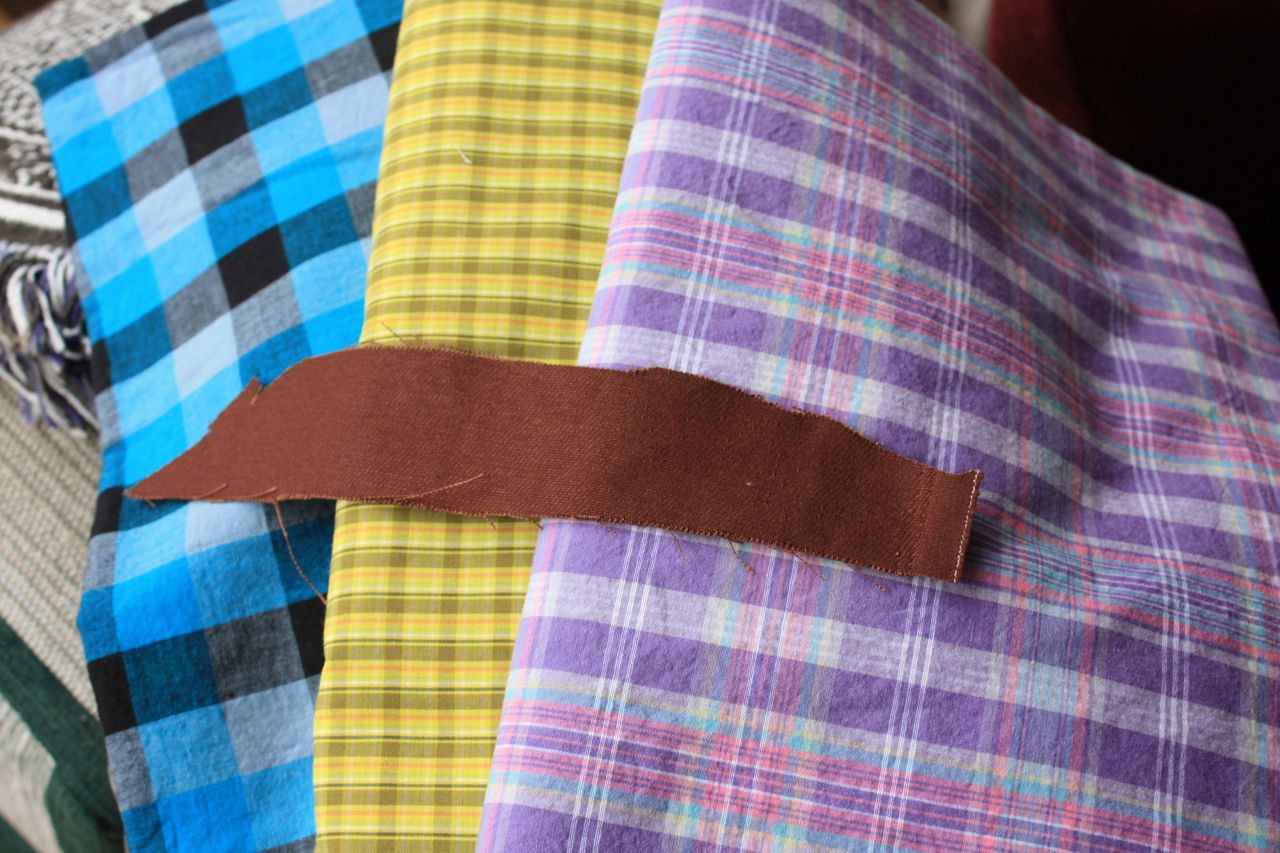
That doesn’t mean the project is over. In fact, freed from the contest rule limitations it’s expanding to three pairs of pants and three shirts. Fabric Outlet, as expected, began their 40% off sale and I picked up a cut of the brown twill I had passed over for the platinum grey. It goes great with the shirt fabrics, and as a side benefit will take this summer wardrobe into the fall months. (September and most of October are traditionally the best “summer” months in San Francisco, because they have less fog and more sun).
I have to give the contest credit for inspiration. I make a lot of one-off projects that look nice by themselves, but don’t necessarily work with with anything else in my wardrobe. This is the first time I’ve actually planned a set of garments intended to be worn with each other, and I’m really excited to see the results. The project is way more important to me than the contest.
Muslin Fitting #2
Last time I stepped down a size, and graded from 34 at the waist to 32 at the hips. I picked apart the first muslin and used it to cut out the second. I cut new pocketing, yoke and facings because the new pattern pieces didn’t fit inside the old.

Right away, I ran into some construction problems with the new facings and yokes. The inside pocket facing (the one on the underside of the pocket opening) no longer matched with the pocketing.

The yokes are also about 1/4 inch too high. I think that’s because I needed to cut the size 34 version of the yoke at top and bottom, rather than the 32.

Construction glitches aside, the new muslin turned out much more successful than the first. There’s a lot less fullness in the hips and thigh.
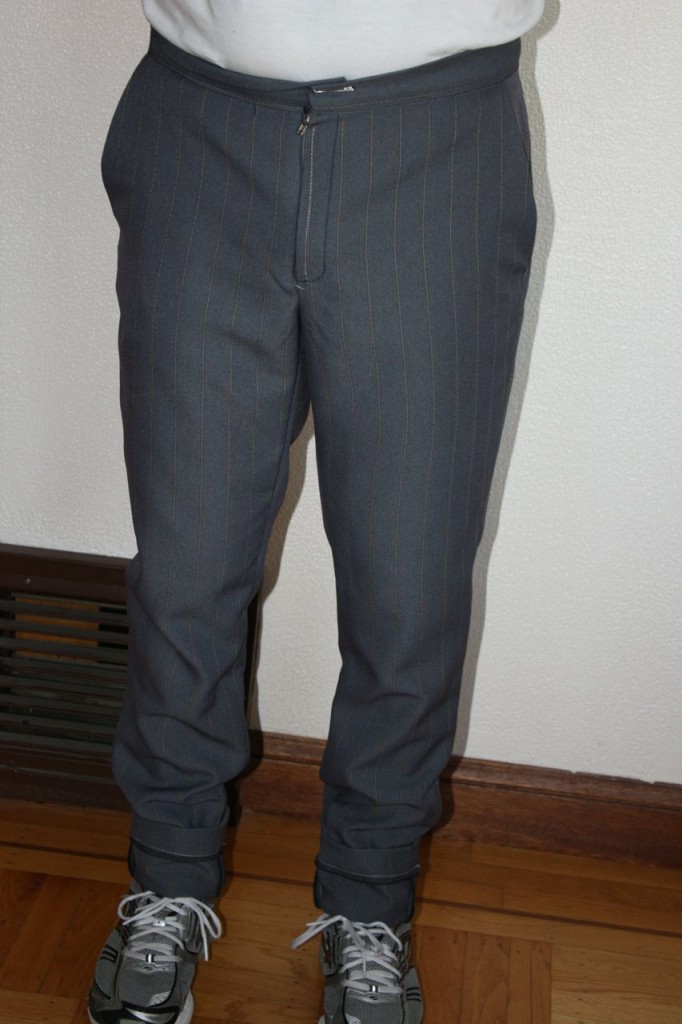
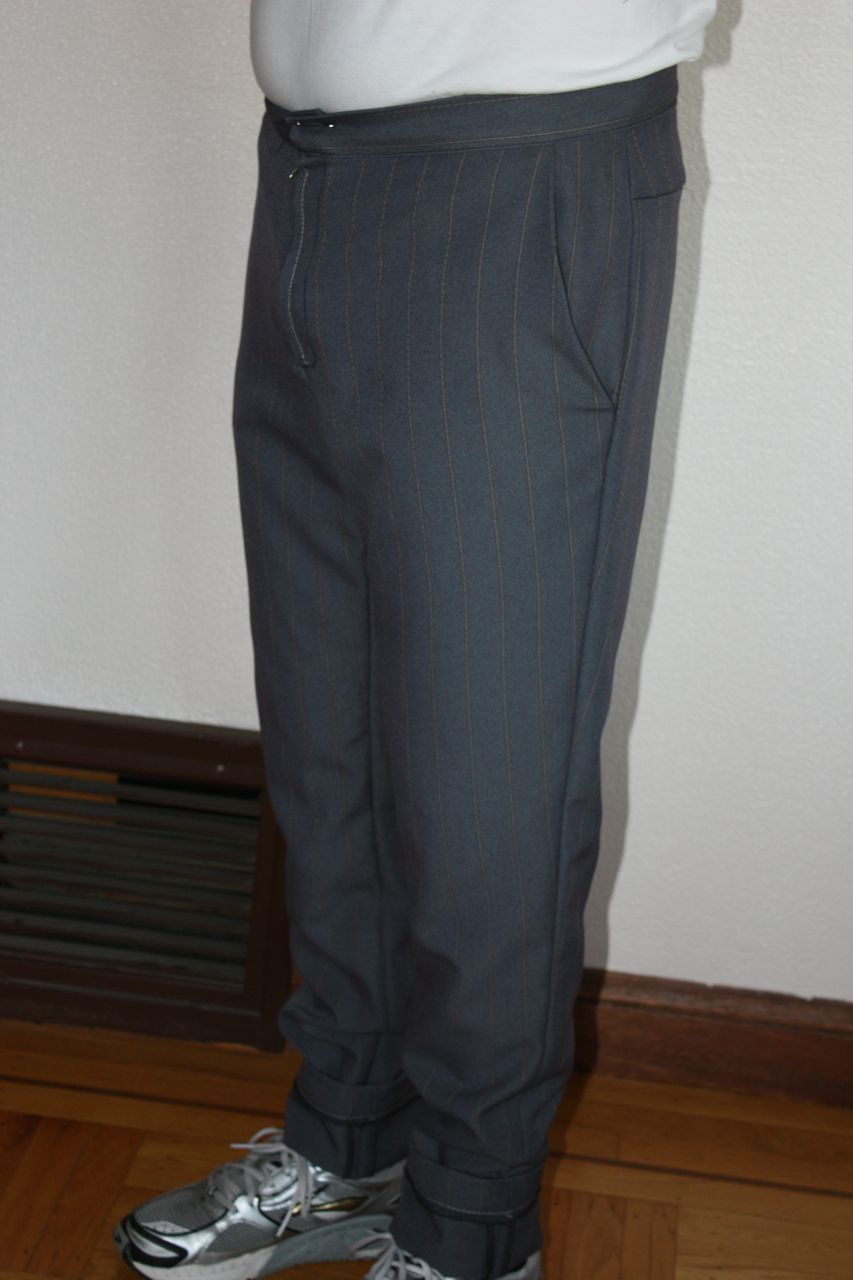
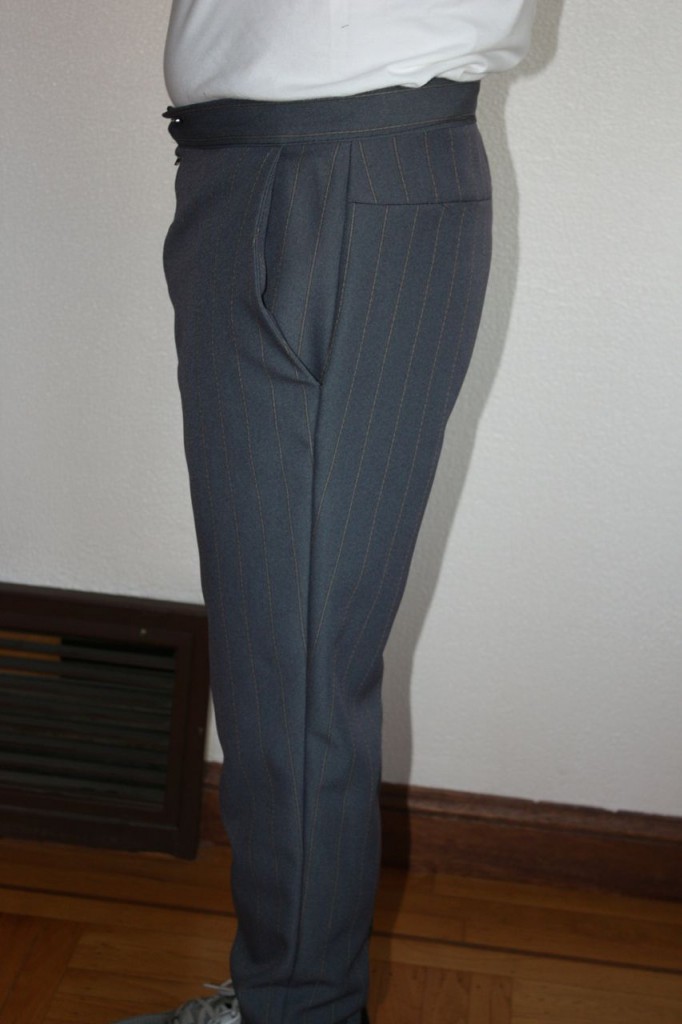

Here’s the list of issues coming out of this muslin:
- The facing and yoke pieces aren’t quite the right shape, as I noted earlier.
- The zipper went in really funny; the zipper teeth are barely covered by the lefthand (upper layer) of the fly. I think this happened because I wasn’t paying proper attention to the notch markings along the waistline that direct you where to fold the zipper shield. One is for the left side, the other for the right. I think I mistakenly used the same notch on both sides. I would advise anyone making this pattern to follow the pattern directions over Thread Theory’s tutorial video for constructing the fly; I think I was led astray.
- As the Thread Theory site warned, the front pockets seem to gape a little more. I have decided this isn’t a major issue for now, rather I’d like to see a sample done in actual fashion fabric (cotton twill) rather than this polyester.
- Somewhere around 3 inches need to come off the hems.
- The crotch height is a little bit too tall. I can feel the inner seam between my legs when I walk around in these pants. As far as I can tell, the crotch seam needs to be raised an inch.
Another Muslin
So, it’s time for another round of pattern modifications, and another muslin. This time though, it will be a wearable muslin with all the appropriate finishing and details, including belt loops and pockets.
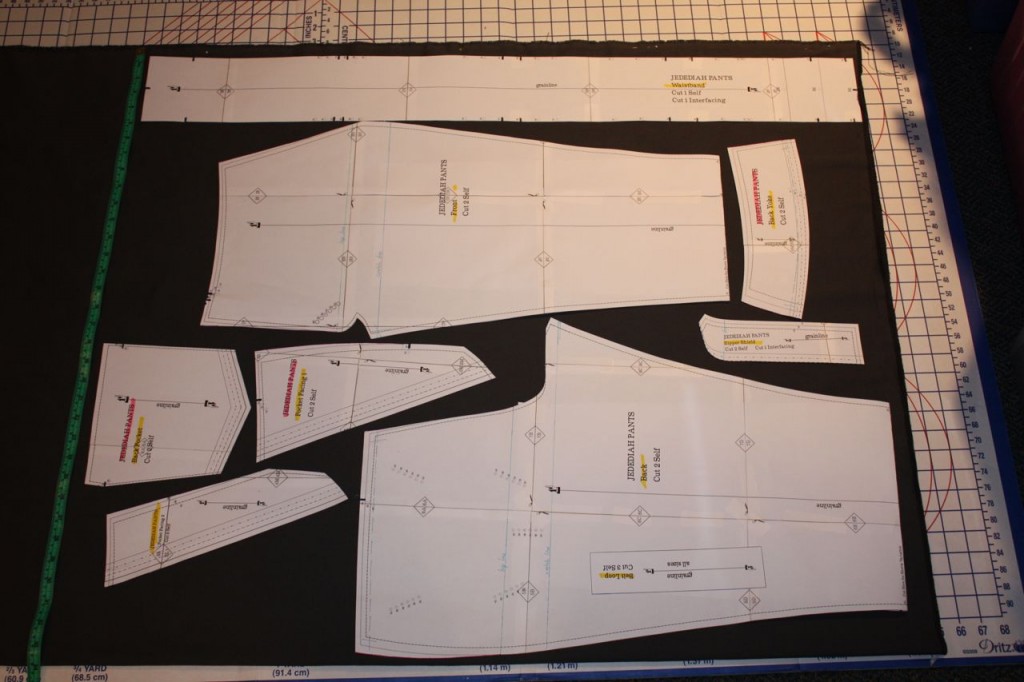
I did some test layouts on my dark gray twill. This fabric is actually 68 inches from selvage to selvage. The extra space makes it possible for me to lay out both a pair of shorts and a pair of pants on the same cut of fabric.
Shorts layout

Pants Layout
Fixing the Facings
It was easy enough to trim the facing and yoke pieces to match up properly with the rest of the pattern.


Raising the Crotch Point
I followed the instructions in Nancy Zieman’s Pattern Fitting With Confidence, starting with the front piece.
On tracing paper, mark one-half the distance you need to raise, upwards from the crotch point. Here, I drew a pink line.

Slide the pattern upwards to the mark, retrace the inseam portion that changed, then slide the pattern back down. The merged outlines of both inseams are the new pattern pieces you cut. What I did was trace out a whole new pattern piece, blending the new inseam line into the traced inseam. I chose to retain the original fly extension (in light blue) rather than the raised version, so that the zipper didn’t get shortened. I hope this just raises the inseam.

Repeat this procedure with the back piece.
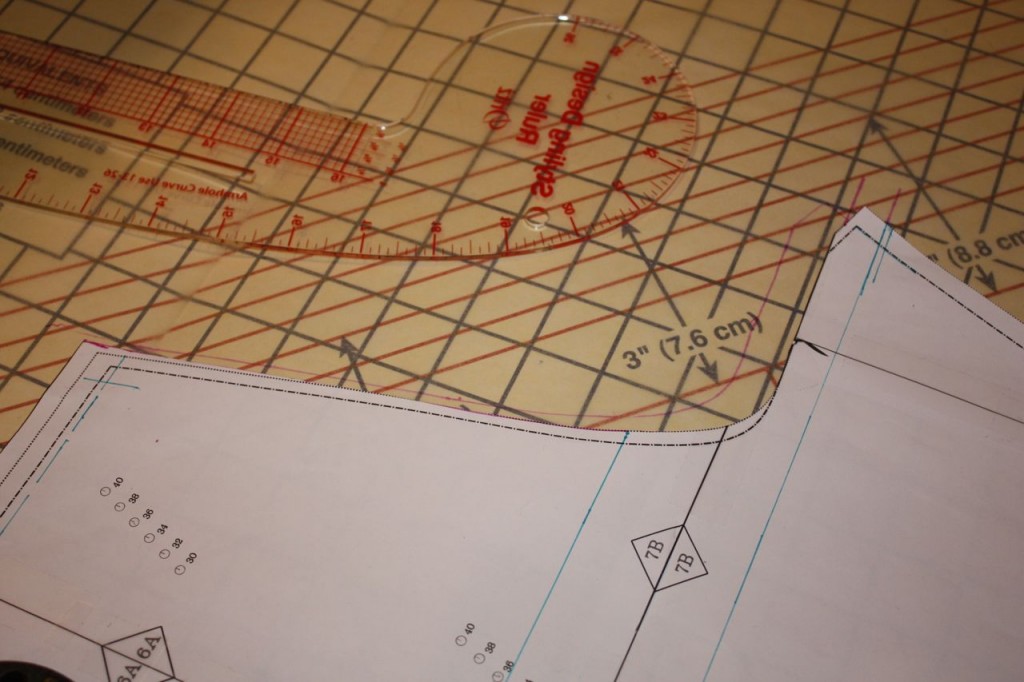
I had to use the curve on my styling design ruler to match the raised line up with the center back seam at the hip line (not shown in this photo, alas).

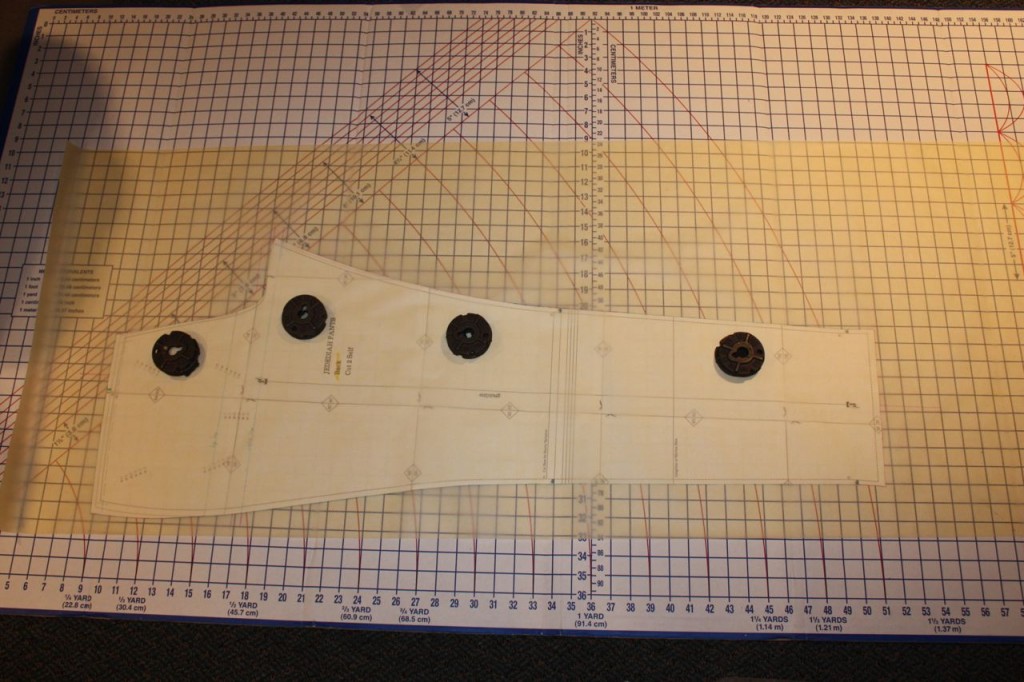
Here’s the fully traced back piece, ready for cutting. The advantage of this method is that I make a new pattern piece, so I can go back to my printed pattern piece if something goes wrong with the alterations.
Next Time
The shorts have been cut. Next time, we’ll see how they fit.
I like it. I like it. Pants fit you nicely. I wish I could have a picture of my baggy linen pants I made a few days ago. I had to add a gusset to the crotch. Say NO to camel toe. I say enough…
Thanks for sharing
The crotch fork on your pattern looks suspect. The curve on the back crotch as it goes into the inseam is at nearly perpendicular; this causes that too high back butt crack seam when you wear them. All the patterns I have worked with have a much shallower curvature at that particular spot. You might want to compare your pattern with another men’s pants draft.
When you are at the muslin stage, you cut only the principal pattern pieces. (The Cabrera book, which I think you have, says this.) You leave aside parts like the facings until the muslin fits perfectly, then you draft them based on the new shape. It also looks like you need to press your seams better, as that will affect the fit. Polyester is much harder to work with than cotton or wool. You should consider buying a bolt of sewing-weight muslin. In New York, it can be ordered from Steinlauf and Stoller. There must be places in SFO and online that sell muslin for a reasonable price. Bought in bulk, you can get the price down to a couple of bucks per yard. You may also find it worthwhile to trace the pattern in a medium like Swedish Tracing Paper, Bosal, or Pellon True Grid and pin fit and alter the pattern before proceeding to the muslin.
I know you have mixed feelings about the Cutter and Tailor forum, but the tailors there would be able to give you many suggestions.
My latest round of fitting does use actual muslin, and I’m now taking the effort to press the seam allowances. Those were some of the takeaways I got from the polyester muslin fitting experience.
I’ve seen some helpful resources for trouser fitting posted to the Cutter and Tailor forum. I’m okay to lurk there, but I don’t find the overall tone of the forum welcoming towards amateurs or, god forbid, “home sewers”.
This is a site that has a handout for altering and fitting that pants that really helped me get those bags out of under the butt. She uses a fish eye dart that and shows how to close it. It raised my crotch up about an inch so I had to cut another pattern and muslin, and I had to do another dart. But it worked and most of the extra bagginess is gone.
https://ginareneedesigns.com/download/2019/03/04/free-pants-fitting-guide/
I don’t have an affiliation to this site. But she knows how to fit pants and given the directions in a very easy to follow guild. Good luck. I am impressed with anyone who gets to this point. It has taken me years.