The blog says my last post here was over a month ago. I got so wrapped up in wanting to prepare something for you all, and then I lost track of time.
Last time I promised interesting developments, but even I didn’t know what they were. The good news is that two of my three shirts are completed, and I can share photos of them with you along with some construction notes. But let’s start with the bad news.
Technical Difficulties
Currently, my sewing machine (a Brother PC-210PRW) is sitting at the sewing machine store, awaiting the technicians to inspect it and give me a service estimate.
I’ve had an on-and-off problem with my machine that first showed up a few months ago. I will hear clacking sounds coming from the bobbin area from time to time. It happens at anything higher than low speed. Doing a backstitch can set off the clacking as well. If I stop and restart stitching, the clacking will go away for a while and then come back a minute or so later. Usually the clacking is accompanied by poor quality stitching on the bobbin side.
While working on the third of my three shirts, stitching straight seams on shirting fabric, I heard a mechanical scraping sound coming from the bobbin, followed immediately by an inch-long thread nest in the seam. The third time this happened, I realized something was seriously wrong and stopped work before the machine ate my project.
I’m not sure what’s wrong here; I suspect something in the bobbin area has gone awry, perhaps the result of a massive jam or needle breakage. This seems like a simple repair, but I’m concerned the dealer’s quote to fix it will be a significant chunk of the $300-ish price for a replacement machine. The repair estimate is free, but they’ve already told me the minimum for any service is $89.95. It does include cleaning and lubrication so there’s that.
If the repair cost ends more than half the replacement cost, my current thought is simply to take it home and tinker with it myself, and look for a replacement machine. Unbeknownst to all of you, I have been thinking about upgrading my machine ever since my visit to the Sewing Expo earlier this year. That topic deserves an article all its own.
It’s sad that modern economics makes a strong argument to send a perfectly good sewing machine to the landfill, though.
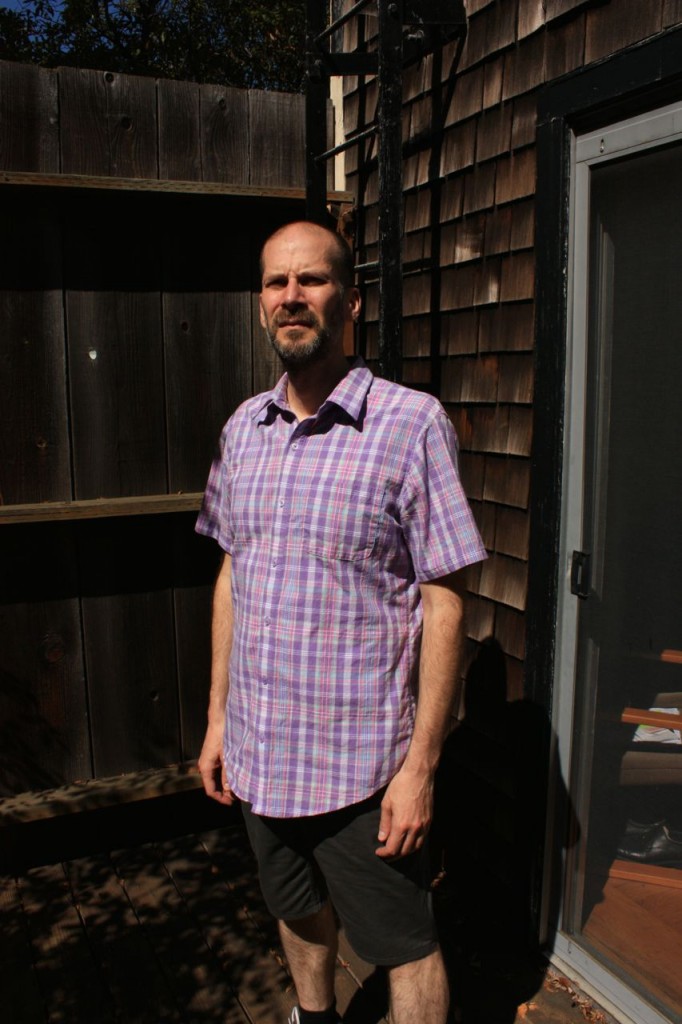
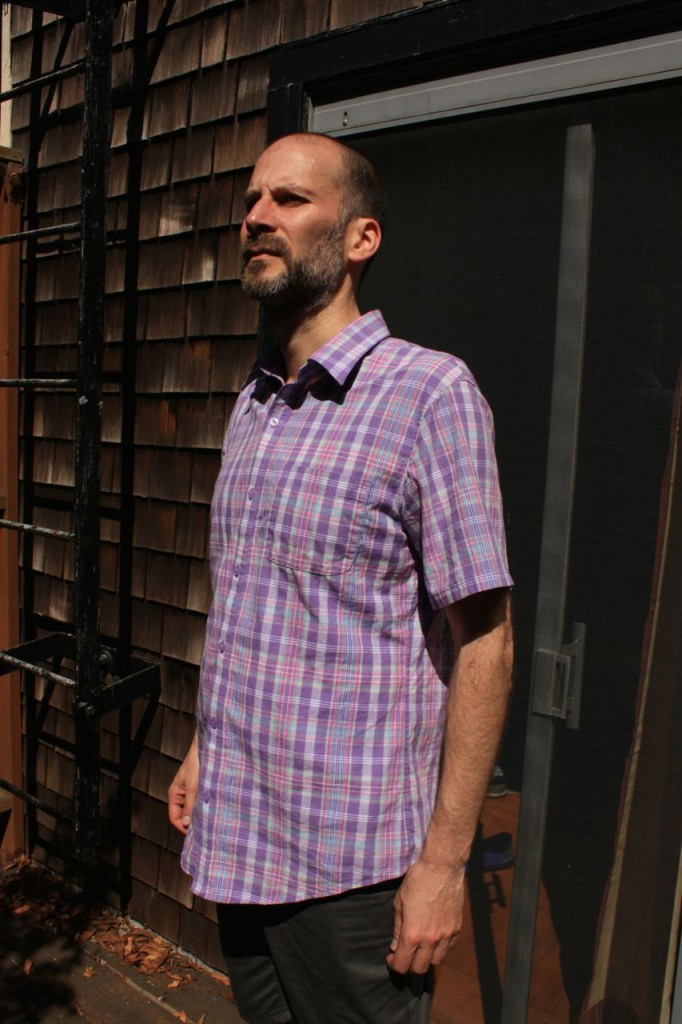
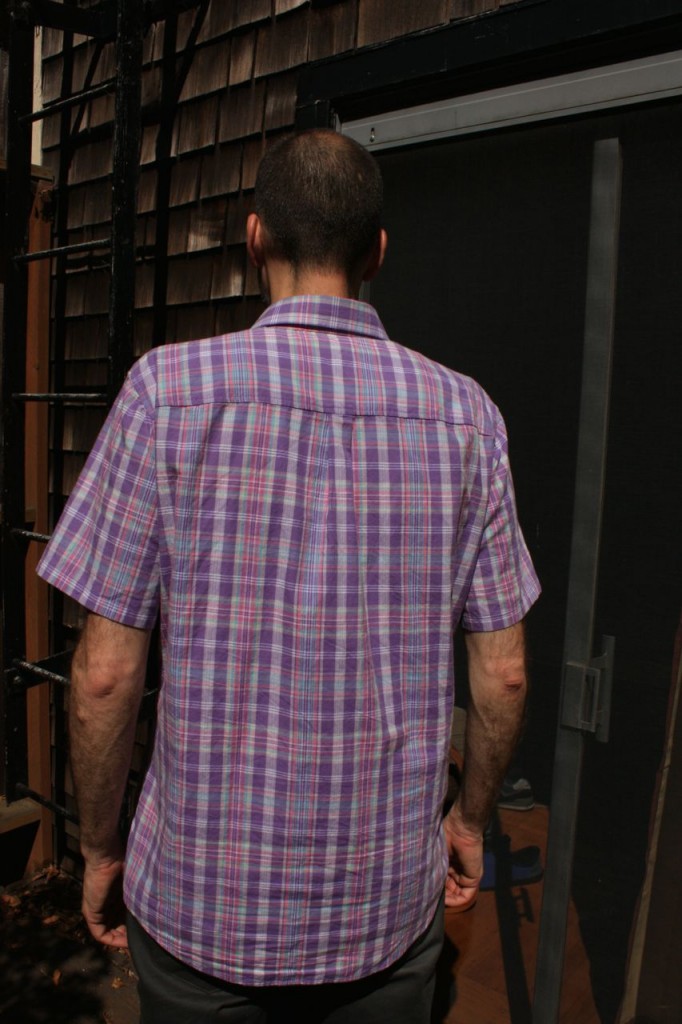
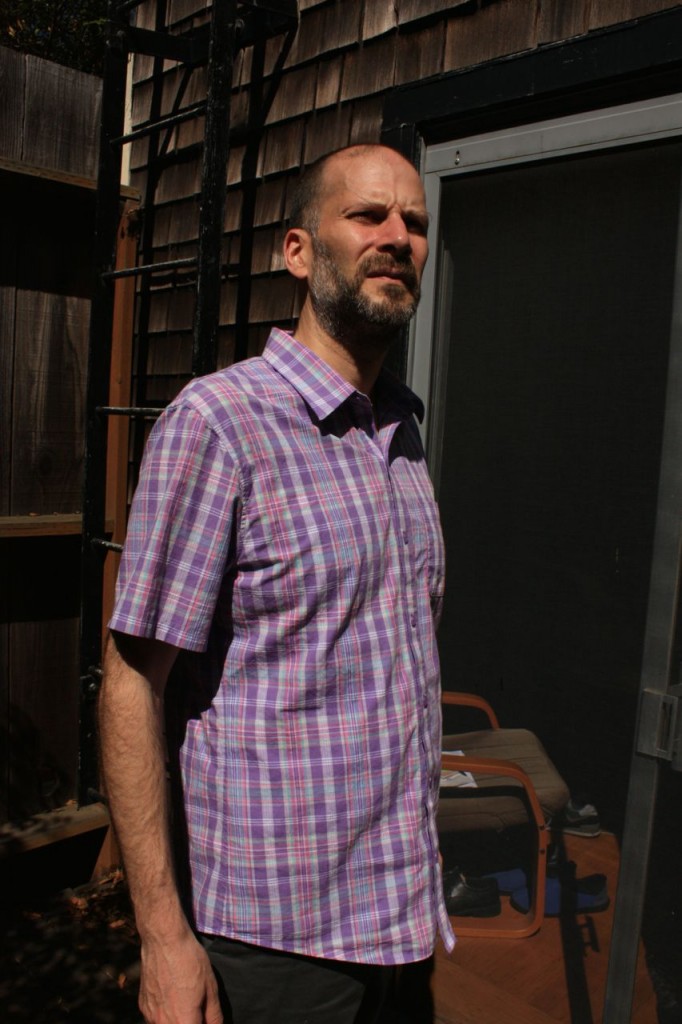
The Purple Shirt
Here’s some modeling photos of the purple shirt. I’m also wearing the shorts muslin I did for the Jedediah Pants pattern. Which I’m happy I made, because I’m getting some use out of it in the warm Indian Summer weather we’re having in San Francisco at the moment.
 Construction Notes


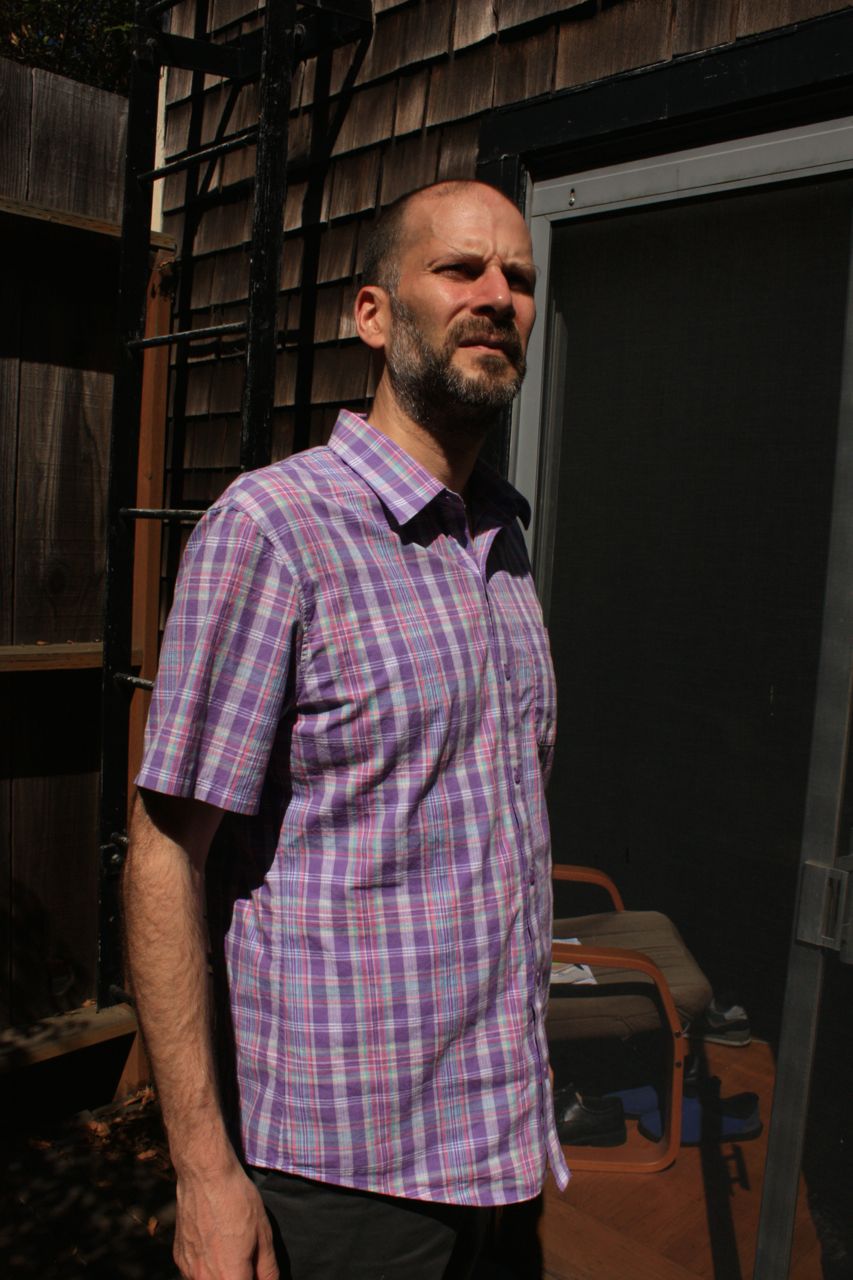
This shirt was a bear to get right. Just about every seam was picked and restitched because I wasn’t happy with the way it turned out the first time.
 Even the edgestitiching on the front pockets got redone; I put down a basting stitch after the first attempt, ripped out the first round of stitching, then did the second round of edgestitching with the first still in place.
Plackets
 On the front placket, the walking foot did a better job preventing the fabric from shifting and twisting than my attempts to hold the fabric gently taut.
I also made a mistake matching the plaids on one of my front plackets – the plaid stripes were too low relative to the shirt front. I didn’t have enough fabric left over to cut a new one, so instead I simply cut a scrap, interfaced it, then pieced it on as an extension to the bottom of the placket.

Collar

 The collar turned out very nice. I switched to a short stitch too soon at the pivot points, but the collar points are turning out nicely with the tips I got from both Kenneth King and Pam Howard’s video lessons on Craftsy. I was never successful at getting Pam Erny’s magic collar point trick to work (the link is to the BrianSews! website, where Brian demos it on video) so I’m glad I found an alternative.
If I have more success with my method, I may do a video on how I prepare collar points since I’ve seen so many ways to approach it at this point.
Sleeves
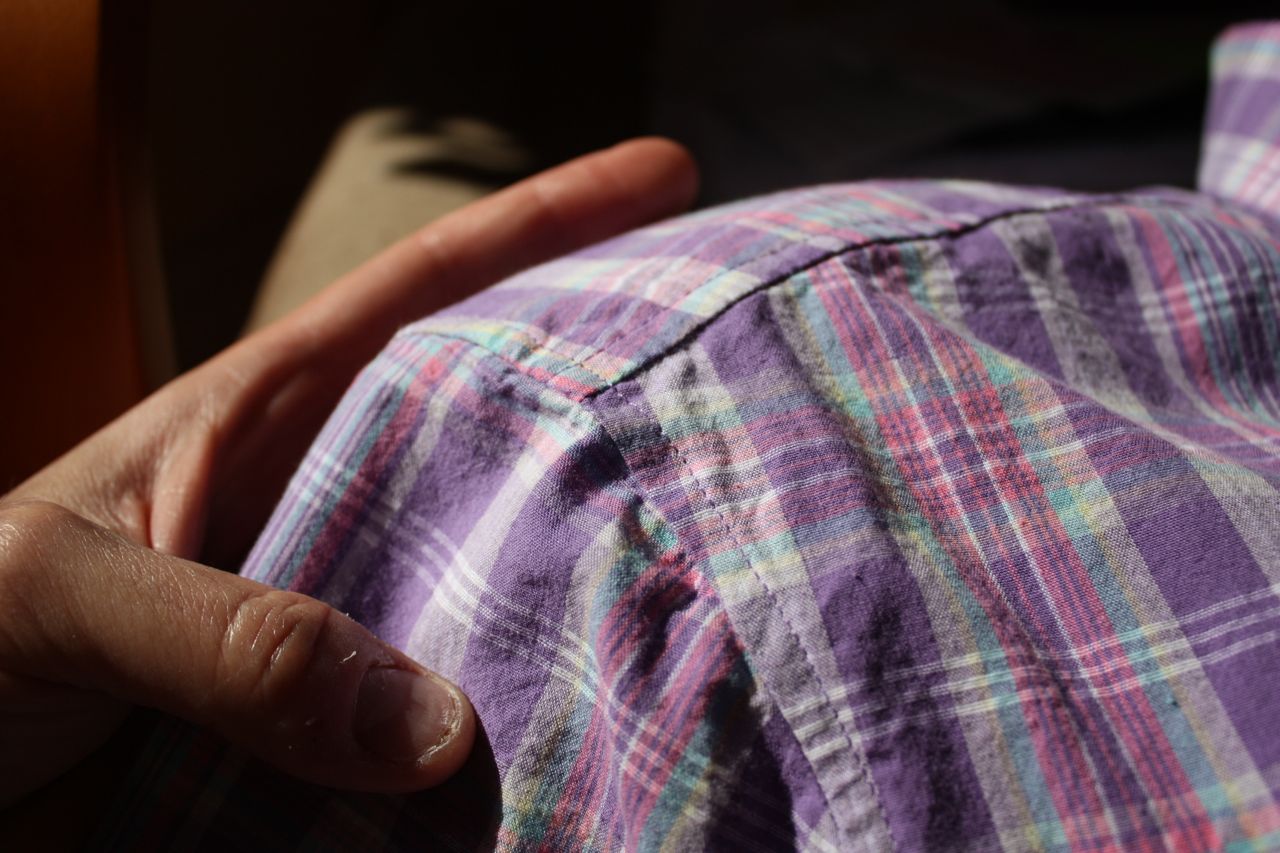
 The big difficulty was setting the sleeves, which you can see in the photos above.
McCall’s 6613 has a big flaw in that the sleeve is drafted with too much ease. When you try to ease the sleeve to the armscye there’s just too much to go around and you inevitably get puckers. I tried several times to get this right, but ultimately I went back to a muslin so I could alter the sleeve cap to take out the excess ease.
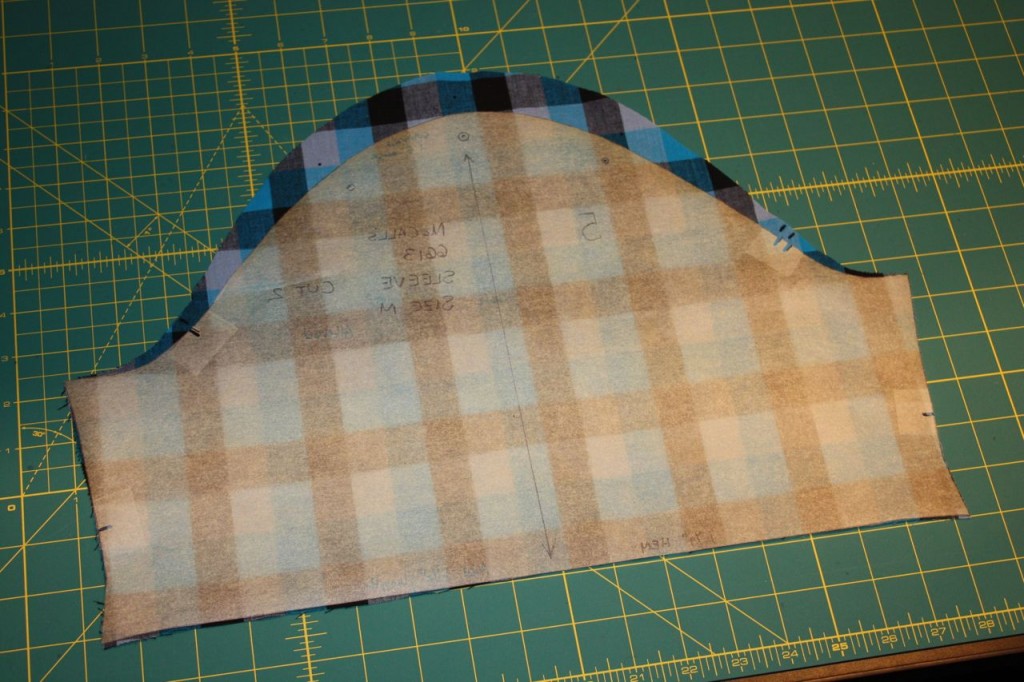
I found several guides to eliminating excess ease from a sleeve cap, and ultimately settled on this method as being both simple and intuitive to follow – both big points in my book.
Here’s the pattern piece adjustment in action. The first attempt, I removed 1 inch of ease, which still wasn’t enough.
 For the second shirt I removed 1.5 inches of ease from the sleeve cap which worked much better. I cut all three shirts at once at the start of the project, so after adjusting the pattern piece I went back and trimmed the blue shirt to the new pattern.
 Next Time

I’ll have some photos of the blue shirt, and maybe an update on the ailing sewing machine. See you then.
Sorry about your machine. One way to save costs on machine repair is to try and find an independent mechanic, someone not associated with a store or company, who visits sewing contractors to repair their machines on site. Just call a few sewing contractors in your area and ask who they recommend. If you need a new machine, check craigslist for a vintage, all metal machine such as Pfaff (it’s what I use), Singer, Sears, or Necchi. The Pfaff 260 that I use in my sewing business I use every day, and I found it in a thrift store for $25, but I spent another $50 having my mechanic tune it up.
The big three pattern companies men’s shirt patterns: always measure the armhole vs. the sleeve cap. There will always be too much ease, probably a habit from the ladies blouse patterns. Rule of thumb for men’s shirts, no ease needed for a man’s casual dress shirt. A man’s shirt sleeve pattern has a low cap and a generous armhole, allowing lots of arm movement. It is superfluous to add ease at the cap, since the armhole/sleeve cap seam needs to finish flat. A pattern trick I often use to equalize sleeve cap and armhole is to use a flexible curve ruler, those really bendy soft plastic rulers. Measure your full armhole, divide in half, and note that on the ruler. Now bend the ruler in the approximate shape of the cap, place on the sleeve cap, and trace the new shape from the ruler onto the sleeve pattern. The cap will be lower if you maintain the original biceps line.
Hope this helps! John Y
Thanks for the tip on the shirt sleeves. To be fair, McCall’s 6613 is a unisex pattern, so that might be where the excessive ease on the sleeve cap comes from. I’m amazed that you can approximate something with the bendable ruler and have a result that works well.
Your advice for sewing machine repair sounds good. There’s a store not far from work that specializes in selling industrial machines, but also does service on domestic units. But I’m not sure they’re much cheaper than the dealership I took my machine to, which is an authorized Brother service center.
As for a replacement machine, I have at least one full blog post I intend to write on this topic. I have no intention of collecting sewing machines. I simply don’t have the space, and I don’t have the romanticism over it that many other sewing bloggers have. As for getting a vintage machine, I’m concerned about trying to find one (hassle) and getting it fixed and tuned (a hassle whether it’s DIY or I get someone else to do it). I like the idea, but my thoughts lean towards getting a brand new machine.
Hi Michael,
I am sorry to hear about your sewing machine troubles. Do you have a spare? That is what have worked for me.
On a happy note. Great job with the shirt. I too have to let it go my perfectionism. Looking good
Last week a made a “Betty Boop” blouse, with bottons. My babylock machine refuse to make button case(I have not use this feature for a few years). I had to clean, and oil, sew samples, different button cases. It worked.
Keep me posted on your sewing machine adventures.
All the best
Joselina,
Nope! No backup machine. I don’t have a lot of space for storing machines. Plus, it was my first sewing machine and up until now it has been doing rather well.
I’m really curious to hear what the estimate is.
Your shirt looks nice. I have made this pattern several times and the sleeves sometimes fit easily, other times I fight with them.
Hope your machine dilemma works out.
Your shirt looks great. I like the video too. Very informative, I really liked your opinion on sewing machine collecting. I haven’t heard that before. It gave me some perspective. Now I can ease up on CL & Ebay!!!
Please write more on that.. Thanks
Your shirt looks great. I like the video too. Very informative, I really liked your opinion on sewing machine collecting. I haven’t heard that before. It gave me some perspective. Now I can ease up on CL & Ebay!!!
Please write more on that.. Thanks