The Brother 1034D is a popular, dirt-cheap serger ($200 or less on Amazon) which performs well. I’ve had mine for six months now and find it a pleasure to use.
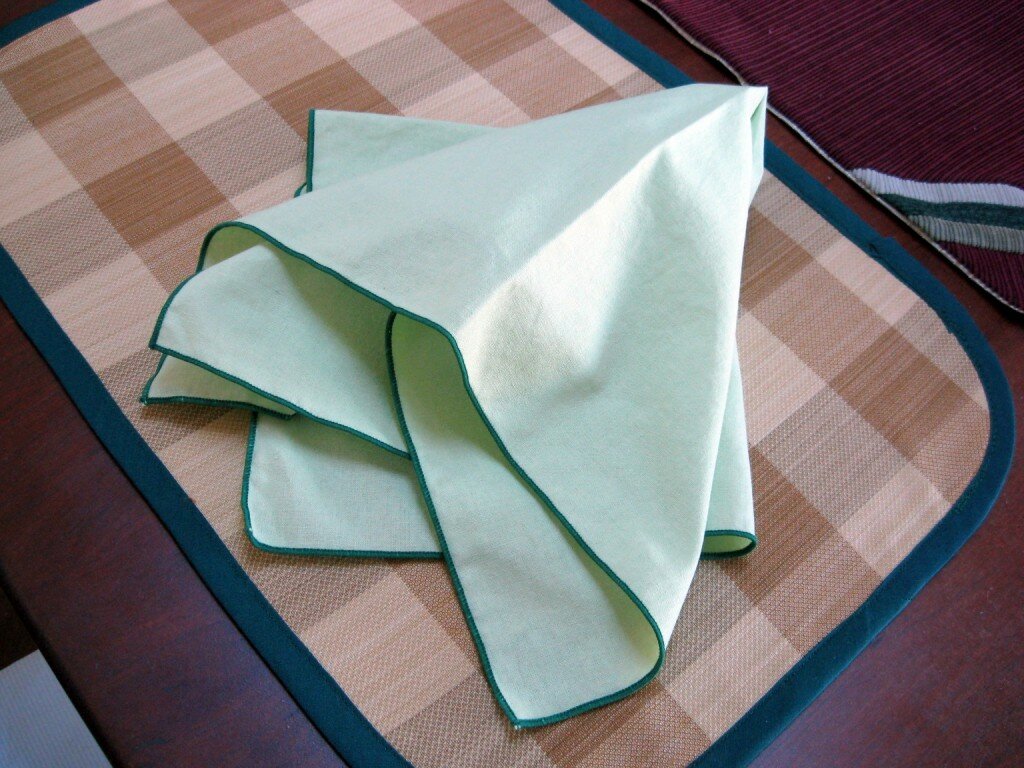
Recently, I made a set of dinner napkins from cotton broadcloth. It was partly a chance to explore the serger’s capabilities, and also part of a larger project to produce new dinner table decorations including placemats and a table runner.
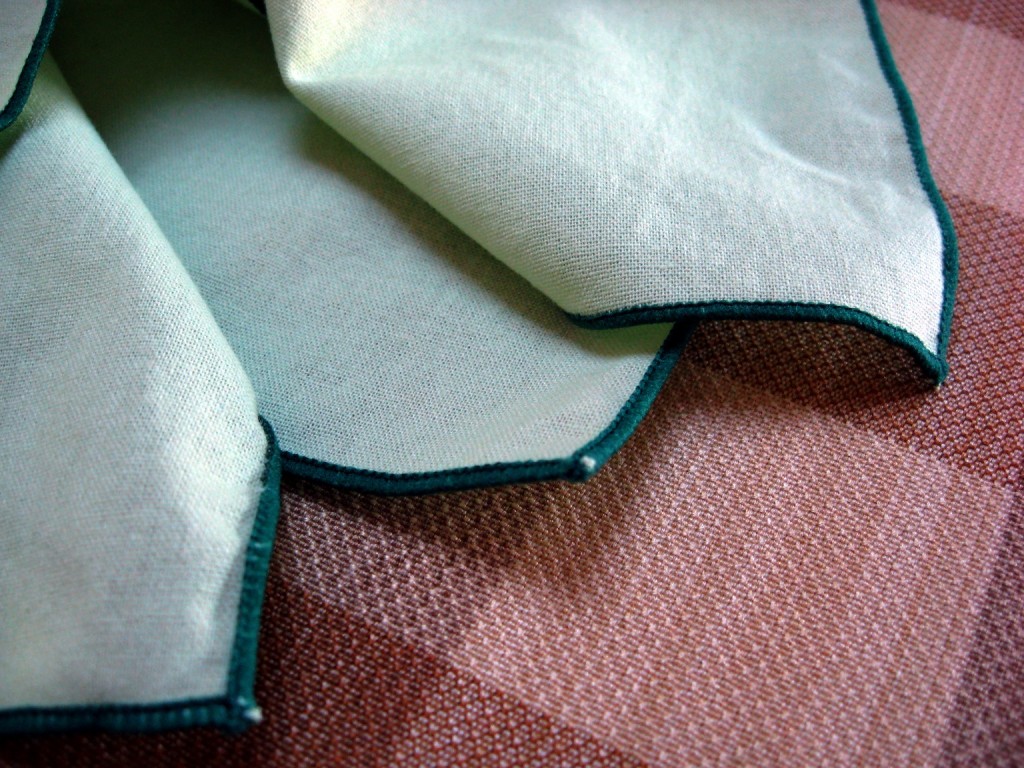
The napkins turned out very nice. The fabric is cotton broadcloth that I got from J0-Ann’s. (The placemats and the table runner in the upper-right corner were made from upholstery fabric samples I acquired at the local fabric store and from FabMo, a creative fabrics cooperative).
I spent a lot of time experimenting with the 1034D settings to get a nice rolled hem. Here’s what I came up with, after much experimentation. I present settings for two different types of thread. The first is for standard Maxi-Lock serger thread everywhere. The second uses Maxi-lock in the needles, and Wooly Nylon thread in the loopers.
Don’t forget to remove the stitch finger (instructions are in the manual) before you attempt to serge a rolled hem.
With Maxi-Lock Serger Thread
Settings for standard Maxi-Lock serger thread in needle and both loopers.
Left Needle: not used
Right Needle: 3.1-3.2
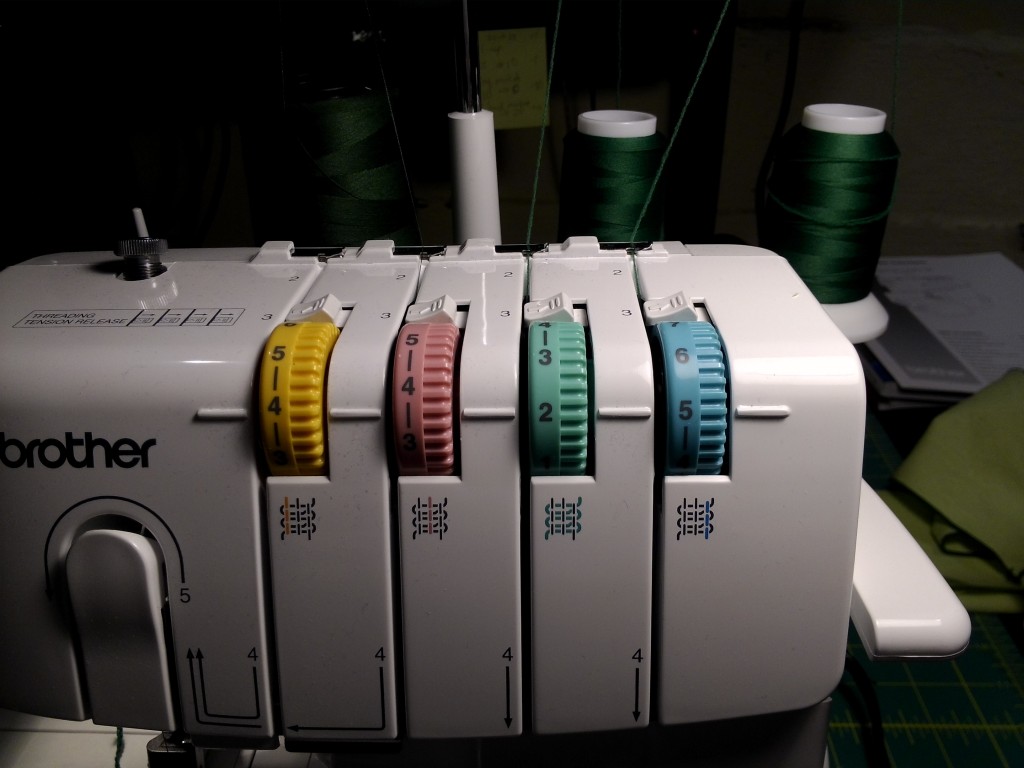
Upper Looper: 4.5
Lower Looper: 7
Stitch Width: 5.3
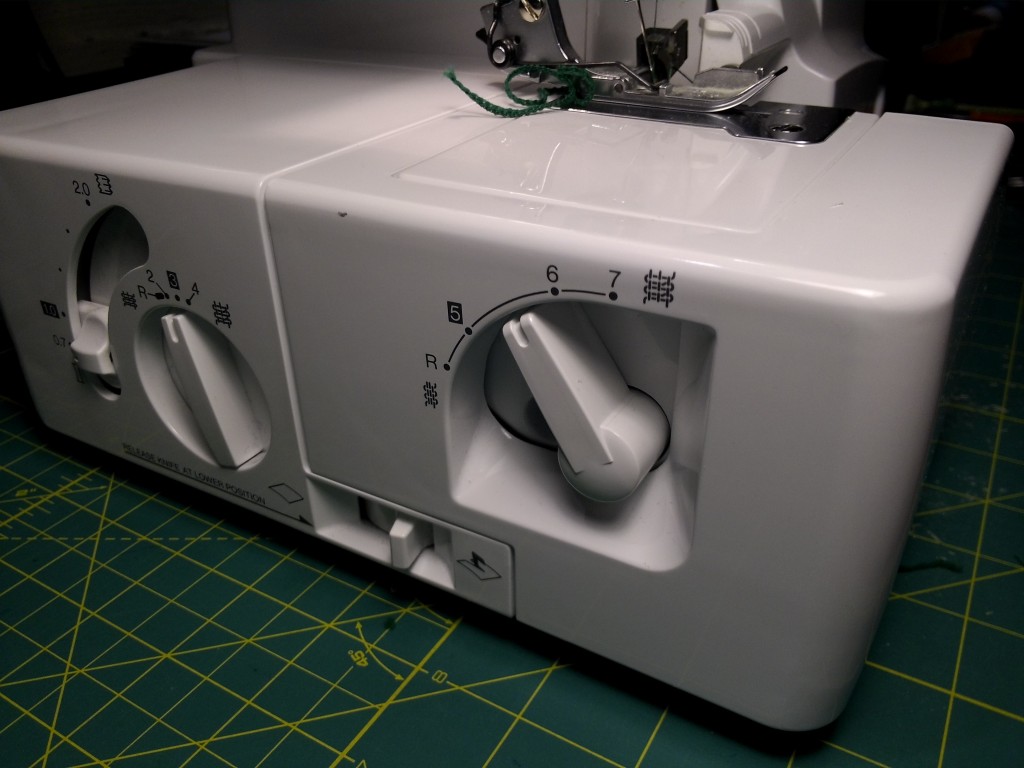
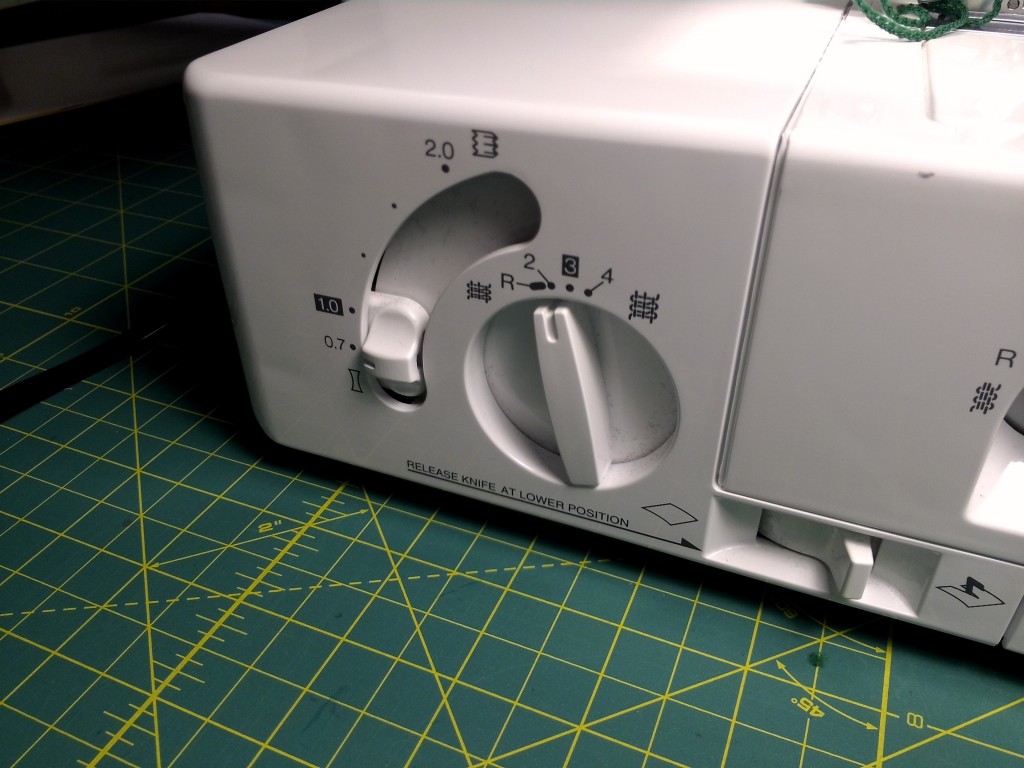
Stitch Length: R
Differential: 0.7
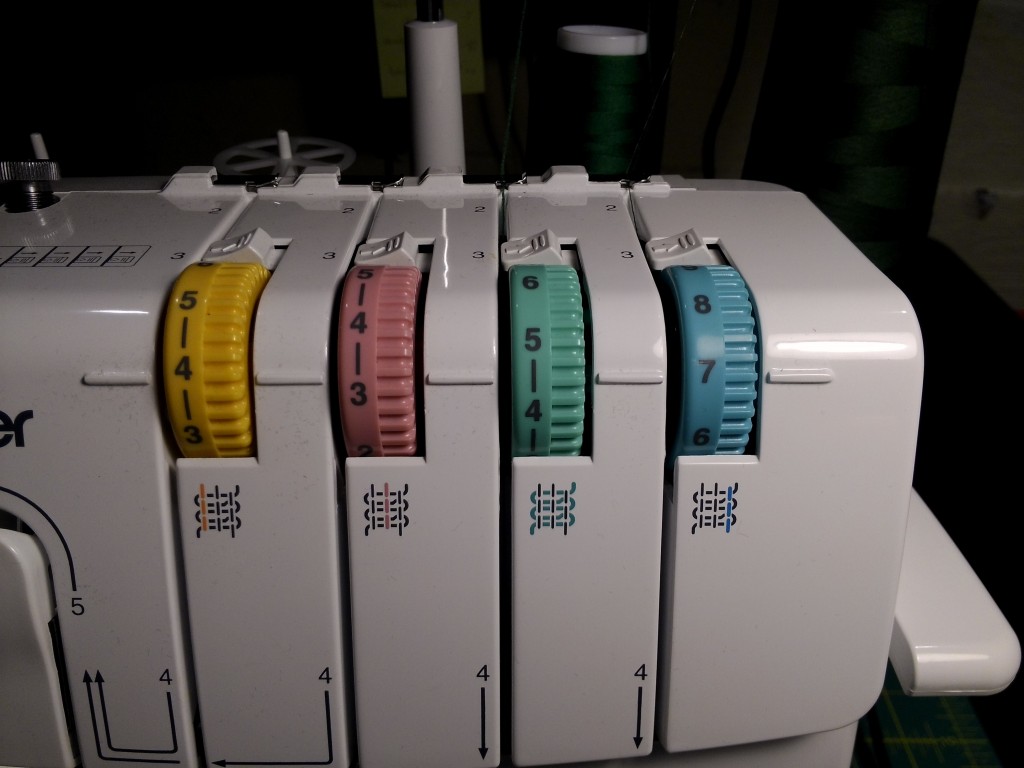
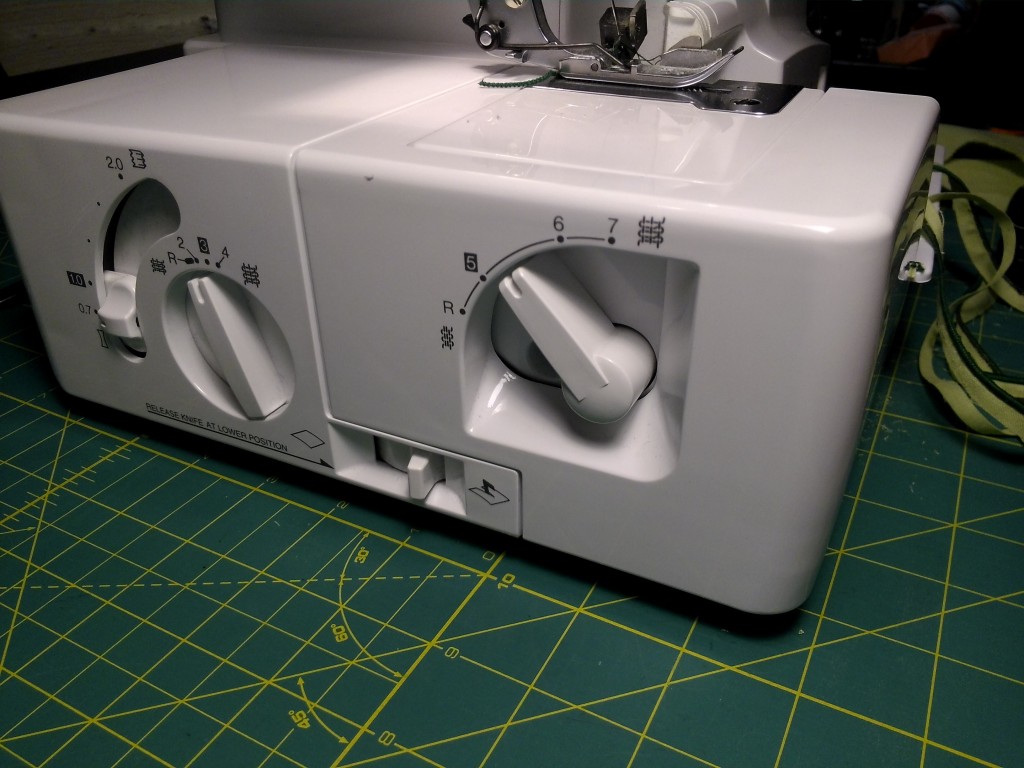
Here’s photos of the settings on my 1034D serger:

Maxi-Lock in needle, Wooly Nylon in both loopers
Left Needle: not used
Right Needle: 3.5
Upper Looper: 2
Lower Looper: 5 (any higher, and thread will break)
Stitch Width: 5.5-5.6
Stitch Length: R (or go one click-step up to 2 to get some visible stitches on the hem)
Differential: 0.7
Again, here’s the photos of this setup. I have the Stitch length set to 2 to get some visible variegation on the hem, but if you set it to R you’ll get a solid ribbon of hem.
I was really surprised at how much the tension settings changed when I switched from regular serger thread to Wooly Nylon in the loopers. I basically had to start all over again with the test stitches until I got something that worked.
The 1034D comes with two instruction manuals; one covers basic operation, the other is a “techniques” book illustrating how to accomplish different effects. The suggested settings in Brother’s Serger Techniques instruction book are different from the settings in the regular instruction book, and they were a much better starting point.
I found the book Complete Serger Handbook by Chris James useful, because it has a really good discussion of tension settings, and it also helped me troubleshoot problems with the rolled hem (like puckering and threads poking out from the hem).
Thank you for these tips. I am having trouble with my 1034D doing a “lettuce edge” on a mid weight knit fabric. I can’t find any specific settings for a lettuce edge on the 1034D serger. Most sites say use the rolled edge and adjust – I just can’t seem to get the right combination of tension and other settings. The brother book that came with my serger does not give any settings for the switch width (only the stitch length).
If you know of any tutorials or info on the lettuce edge for a 1034D please let me know.
Thanks
Marianne,
I checked one of my serger books this evening, and it says that for a lettuce edge you set the machine for a rolled hem, but stretch the fabric as it goes through the serger. It also says to be careful to keep the serger in motion while stretching the fabric, so as not to bend the needles. (I’d probably make sure I put even tension on the fabric on both sides of the feed dogs).
Hope this helps!
Thank you for your response. I was using a rolled edge setting and stretching but was getting inconsistent results. i finally got it working. ( took a lot of practice runs!) I put in three different color threads and kept adjusting my stitch tension in the lower looper until it looked right. Directions i found on line said to pit the lower looper at 8-9 . I also worked at stretching the fabric the right amount for the results I wanted. I do hear that each serger is different in terms of settings and found this to be very true. If it helps anyone else here are my settings on my Brother 1034 D that gave me the results I wanted.
Lettuce edge: 3 thread- remove stitch finger
Differential0: between 0.7 and 1.0
Stitch length: 2
Stitch width: 5
left needle: none
right needle: 4.1
Upper Looper 5
Lower Looper: 7
Type of thread: Maxi Lock
I am having a problem with the material not moving, then it continues to sew’ staying in the same spot.
I’ve never had this problem with fabric feeding on my serger, so I’m not sure what to suggest. Have you tried adjusting the differential feed setting to both extremes, to see if it makes any difference?
Do you use the same color thread in all 3 (right needle, upper and lower looper)? I am having major trouble doing some placemats. Looks good on the front of the rolled hem but the back looks awful, which is bad because they are reversible. Got to keep trying.
Yes, I use the same color of thread in all three loopers. Some of the examples used Wooly Nylon in the loopers. If that’s so I use regular serger thread in the needles, and get as close a color match as I can between the two.
What do you do with the ends? Do you hand tie them, or thread the needle with the tail to stitch a knot?
I used liquid Fray Check to seal the ends in this case.