Before Springtime is over, it’s time for me to get going on my springtime shirt made with McCall’s 6044.
Originally, thought I would just sew it up with the fabric I picked up at Joann’s, since its not precious or anything. I was pretty confident based on McCall’s 2447 that If I sewed up the Medium draft, the fit wouldn’t be far off.
But then decided to do a muslin instead to gauge fit. I had some leftover blue floral fabric from my bedsheet, so I used the remainders again. It turns out I had enough of the bedsheet left over for another full long-sleeve shirt.

I am planning to make a short-sleeve shirt, but I saw the opportunity to test fit for both long and short sleeves. So I made the left sleeve long, and the right sleeve short.
Sewing the Muslin
I was very pleased that I was able to cut all pieces and assemble the muslin in a single (long) afternoon – for me, that’s fast. Of course, helping out was the fact that I was sewing a muslin, and so I could (and did) cut a lot of corners and take shortcuts.
Things I was required to do:
Some things I thought I could skip on the muslin I really needed to do.
- The long sleeve required me to construct a (single) cuff. Without the cuff, I would not have been able to assess sleeve length properly.
- Judging collar fit required me to sew the collar. The collar is the most complicated part of a man’s shirt. Fortunately, the collar in McCall’s 6044 isn’t all that complicated.
Construction steps I skipped:
Some stuff was totally unnecessary for the muslin.
- Interfacing. This saved me cutting and ironing time.
- Seam finishes. All seams are unfinished. Not doing flat-fell seams saves a lot of time
- Front pocket.
- Buttons and buttonholes. I just pinned the front band together to adjust the fit.
The Pattern simplified some work
McCall’s 6044 also helped in that it’s simply an easier pattern to sew, and it either leaves out or simplifies some of the standard features you find on a men’s shirt.
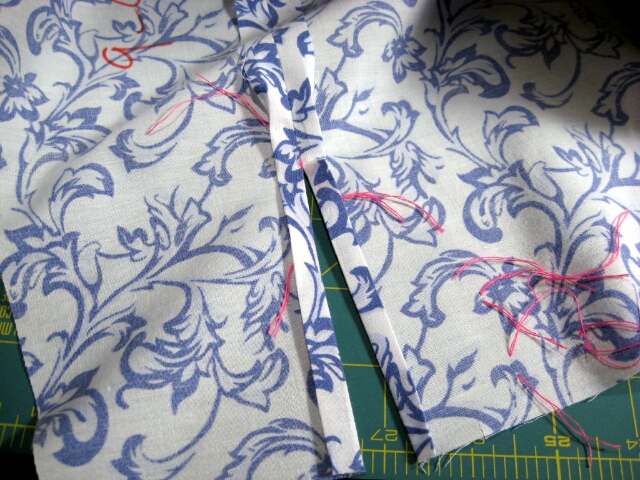
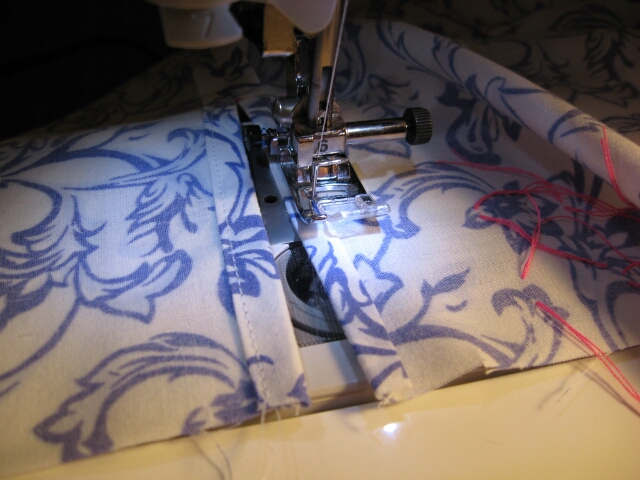
First, there is no tower placket on the long sleeve. The sleeve comes in two pieces. You seam them until about four inches from the cuff end, then simply hem the seam allowances to make a faux placket. Really, I think both the construction method and the result is not very refined. (Click/tap for larger photos).
Second, the shirt has no yoke to deal with. There is a variation with a yoke, but really the shirt still has one solid back piece and you simply top-stitch the yoke pieces over the back and shoulder.
Stuff I did but didn’t need to
There’s a few construction details I did anyway, because I’m OCD or something.
- A rolled hem on bottom of shirt. I did it, but hurried through it and did it kind of sloppy.
- A pleat on the long sleeve. I probably could have just pinned/gathered it out instead of pressing and putting down a basting stitch like I did, following the pattern directions.
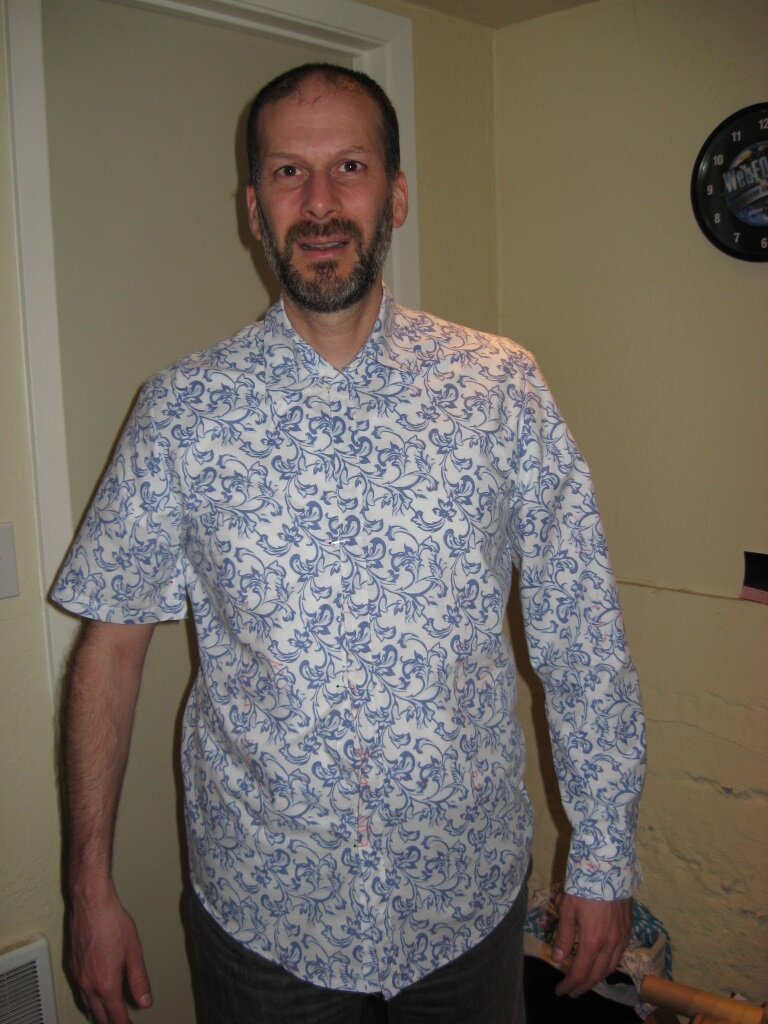
Judging the fit
I was surprised at how well the muslin fit. It was excellent all around.
- The collar fit is dead on.
- Sleeve length is right.
- Shoulders are a bit too wide, but perfectly acceptable.
- Short sleeve has a bit too much volume,. My partner helped me to pin out some excess fabric from the sleeve. I’m now contemplating narrowing that pattern piece.
- The shirt has a nice tapered fit to the torso, maybe on the border of what’s acceptable to fit my tummy. But it doesn’t balloon out around the waist, which is nice.
Judging the Construction
I made this shirt in a hurry, but overall, it came out better than the first attempt.
- Front band in particular came out properly and better (though the construction is different than M2447).
- Some of the closing stitching on the front band and collar didn’t catch, so I had to resew a bit.
- Easing on the shoulder seams is still a challenge. I had to rip stitches entirely on one attempt to sew the sleeves into the armscye, and the other sleeve forced me to rip out a section because I went way off with the seam allowance while trying to ease the fabric.
- Stitching around curves in hem was a challenge, though mostly because the pressing job was done in a hurry.
- I still have problems getting inside/outside of collar and cuff seals to line up.
- Hint: Fold/press a scant 5/8 on the facings so they won’t be caught short and catch the fabric.
- Impatience with feed dogs on bulky curves.
- Need to review collar construction – I forgot to press points and seam allowance on the point presser before turning the collar inside out, which would have resulted in a very messy collar.
Improving the Pattern
This pattern fits well and has some nice styling, but I think it can be improved. These would be pretty simple pattern modifications.
- Add a real yoke, rather than a topstitched faux yoke. I won’t be doing this for my springtime shirt, but I do think I will be modifying the pattern into splitting the back piece into a yoke plus bottom piece. I could also add a box pleat or similar to the back piece.
- Add a real tower placket to the long sleeve.
- Possibly redraft the front piece to include the front band as a cut-on piece, rather than a separate facing piece.
In the next post, we’ll take a look at the seersucker fabric that’s going into the shirt.
It’s great you are willing to try sewing a dress shirt. It’s not easy, but it sounds like this pattern is not throwing too many construction challenges at you all at once.
The pattern is definitely simpler than the first one I started with (McCall’s 2447) and doing it as short-sleeve makes it easier still. The primary challenge I’ve been facing so far is dealing with the seersucker fabric, which doesn’t always crease and sew in a nice, precise way.
The shirt is nearing completion – I’ll be presenting the finished result here soon.
McCall’s 2447 does look more complicated.
Do you baste before sewing? I sew with silk a lot, which tends to shift, and basting really helps.
Looking forward to the completed shirt!
I tend not to baste too much. For the shirts, I do staystitching around the collar, but that isn’t basting. I do use basting stitches to attach sew-in interfacing, and there’s also a basting stitch I use as a guide for making the rolled hem on the shirttail.
I’ve been trying to teach myself taut sewing, to deal with the fabric shifting issues. It took a while to learn that pinning doesn’t really help. I’m also experimenting with the walking foot, since it’s a new toy.
I’m wearing the completed shirt now! Blog writeup (and PatternReview contest entry) forthcoming.