For an “in-between” project, I made wool felt covers for my laptop and tablet.
(Click/tap on photos to see larger versions).
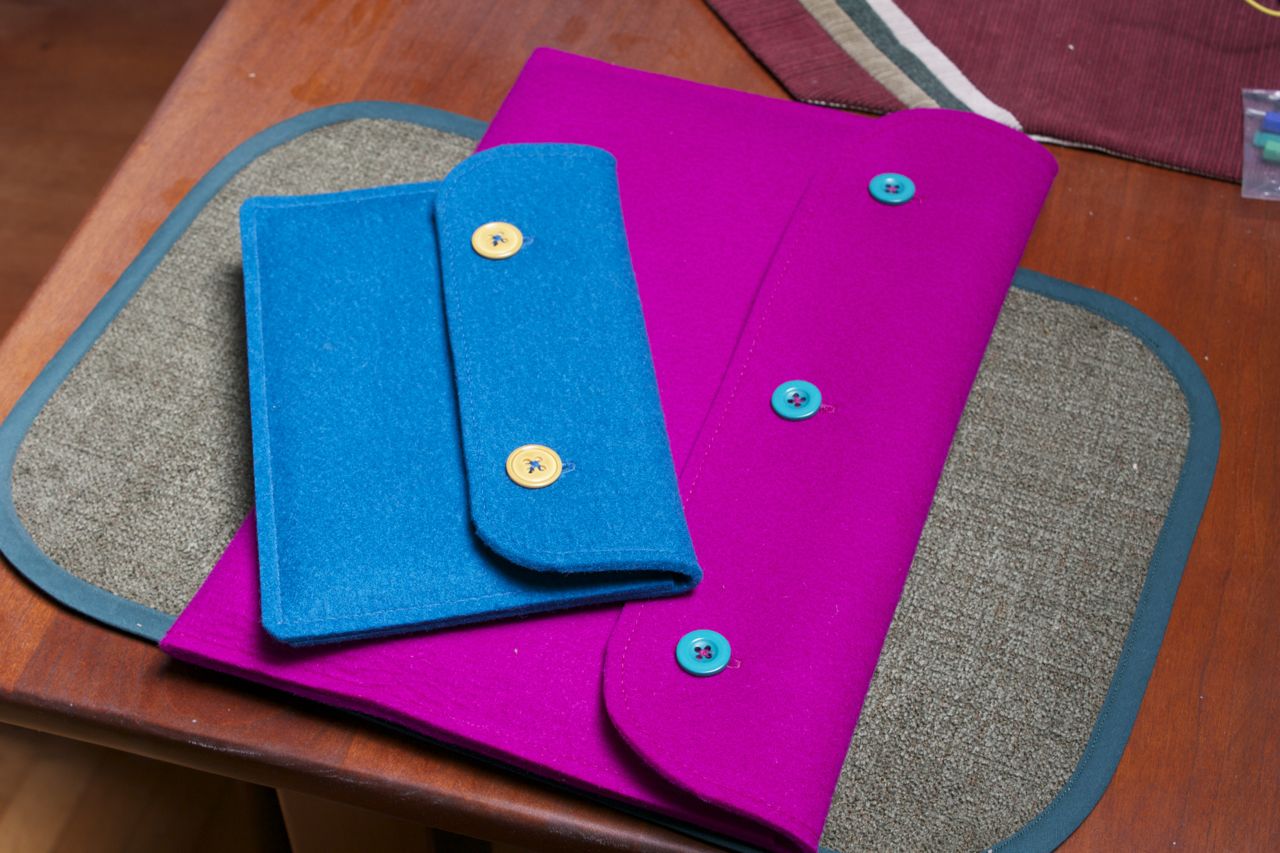


I knew my next project would likely take a long time, so I wanted a quick in-between project as a breather. I recently picked up some nice heavy wool felt during my tour of Britex Fabrics, and really wanted to make matching slipcases for my laptop and tablet.
The original inspiration came from a coworker who saw one of these slipcovers on Etsy a few years ago, right after I started sewing, and asked how hard it would be to make one. I surveyed several of the alternatives available on Etsy – you can see some of them on my Pinterest Pinboard.
I went through the list of possible closures. Velcro was out, because it snags everything and has a tendency to destroy whatever fabric it snags itself to. Buckles are too fiddly, zippers inappropriate. I considered an elastic band like some of the Etsy creations, but was worried the band would distort the slipcover without a device inside. So I was eventually drawn to buttons. Besides, I like buttons.
Construction Notes
Like some of the Etsy choices, I wanted a leather grip handle on the larger laptop folio. Britex had some bright orange leather that worked nicely with the berry-colored pink wool felt I chose.

Grips
Attaching the grip handle was very difficult. I had attempted this feat on an earlier laptop slipcover, and the grip handle turned out weirdly stretched and distorted. I really wanted a way to baste the leather applique in place to keep it from shifting or stretching while sewing it down. But this is difficult for several reasons.
- Pins are out, as they leave holes in the leather.
- Tape of any sort, including scotch tape and painters tape, are also out. They mar the leather and leave visible, permanent tape marks. Ask me how I know this.
- I tried a glue stick, but the places where the glue was applied showed through on the leather.
- I tried a glue gun with even worse results. You could easily see the impression of the glue trail through the leather.
- I tried applying fusible interfacing to the reverse side of the leather, in an attempt to stabilize it. This was a total disaster; an iron, even on low, delivers enough heat and moisture to destroy the leather.
- The leather applique is in the middle of the fabric, so there’s no way to clip it down.
- The leather dragged, stretched, and puckered while sewing, even with the teflon foot.
The ultimate solution was disarmingly simple: the Walking Foot did a decent job. I simply placed the leather applique on the felt, and carefully sewed it in place. The results turned out fairly well.

Side Seams
After attaching the hand grip applique, I folded, then stitched one side. Chalk marks provided a stitching line.

I inserted the laptop, found the natural stitching line for the other side, marked it, and stitched. Then I trimmed each side to a 1/4″ seam allowance with the rotary cutter.

Flaps
To make the rounded flap, I traced around a small bowl with the chalk to make rounded corners, then trimmed with the rotary cutter again. For decoration, I topstitched the flap 1/4″ from the edge.

I used a shot of steam from the iron to shape the flaps where they hinged, so they fold flat nicely. This was my first introduction to shaping wool fabric with steam, and I was floored at how effective the steam iron is at putting a “permanent” shape into wool fabric.
Buttons and Buttonholes
I had some difficulty with the buttonholes. My machine produced a buttonhole slit just a bit too narrow on the heavy fabric. Despite my best attempts, the razor I used to cut the buttonholes managed to slice some of the buttonhole threads. This, despite working with a magnifier tool while cutting the buttonholes.
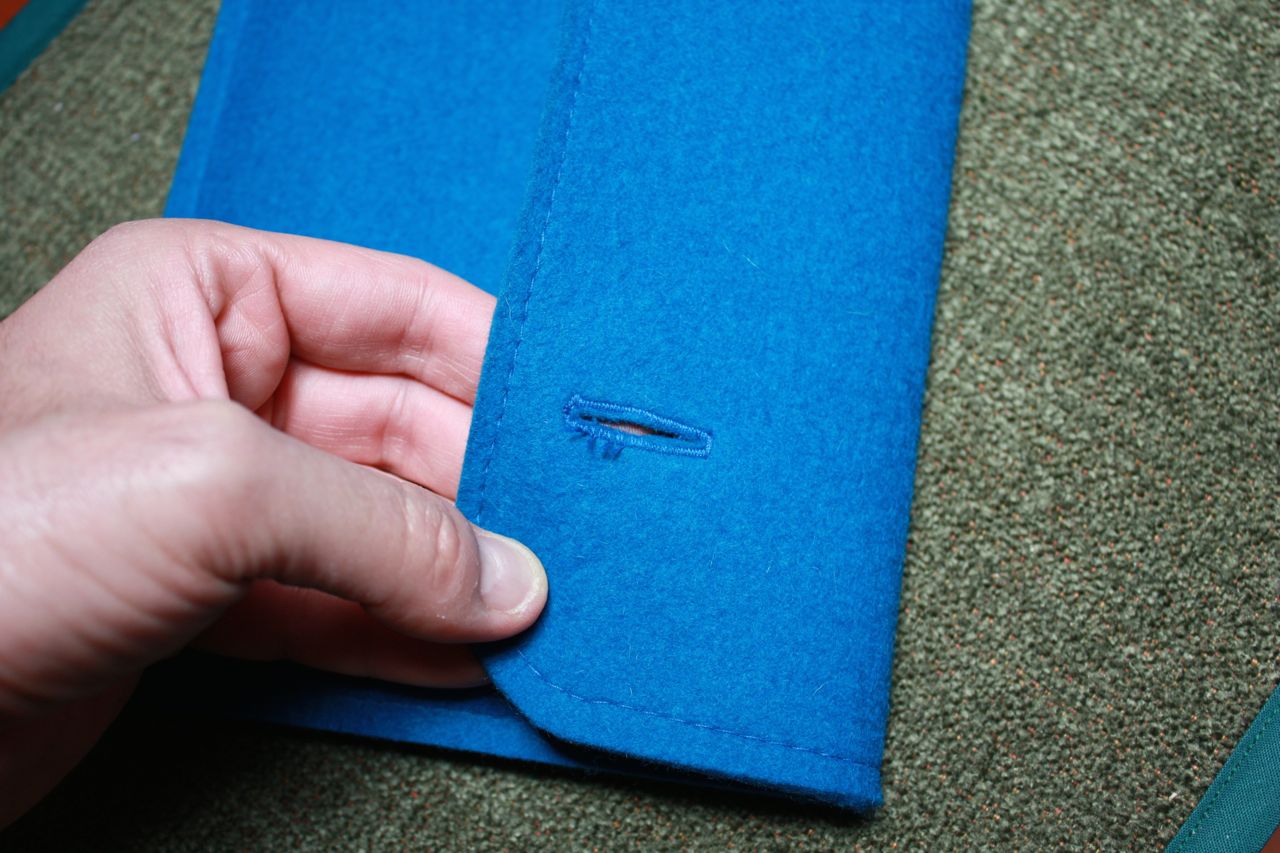
I have discovered that my sewing machine is capable of adjusting the width and length of the buttonhole stitch, but not the width of the slit. Ooops.
Worse still, I tried to “fix” the problem using some anti-fray liquid. This was a minor disaster; not only did the anti-fray liquid not help, it combined with the chalk I used to mark the buttonholes and created some ugly white stains. On the pink sleeve, I was impatient and made some chalk marks before the fray liquid had a chance to dry; this was a major mistake.

A chalk stain, fixed by anti-fray liquid, that won’t come out. And the buttonhole threads are split.
When the sleeves are buttoned, however, it looks fine. If I get really gutsy, I may try to re-sew the buttonholes on the machine, or perhaps rip them out and hand sew them.
I attached the buttons by hand. I got a fantastic tutorial for sewing a button with a thread shank from Kenneth King’s class on Craftsy, “The Carefree Fly-Front Coat.” The very last lesson of the final video in the course shows King demonstrating his technique. Unlike the instructions in my sewing books, he folds the thread on itself so four strands go through the button each time you push the needle through. This makes quick work of attaching the button.


Next Time
Summer wear. Can’t wait to see you all then!
Very nice. The felt is great!
You could always embellish it with another piece of fabric of your choice, by placing it over the buttonhole or even using a piece of leather :)
Both of them turned out really nice for you Mike. Like the leather hand grips. Good Job!
Hi Mike
Love your choice of colors. Felt, I did not even thing about it. I have made several lap top covers. I dislike making button holes, and use gromets.
Thanks
Great project. Like the leather grip. What a great idea that is not only functional but also a designer detail that really makes the project. As for the button holes, have you ever tried sliding sheet of paper towel under your project before you sew the button hole? I know it may sound odd, but a tailor once told me this trick and I have been doing it ever since. I then coat the back of the buttonhole with Fray Check or Fray Block ( the tailor actually used diluted glue) and let it dry completely. I then pull the paper towel off. Sure there is some remnant towel stuck in the back of the button hole, but it will wash out (if you’ve sewn a garment that is going to be washed) or wear off or sometimes, if I am really anal (Hey! It happens1) I get out a Sharpie and just touch up the back of the button hole with the appropriate color. Then once it is all dry I find it is easier to cut open either with a button hole chisel or a razor blade. I know it is not a technique you’d find in a sewing book but sometimes those unconventional techniques get the job done.