Happy 4th of July, everyone! (to my readers in the United States, anyway). I have all kinds of progress to report on the jeans project!
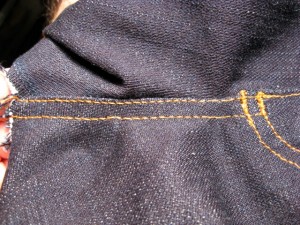
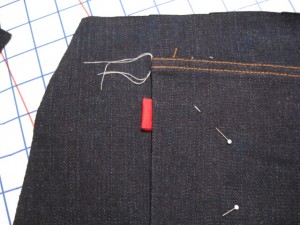
Crotch seam
I pressed the crotch seam first, then double-topstitched the seam allowance in place. No problems here.

Bar-tacks
The Brother PC-210 has an automatic bar-tack feature. Really, it’s a special case of a buttonhole, but it’s still darn convenient to push a button and have the machine automatically burp out a bartack.
I have never done bartacking with fabric and thread this heavy, so I took some time to make some samples first on my scrap denim.
I was able to set the proper stitch length for the auto-bartack. With the heavy thread, it works best to set the stitch length to maximum (1.0 mm, according to the machine’s manual). When I turned the stitch length to minimum, the machine was totally unable to feed the fabric and just stitched in place.

Left and center; two successful bartacks. Right; an unsuccessful bartack due to short stitch length with heavy thread.
But surprisingly, the machine plowed through the bartacks without complaint, even with heavy topstitch thread through several layers of denim. OK, one bartack – the first – didn’t turn out so well. Realizing I had set the wrong settings after I told the machine to go, I stopped in middle of its cycle. When I restarted, the machine stopped feeding fabric properly and continuously stitched in place. I stopped the machine and clipped the lump of extra stitches on the inside of the garment.
It doesn’t look terribly bad, and I know even with regular thread pulling a machine-stitched bartack is next to impossible so I won’t even try a do-over.
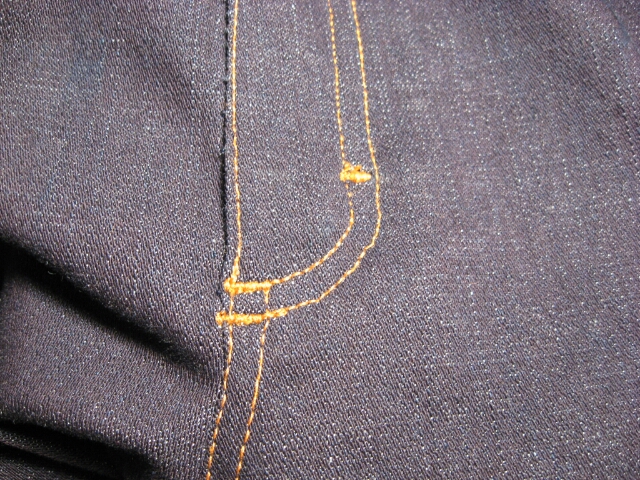
The upper (single) bartack is the goof-up.
I still don’t have complete confidence in the machine’s auto-bartacking – belt loop attachments could be its Waterloo. But I was surprised it did as well as it did.
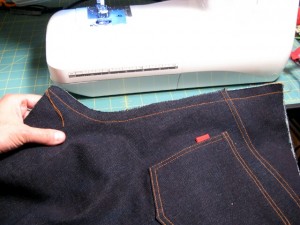
Pockets
I completely skipped putting a fancy design on the back pockets. I’m more concerned with getting this “muslin” completed.
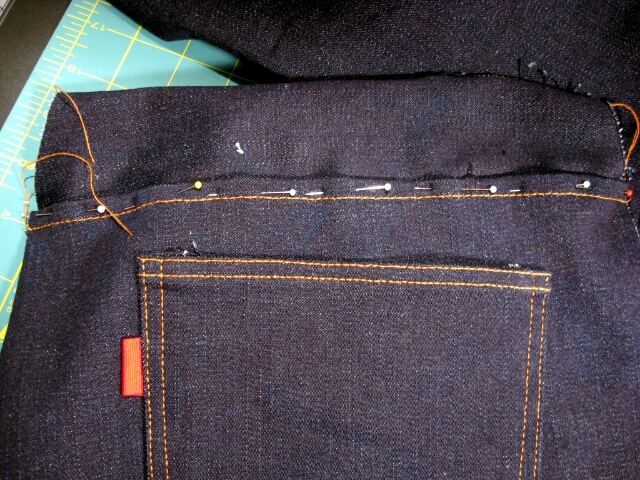
I made some tailors tacks on the rear pants pieces to copy the pocket positioning from the pattern.
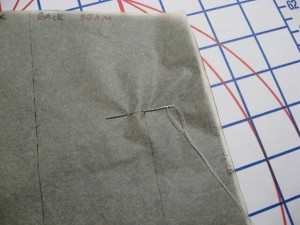
I checked the pocket placement in various places with the tape measure to make sure they were placed the same on both left and right.

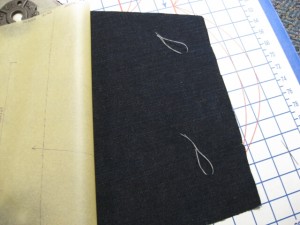
I picked up a yard of 1-inch wide red grosgrain ribbon for 25 cents at Fabric Outlet. I slipped a small loop of red ribbon into the right-hand pocket topstitching to mimic the label of a well known jeans maker. I got this idea from a PatternReview forum thread where somebody said they did this to fool people into thinking their hand-made stuff was actually store-bought RTW.
Yes, this pair of jeans is a muslin. Really! Stop saying that.
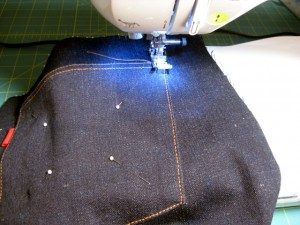
While topstitching the pockets, I took advantage of my machine’s controls to do a short stitch at the turn points. The PC-210 has a button underneath the stitch length slider that switches between manual and auto settings for stitch length. So I can instantly toggle between a long stitch (the slider setting) and a shorter stitch (the machine’s auto length). When I got near a turn point, I hit the button, did a short stitch to get the needle positioned nicely for the turn, pivoted, and then hit the button to go back to the long stitch. So the topstitching came out fairly even and the corners aren’t noticeably wonky.

Left rear pocket.

Right rear pocket, with “famous maker” label secured by topstitching.
Yoke, Center-back and inseam
For the yoke, center back, and inseams, I chose to do flat-felled seams rather than presssing and double-topstitching the seam allowances as done in the pattern instructions. I’ve had plenty of practice doing flat-fell seams, and doing them in the stretch denim was much easier than I had anticipated.
First, stitch the back-to-yoke seams, WRONG sides facing.

Next, press the seam allowance towards the yoke, trim the yoke seam allowance to 1/4 inch. Then fold the rear seam allowance over the trimmed yoke SA, encasing the yoke SA.
I usually press at this point to set the fold for the casing. Then topstitch to close the seam.
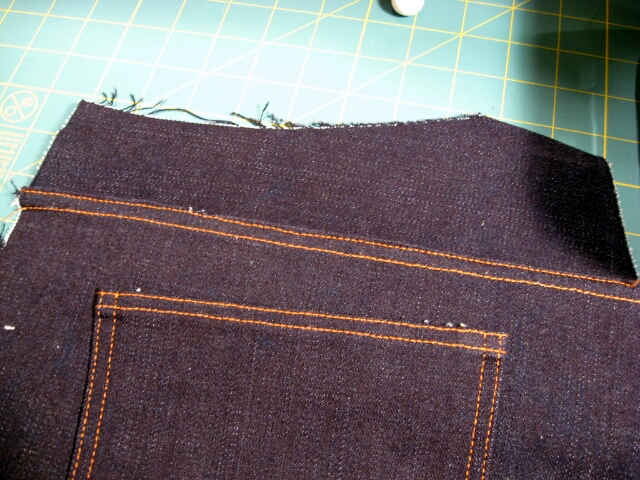
There were some issues I ran into. The pattern notches along the top of the back piece break the fold line for the flat felling, which made folding more difficult and caused a little sticky-out bit in the finished seam. I also had to re-do one of the flat-fell stitches because the line of topstitching didn’t catch the fold-over all the way.
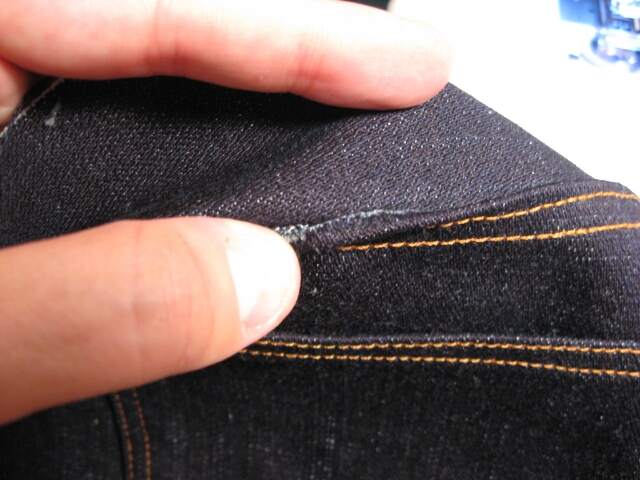
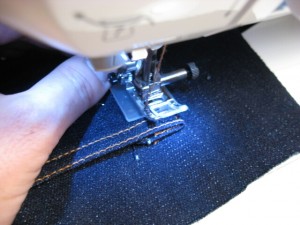
My machine didn’t have problems stitching over the great big lump where yoke seams meet the center-back seam. I did pound the lump down a bit with my clapper, and I also used some plastic presser foot spacers (also available with the brand names “Jean-a-ma-jig” or “hump jumper”) to level the presser foot with the hump.
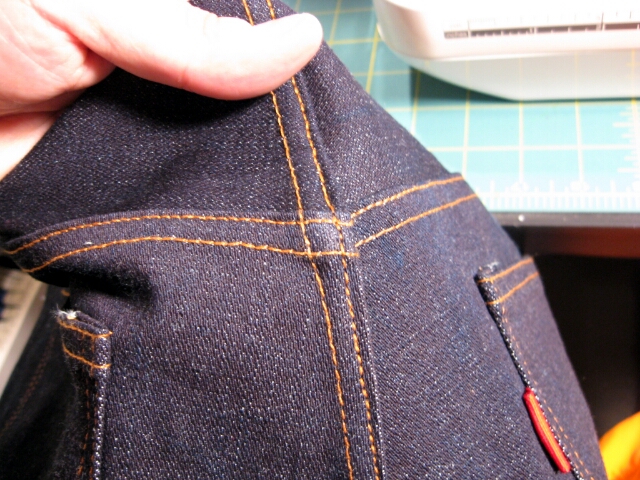
The pants inseam is probably the longest flat-fell seam I have done ever. The seam closed OK, but the topstitching came out with too short stitch length. I try to pull a little on opposite sides of the seam while topstitching the flat fell to prevent bubbles from forming in the finished seam. I might have impaired the action of the feed dogs while doing thing this, causing the uneven stitching.
One nice bit is that given the way the seams were pressed to each side, they nicely missed each other at the 4-way intersection of crotch and inseam. I don’t know if this is kosher, but when I lined up the actual seam lines this is what happened, and as Peter at MPB says, who’s going to be looking down there. This made stitching easier – less of a hump to deal with.

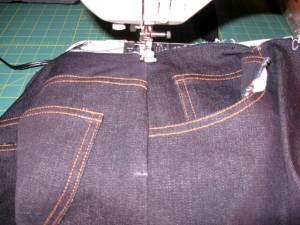
Side seams
Before sewing the side seams, I first used the overcasting foot and overcast stitch on the conventional machine to fix some of my serging boo-boos – the places where my serging didn’t quite catch the fabric.
I’m trying to learn how to sew without pinning, but I did pin the side seams, just to make sure I had top and bottom aligned before running it through the machine.
I also topstitched the pocketing to the side seam as directed by the pattern. I poked a pin from inside to outside at the end of the pocket, and made a chalk mark to know where to end the stitch.
Next time, we’ll get the waistband in place, and hopefully try the jeans on!