Goodness, the Jeans project (well, my “muslin” at least) is almost complete!
Today we’ll look at getting the buttons and rivets installed.
Early on while making the jeans, I decided to skip the pattern instructions to bartack the pocket openings, in favor of rivets – to try to look more like the “famous maker” jeans we’re all familiar with. Plus, installing the rivets is something new to learn.
Tutorials
I found some some excellent tutorials on the internet to help me install my rivets.
- BrianSews! has a three-part YouTube video tutorial which shows how to install the rivets as well the “tack button” which closes the waistband.
- TaylorTailor also has a nice rivets tutorial. Be sure to check out the comments in this article for more tips and troubleshooting suggestions. It’s worth noting Taylor runs a small supply shop from his website that sells supplies for jeans making, including professional-quality rivets.
Supplies
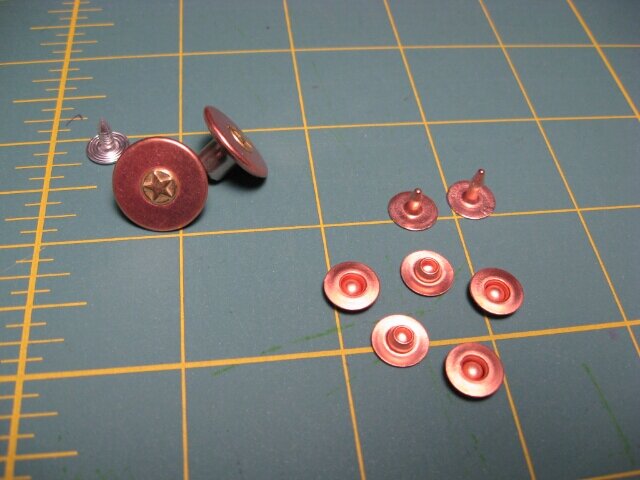
Based on the recommendation in the BrianSews video, I ordered a batch of copper rivets and matching tack buttons from Grommet Mart.
My local fabric store had some rivets on hand, but I didn’t like the style a whole lot.
The Bench Block
In order to pound in the rivets successfully, you need a smooth metal surface to back the rivets. Brian’s video suggested buying a “bench block”, which is a 4 x 4 x 1/2 inch block of smooth steel. Apparently it’s used quite often in jewelry making.
Amazon does have these blocks available, but I was impatient and didn’t want to wait until after 4th of July weekend in order to finish my jeans. So I started calling around town. Nearly all the jewelry, beading and hobby shops were closed for the holiday weekend.
Taylor’s tutorial simply used a flat piece of steel rather than the prescribed bench block. And I also needed to buy an appropriate hammer. So I took a visit to Center Hardware, a store about three blocks from my house that’s frequented by professional builders. I knew I could get a hammer, and maybe some piece of steel that would work.
I described my task to the nice woman at the counter, and suggested maybe they had something like a smooth steel block I could use? “I don’t have something like it, I have it”, she replied, then promptly took me to a shelf which had a real bench block!
The block appears to have been sitting in the store for years, if not decades.
Clearly it had been waiting for me all this time. I purchased the bench block and an 8 oz ball-pein hammer, and headed home.
If you purchase your own bench block, I found some care instructions at this jewelry makers site.
Practice
I set up a workstation on the floor of the laundry room in my basement, and practiced with my sample denim piece which by now was covered by stitching, belt loops, and buttonholes.
First, I practiced attaching the waistband buttons. I had a package of Dritz Jeans buttons I had purchased a while back in anticipation of this project. In Brian’s video, he said he didn’t like the Dritz variety very much, so I was curious to see if there was any difference between them and the ones I purchased at Grommet Mart.
As it turns out, the Dritz variety is hard to get installed correctly. You have to them hit spot on with the hammer, directly vertical. If you strike them with the slighest angle the shaft will crumple and they will look mangled. And it’s virtually impossible for me to land a direct hit each time with the hammer.
I went through all six of my Dritz buttons, and got maybe one installed successfully.
Next, I tried attaching the copper buttons I had purchased from Grommet Mart. These were much more successful. It required much less pounding with the hammer to get them installed, meaning fewer chances to screw things up. Plus, it seemed like the shaft was more sturdy and resistant to crumpling.
I also practiced attaching the rivets. This went pretty well. The key bit was making sure I had enough thickness of denim to pound through. I just used the belt loops on my sample, but following the advice from the tutorials, I added little bits of scrap denim when I pounded the rivets into the real jeans.
Attachment
The finished buttons and rivets came out okay. The rivets turned out very nice.
I used a bartack instead of a rivet to reinforce the hidden corner of the coin pocket.
The waistband button still turned out a little lopsided, but unless you actually get up close and inspect the button you’ll never notice.
Next Time
The jeans “muslin” is complete! I’ll show them off for you.
I just removed the bartacking from my front pockets today and am going to use rivets too. It just seems stronger and looks better IMO.
The steel block is a good suggestion. I’ll probably buy one. I used a nail to make my rivet holes and managed to get one nail point into my desk by accident.
Matt, I think going for the rivets over the bartacks on the pockets is a good idea. Bartacks don’t look out of place, but the rivets definitely make the jeans look like they came from a store shelf.
I thought the steel bench block would be hard to find, but Amazon has it. You still use a nail to pound starter holes throught the denim. I used a scrap piece of wood for that.
One thing I forgot to mention is that I didn’t use the bench block for the button. Instead, I used a few rags against the scrap wood to protect the design on the front of the button.
I pounded on my button too much and the back-rivet point came through the front of the metal button. Haha. It was a cheap one from Joanns. Well I couldn’t see any way to take it back apart and replace it so for now it will just have to do. I pounded down the rivet point so it is blunt and won’t poke my finger when I touch the button.
In the BrianSews! tutorial videos, I think he uses a drill to remove buttons and rivets after they’ve been installed.