Well, it’s been a bit of a stretch since the last installment of this series, but I have an excuse.
This Friday was my last day at my old job. I worked at a small company making children’s educational software for mobile devices. Its parent company was one of the more well-known smartphone manufacturers. This past Thursday the parent company shut us down with a mass layoff. Fortunately, I saw this coming and have spent the better part of the summer engaged in a job hunt. I’m pleased to say that I had already resigned by the time the layoff hit, and my new job opportunity begins Monday the 16th.
Now that I’ve gotten rid of my job, I have some free time on my hands. I plan to use it to get some projects completed, maybe even this one! I had also thought about entering the PatternReview mini-wardrobe contest going on now. I like the concept, but I’m still not sure I could get the whole contest completed even with two weeks of unemployment to help me along.
Finishing the Muslin
Over the Labor Day weekend, I finished up the muslin for the Chambray Comfy Shirt.
The construction isn’t great. There’s places where stitching doesn’t catch the fabric on the inside of the cuffs and plackets. There’s a nice pucker where the collar stand meets up with the shirt body. The patch pockets didn’t come out the same height. And I stitched the shirttail hem completely on the machine folding as I went along, rather than folding and pressing at the ironing board. It turned out a puckered mess.

Still, I was practicing technique, and working the machine much faster than I normally do. None of this affects the fit of the shirt, which is really what I’m looking for.
Fitting
With the muslin complete, I let Jim try it on. I used pins in place of buttons for the fitting. Here’s the way the pattern fit straight out of the envelope.
The collar fit just nicely – not too tight, not too loose. And he likes the style of the collar too. That’s good, because if I had to alter the collar size I’d also have to adjust the neckline.
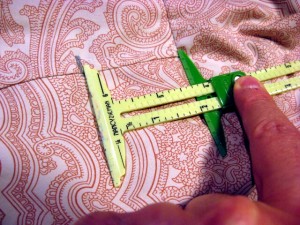
The shoulders, however, are way too wide. I marked the shoulder joint on both sides of the muslin, and it’s pretty consistent – I need to remove two inches from each shoulder.
The sleeves are just a tad too long, but to be truthful I’ll have to check sleeve length after readjusting the shoulder.
The chest and torso were also somewhat large and baggy. Granted this shirt is a boxy cut, but even so there was a bit much fabric to go around.
I tried pinning away 1 inch on each side, for a total of 4 inches removed from the total circumference of the shirt body. I went back to the machine and did a basting stitch with a 1 inch allowance, but forgot about the 1/4 inch allowance already there.
This makes the effective seam allowance 3/4 inch, for a total of (4 * 3/4) = 3 inches removed from the circumference of the shirt body.
I let Jim try out the shirt once again, and this time I even talked him into putting proper pants on.
I think this removes a good amount of the excess bagginess in the torso. There’s still too much fullness in the sleeves. I could simply bring in the side sleeves, starting at an inch or so extra seam allowance at the armscye and tapering down to no extra allowance at the cuff. But I’m not sure how that will turn out, and if I will need to adjust the armscye to accommodate the smaller sleeve.
More on this, and my eventual solution, in the next blog post where I alter the pattern.
Shoutouts
I’d just like to acknowledge two friendly tips of the hat I’ve received from my friends in the sewing blogosphere.
First, I got a great shoutout from Joe Zuchowicz, at his blog “Seam Ripper Joe….and his Sewing Machine”. I had discovered Joe’s blog not too long ago through one of the sewing communities on Google+, and his sewing adventures are always a joy to read.
Secondly, I notice I’ve received a few new readers by way of Peter Lappin at Male Pattern Boldness! Peter, thanks for the referrals on your blogroll.
On the hemming thing: rolled hem foot. It’s the best way to get a good looking, really narrow shirt hem and freakishly satisfying, though it does take a little practice. I made a dozen hankies and by the time that was done I mostly had control of the thing.
Looks like great progress on your muslin.
The new muslin looks much better. Congratulation on the new job!
I think you are right on track with the fitting. The shirt looks great.
A tailored shirt should have the option of being worn with a tie, and a small amount of width is necessary at the collar center front for the tie to fit nicely. Notice on your muslin there is no space where the collars meet, right at the collar stand. What you need to do is to finish the collar about 1/4″ from the center front collar stand. There should be a notch on the collar stand indicating that spot where the collar dives into the stand. Check to see if the notch is app. 1/4″ from center front, if it is, maybe you set the collar in at center. Are you using 5/8″ seam allowances? If so, it’s easy to miss the correct location since the collar is angled at that point.
Hi John, the pattern is from Kwik Sew and uses 1/4″ seam allowances. In fact, I deliberately enlarged the seam allowance to 5/8″ in the areas where the seams are flat-felled.
I’ll double-check the pattern and the muslin to see if the collar enters the stand just shy of center as you suggested. Thanks!