It’s time to start a new hoodie!
The Inspiration
This design was inspired by the fabrics lying around in my stash. I have some black sweatshirt fleece and also this rust-red knit ribbing, both from JoAnn’s:
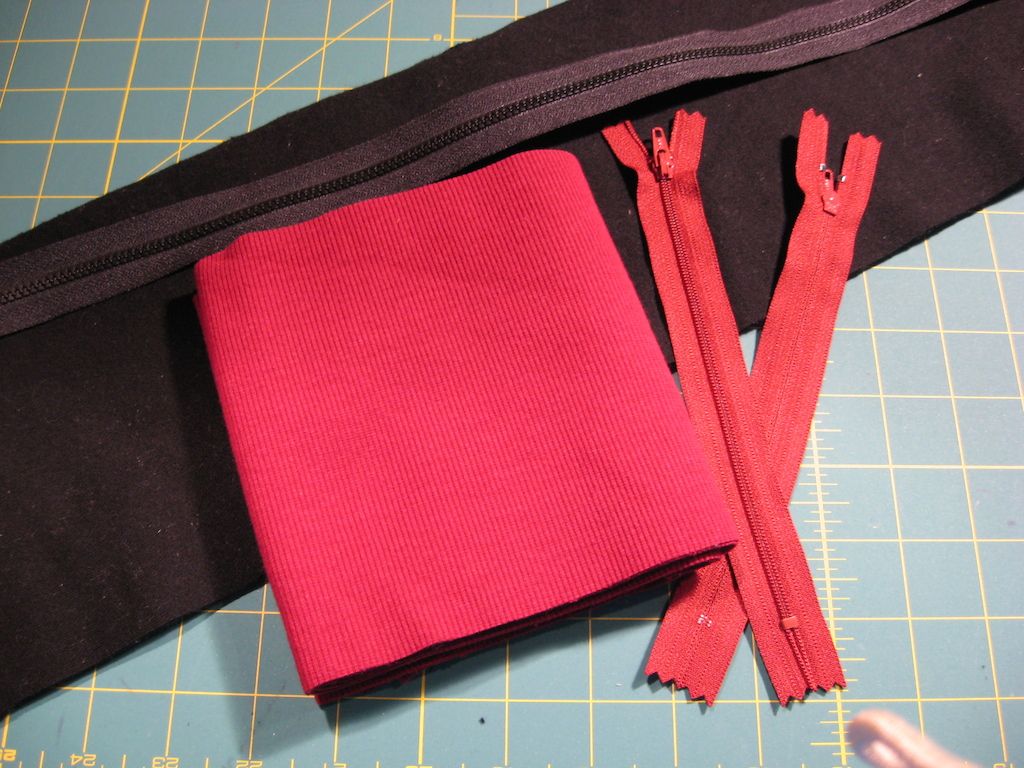
It looks rustier in real life than in this photo. (There’s a better photo near the end of this article).
I thought it would look sharp as the waistband and cuffs on a black hoodie:
A Pocket Redesign
For this design, I plan to redesign the pockets from those in McCall’s 5252. Instead of on-seam pockets with inside bags as in the pattern, I plan to make slant pockets similar to those found on most sweatshirts.
I was disappointed a little by the zippers on my first hoodie; the on-seam zippers are covered beneath the seam allowances and while that looks very trim, I actually want the zippers exposed as a design element. What I want is something more like a welt pocket.
I came across this YouTube video by Gretchen Hirsch, explaining her technique for making a zippered welt pocket. It’s pretty much what I was looking for:
I have never made a welt pocket before. Could I successfully make one in sweatshirt fleece?
Let’s find out.
Altering the Pattern
Step one is to alter the pattern to eliminate the seam. Pieces 4 and 5 comprise a front panel and a side panel. Overlapping the 5/8″ seam allowances on both and tracing yields a combined pattern piece.
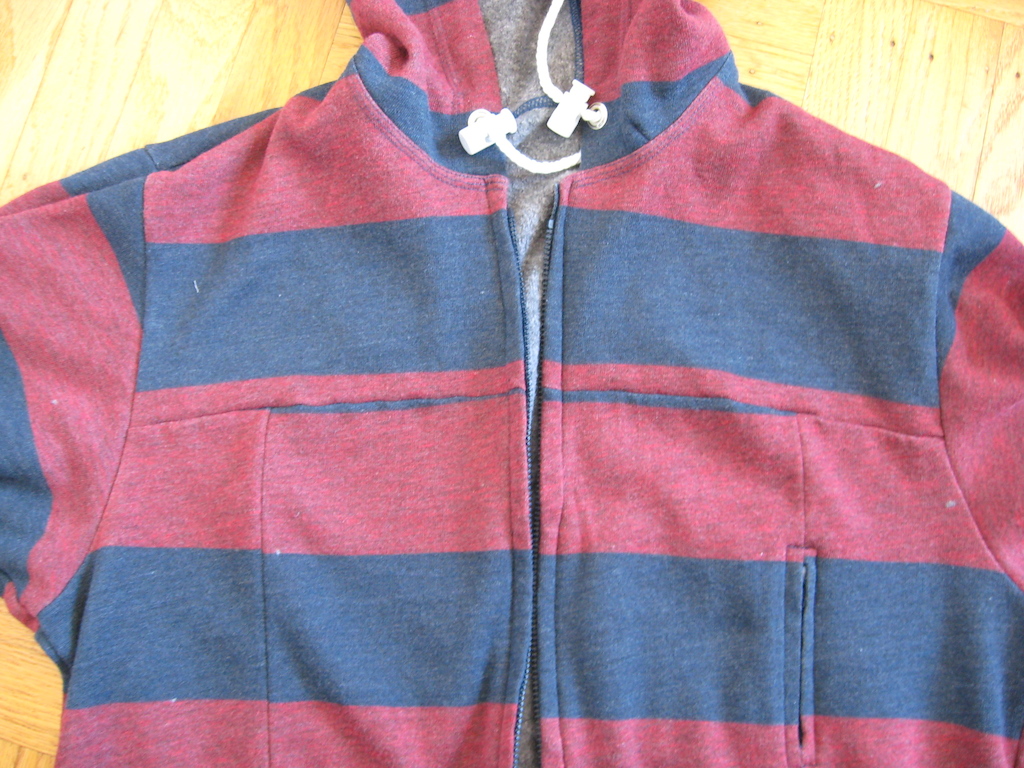
In my last article on the striped hoodie muslin, I noted that the blue stripes appeared near the seams even though I had positioned the blue to fall inside the seam allowance:
While aligning the pattern pieces for tracing, I discovered a pattern drafting error: the two front pieces don’t match. They’re not the same height. (I traced size S, the small dashed lines).
Piece 5 (the front with zipper) is a little shorter than Piece 4 (side panel) when you align them at the hem. That length discrepancy is about the same as the blue stripes that extended outside the seam allowance.
I blended the two lines when tracing to even out this seam.
Finally, I shortened the front and back pieces by about 2 inches to account for the red knit waistband in place of the hem originally called for.
The Welt Pocket
The pocket is essentially the slanted patch pocket you see on most sweatshirts. It is sealed in the stitching along the zipper and hem. The rest of the pocket is topstitched/edgestitched into place.
Where the opening would normally be on a regular sweatshirt, it is sewn down and a zippered welt opening appears in its place.
I measured the patch pockets on two hoodies I had lying around, and drafted a pattern for the patch pocket.
I also added welt opening to the new to the new front panel pattern piece I had traced. This is because I wanted to explore two options for the welt pockets. One option puts the pocket on the outside as in a standard sweatshirt. The other puts the pocket on the inside with the welt appearing on the front panel.
Constructing the Welt
I cut some extra fabric to make some samples. An abbreviated front panel, plus a pocket piece.
The right-side sample puts the pocket, with welt, on the outside of the garment. (Hem is at bottom, front zipper is along the right-hand side).
The left-side sample puts the pocket on the inside of the garment, with welt on the front panel. (Hem at bottom, front zipper along left-hand side.)
As depicted in the Gretchen Hirsch video, I stabilized the area underneath the welts with some fusible interfacing.
The first welt I attempted used silk organza stitched on the right side, as in the video. I retraced the welt lines to make them more visible.
After cutting the welt open, turning the organza to the inside, and pressing, I got the following. The organza made it easy to press a nice, square box to frame the zipper. Pretty encouraging so far.
Zipper basted into place with Wash-away Wonder Tape. Both ends of the zipper are stopped with a zig-zag stitch on the machine with the feed dogs dropped.
Zipper edged-stitched into place with the zipper foot.
After stitching the pocket piece to the inside, and running it through the laundry to get rid of the basting tape, I ended up with this finished sample. The stitching could be a bit improved, but overall the welt is quite feasible.
One problem with this welt is that the silk organza is visible around the edges. That’s because the sweatshirt fleece is thick, fluffy and doesn’t fold crisply, so you don’t get a nice “turn of cloth” with the organza. I suppose I could try black silk organza, but I’m lazy. And do you know how expensive silk organza is, even at discount?
I tried making the second sample without organza, instead just pressing and taping down the welt opening before adding the zipper. This sample put the pocket on the outside of the garment as a patch pocket.
Again, the stitching could be better, but this one works too. The opening isn’t nicely square, though – it’s much harder to do without the organza to shape the opening. Still, I think this method is doable and I think I can get better results with practice.
At first, I was partial to inside pockets, but Jim says he likes the patch pockets on the outside better because it’s more like what you expect from a sweatshirt. So I’ll probably go with that for the real thing.
Laces and Drawcords Again
While shopping for the organza, I checked out the drawcords on sale at Discount Fabrics – no such luck for finding rust-red drawcord.
I also checked out the selection of fabric dyes, but decided I didn’t want to go there. These boxes of dye make gallons of dye and can dye pounds of fabric. I just want to dye a 45-inch length of cord. Way too much mess and hassle.
I went to Shoe Biz II in San Francisco’s Haight District, because they specialize in sneakers and heard they had a good selection of laces. They had some laces, but not a whole lot and not in my color. But they did have an awesome red dinosaur in front of the shop that made the trip worth while.
I eventually resorted to the Interwebs and found a pair of 48-inch Team Red shoelaces from Fully Laced, a local sneaker/streetwear maker. The order arrived today. The color match is pretty good. It’s a shade darker than the trim and zippers, and a bit bluer, but otherwise quite acceptable.
Next Time
We make the Red and Black Hoodie.
See you then!
No need to use silk organza for this purpose. it´s only used for delicat fabrics like silk or wool, that will not be washed. it will not stand washing either.
Use some thin cotton or even a piece of lining fabric instead.
To avoid showing, turn the fabric inside and pull, till the seam is exactly on the edge and secure it with basting while doing that. The sweater fabric will not stay in place only with ironing.
I tivo the show “It’s sew easy”, this week Angela Wolf show how to do welt pocket.
Looking foward to see your progress