My quest to find the perfect fitting pair of pants continues, but work-related drama has been consuming my time and energy. So apologies for the slowdown here on the blog, and I hope this is only a temporary state of affairs.
I thought this round of alterations was going to take me very close to something ideal, or at least something I would move to a test pair with. Instead, I was very disappointed with the changes I’ve made and I feel like I’ve taken some steps backwards.
But first, let’s go over what I did to the pattern after Muslin D, before we talk about what didn’t work out.
Muslin E
Here’s Muslin D deconstructed, pressed, and laid out on my work table. The front piece (to the right) has two different front crotch curves I experimented with, and the back piece has a back crotch curve that has been scooped a little bit more. You can also just see see the purple markings where I added to the back crotch by letting out at the inseam. The side seams are also marked where I pinned out excess curvature at the hip.
Front Crotch Curve
I took the innermost of the two front crotch curves and traced out a seam line in pencil to approximate the muslin.
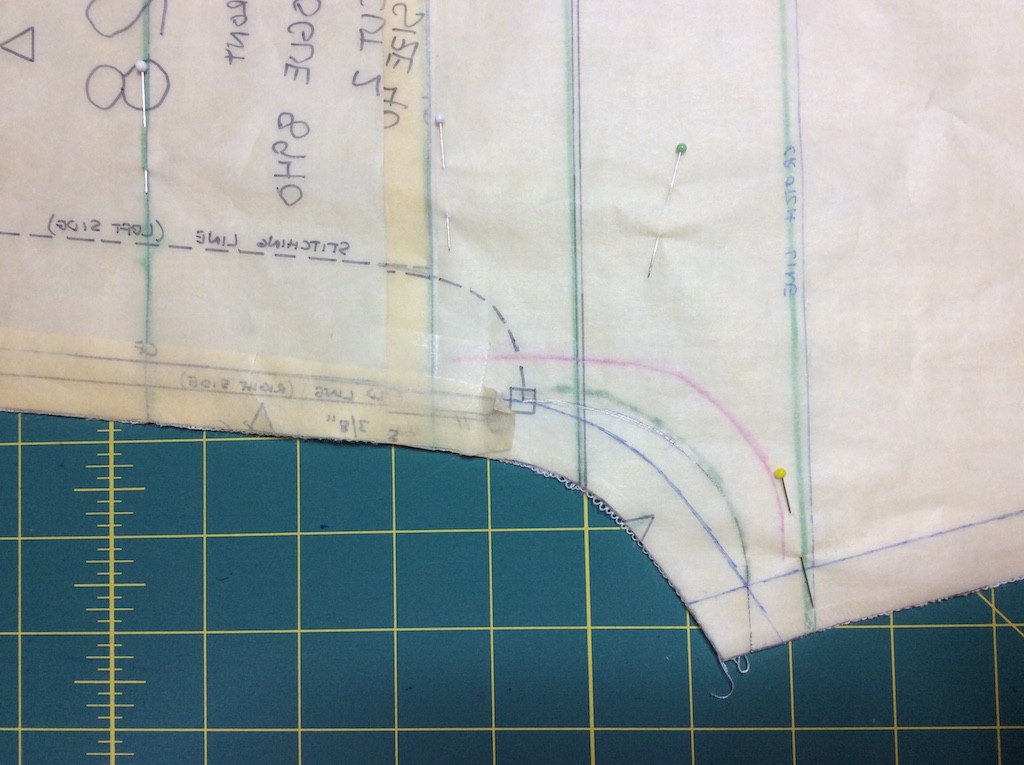
Here’s the new front crotch curve. Pencil line is seam line, red line is cut line.
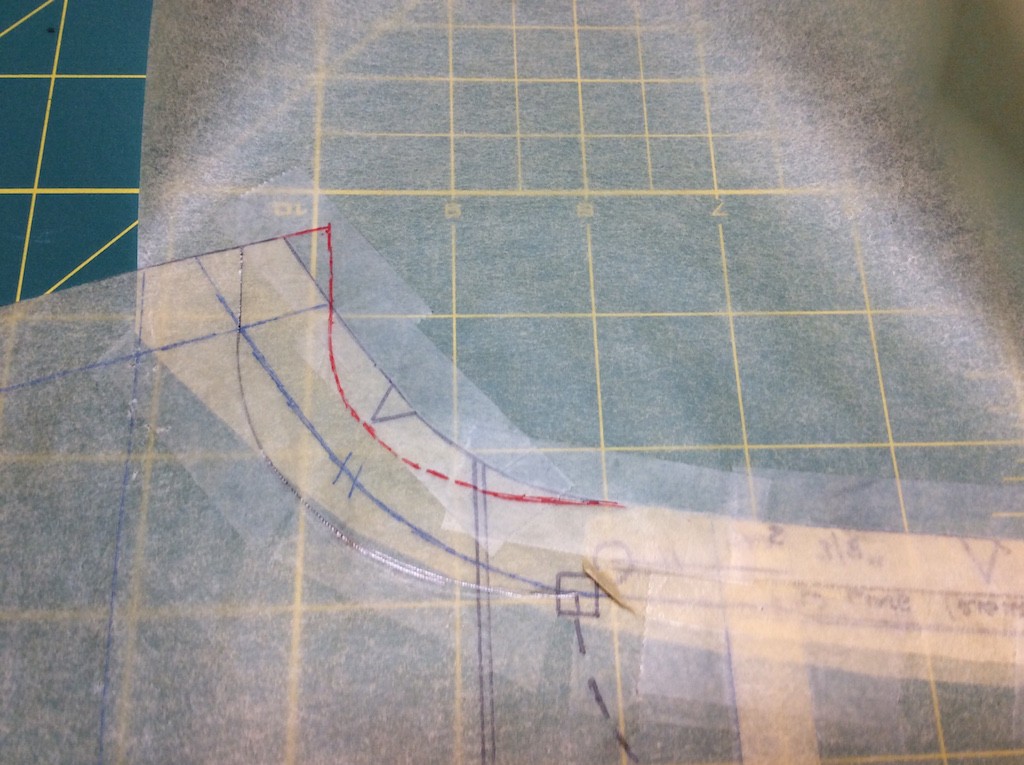
Back Crotch Curve
I scooped out yet more of the back seam. Again, pencil line is the new seam line and the red line is the new cut line.
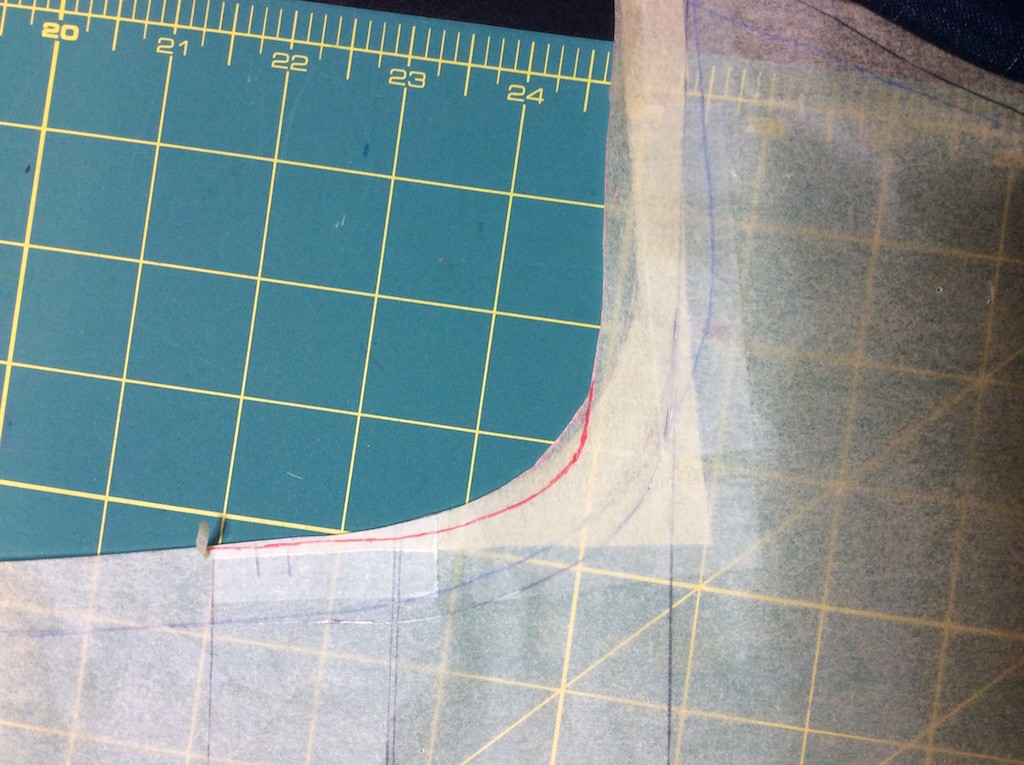
Here’s a closeup of the additional length I’m adding to the back crotch right at the inseam. Again, pencil is the seam line, red line is the cut line.
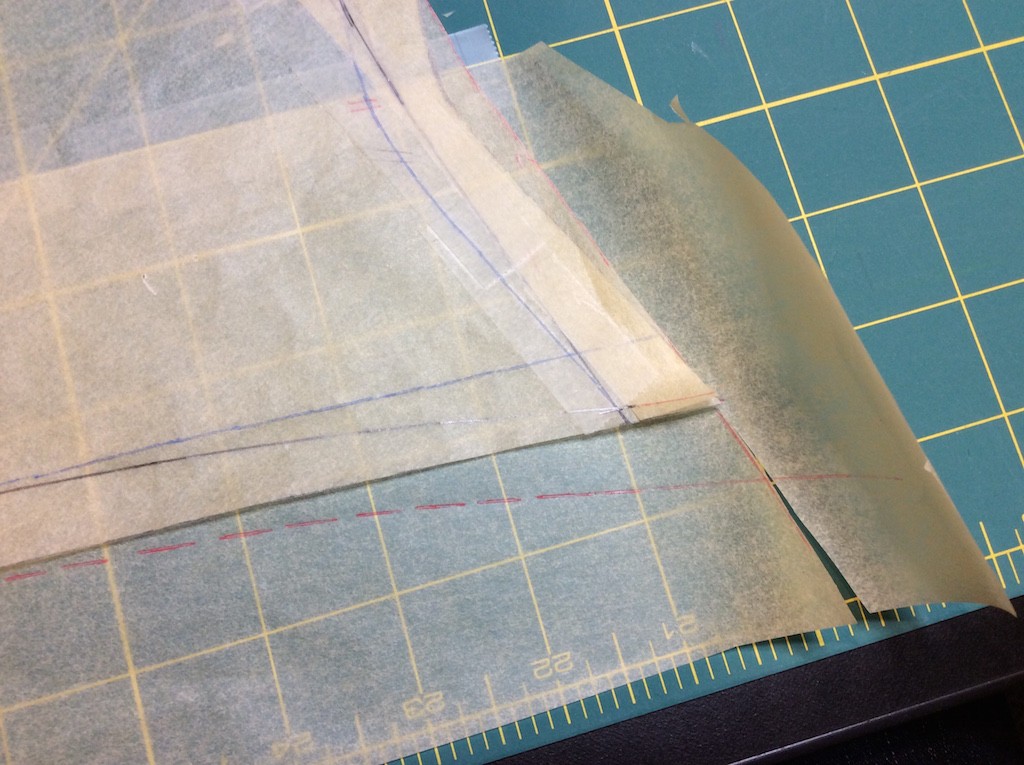
Side Seams
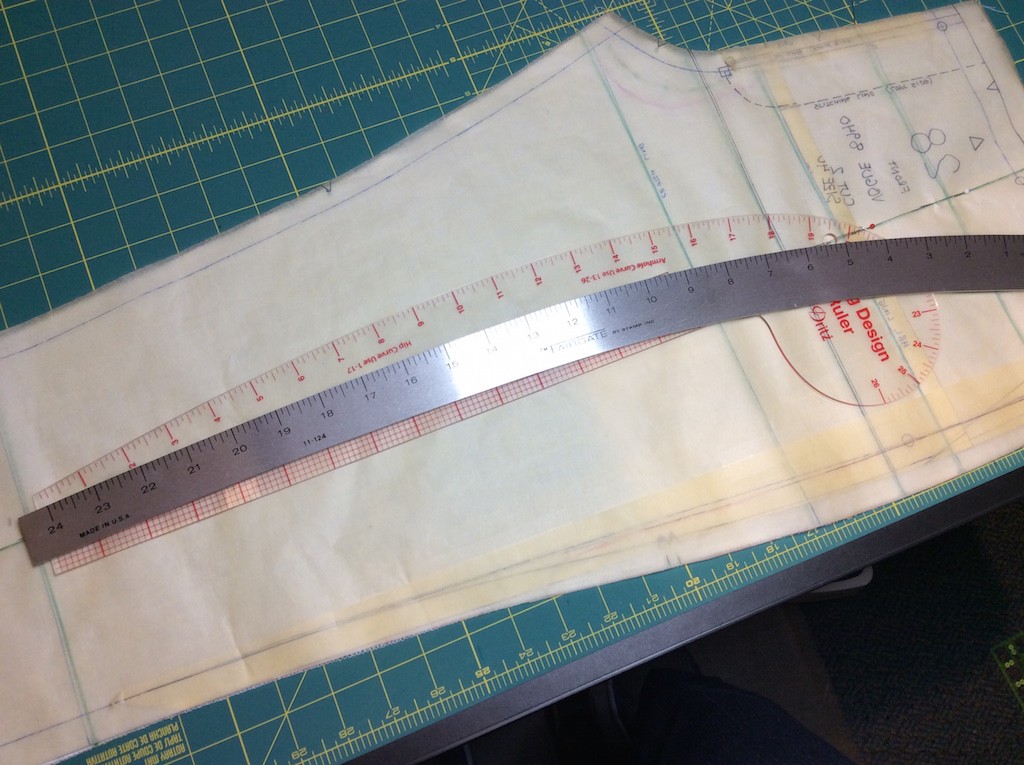
I redrew the side seams with my metal hip curve ruler, which has less pronounced curves than my regular plastic pattern ruler. Also, I took a longer taper to the knee, and added 1/4 to each piece near the waistband, again to keep the seam straight.
I also put the zipper in back rather than in front, because I wanted it out of the way for the front crotch fitting I wanted to do with this muslin.
First Tryout
How does Muslin E look? Not much better than Muslin D, to tell the truth.
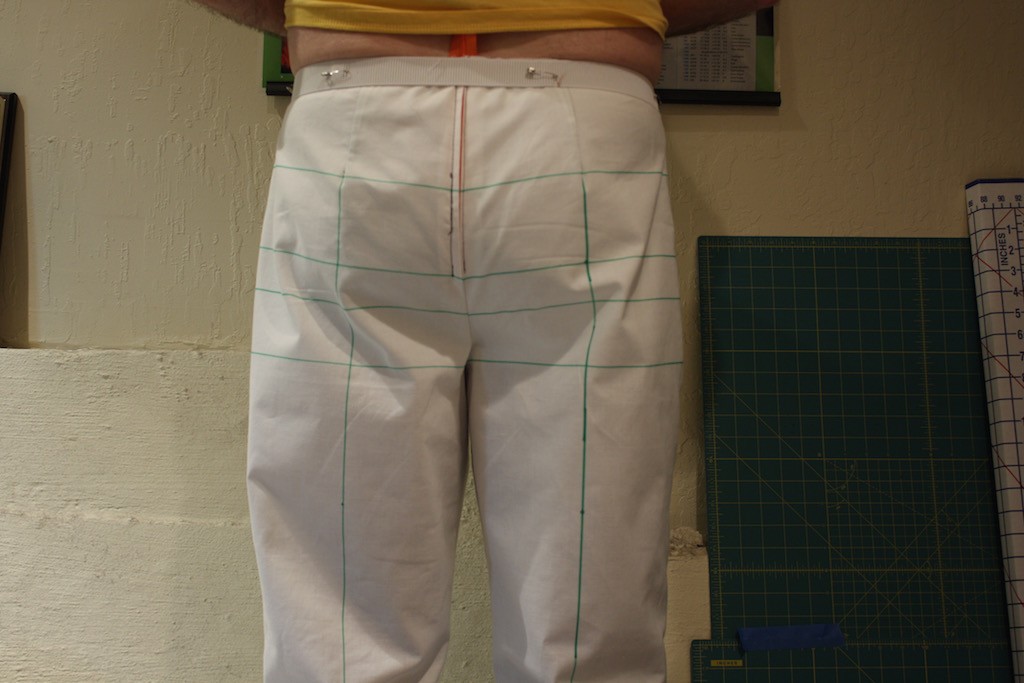
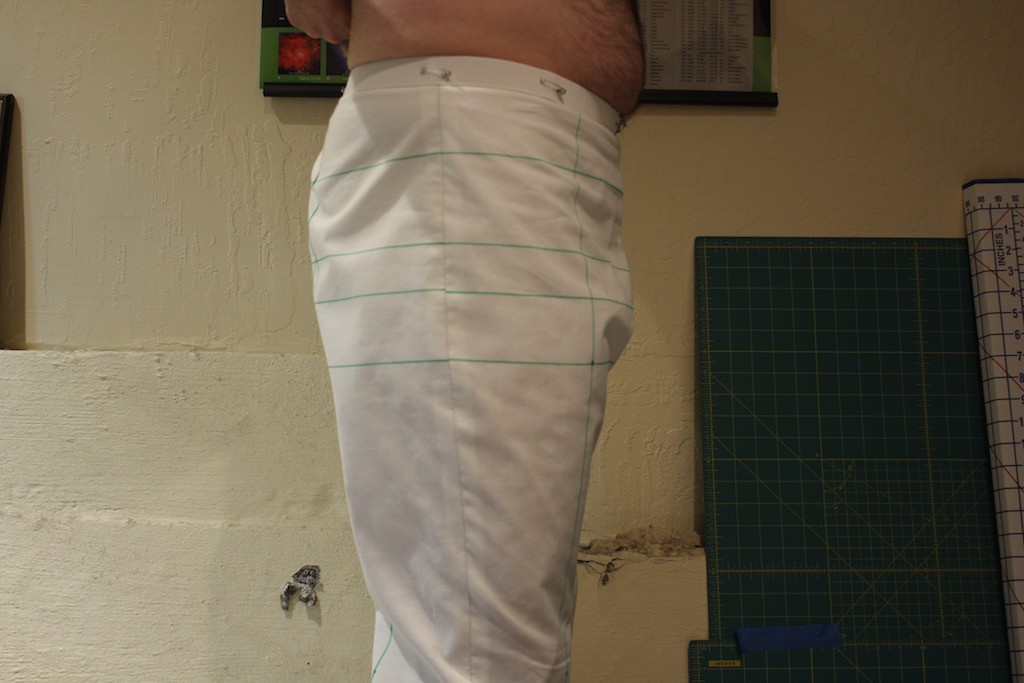

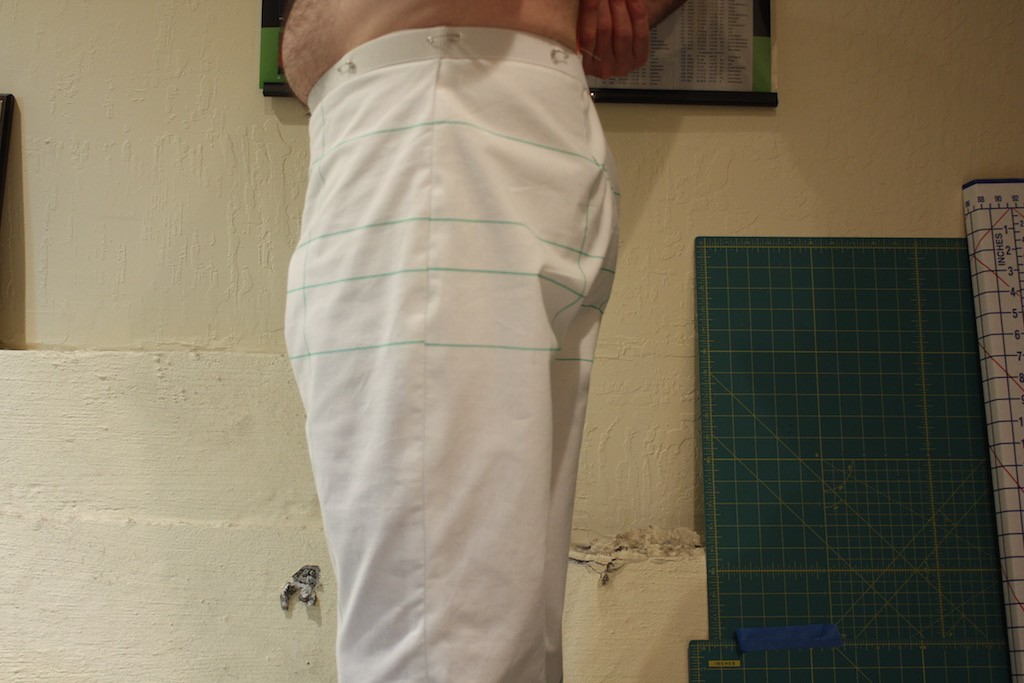
Adding the ease has introduced all kinds of wrinkles and drag lines along the back, and the front is still puffy.
Addressing the Excess Fabric in Front
I attempted to get rid of the fabric in front in what I thought the most straightforward way possible. I pinched out the excess fabric along the center front crotch, and pinned it out (using safety pins, of course).
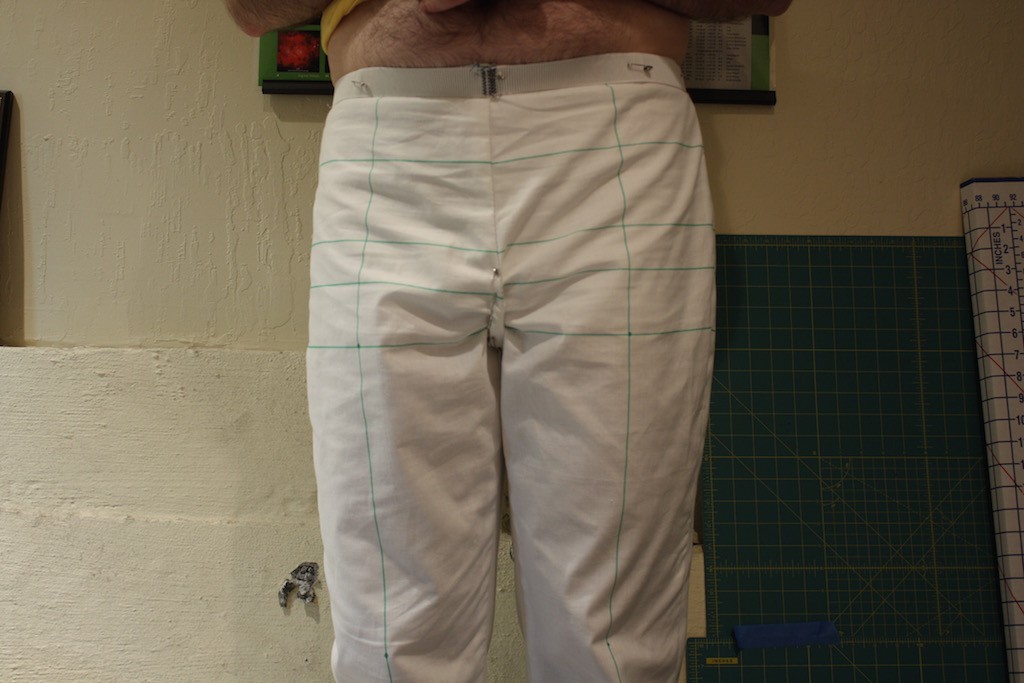
This got rid of a lot of fabric puddling in the area. But it caused a new problem. The action of “scooping out” the front crotch also lowered the entire crotch seam, so it now hangs an inch lower from my body.
Here’s what the new front crotch seam looked like, after I put a basting stitch in place of the pins. The deeper curve takes fabric and puts it into the seam allowance, but also lowers the seam.
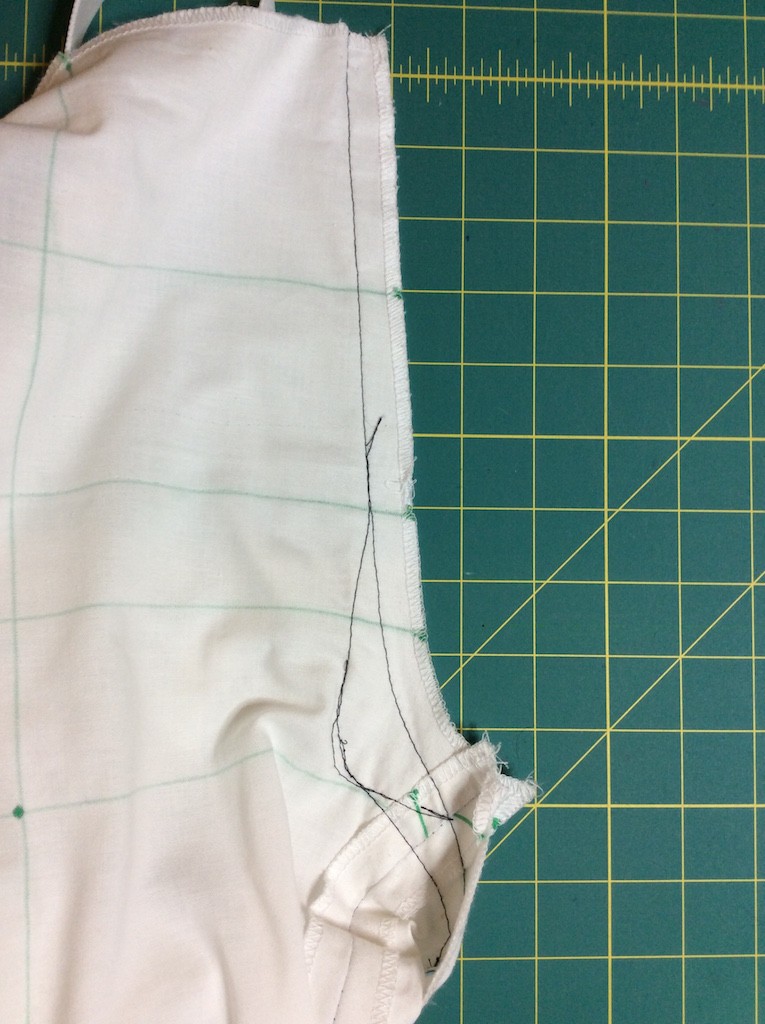
Even the back crotch was affected; the stitch line lowered the point where the back crotch meets the inseam.

I noticed the lowering of the crotch seam immediately – because I got a lot of pull on my front thighs when walking.
Piling One Mistake Onto Another
I decided to raise the crotch point by taking a 1-inch tuck at the hip all the way around, effectively pulling the crotch up so it would meet my body again.
Here’s the full set of photos of Muslin E after this alteration.
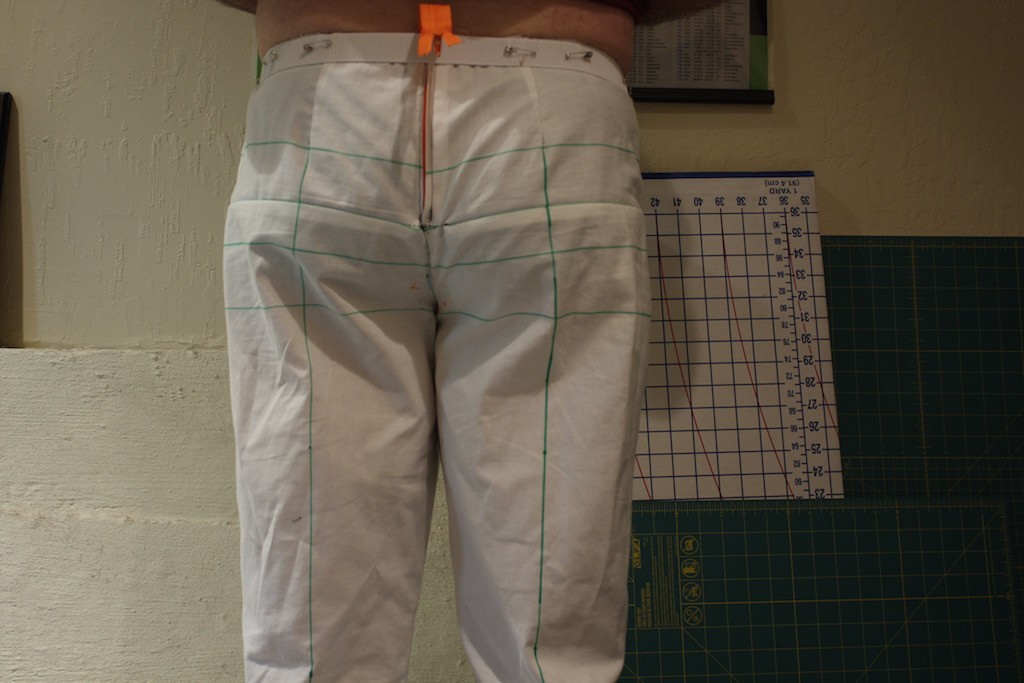
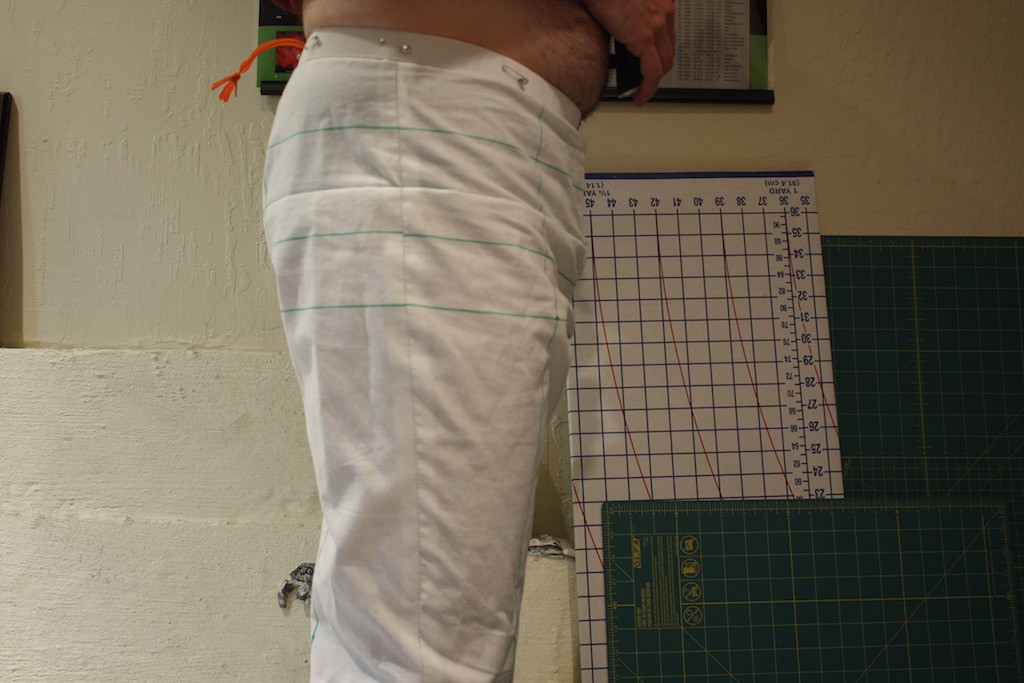
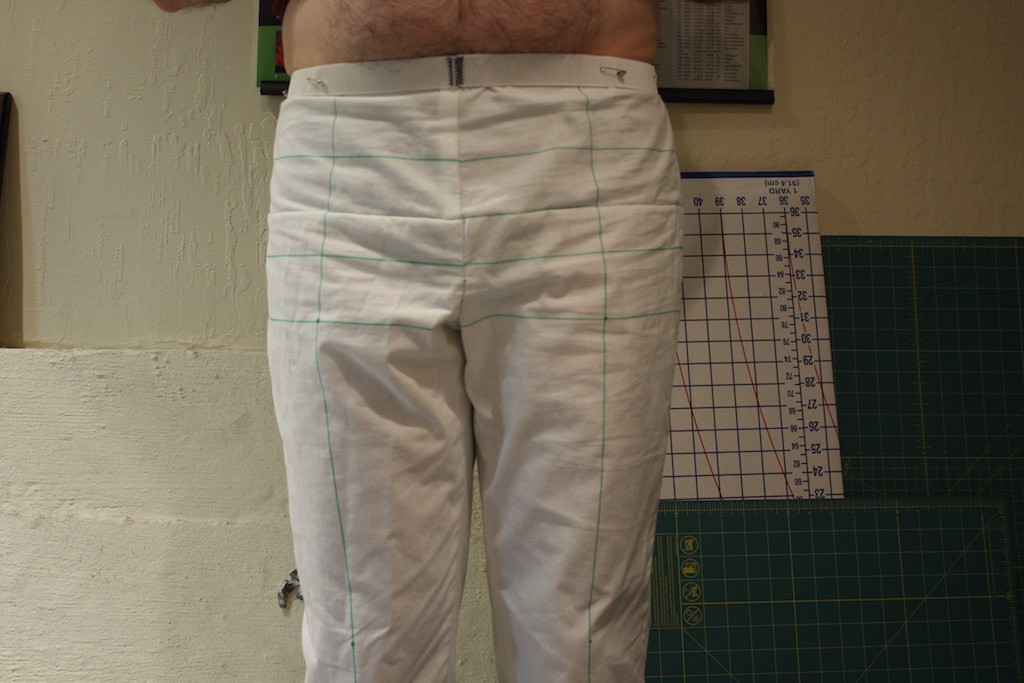
The tuck did make the pants feel more comfortable and move more freely. BUT, it caused new problems. It shortened the back crotch seam, and now the back crotch is completely out of adjustment.
The vertical balance lines in back are bowed out once again, indicating insufficient front-to-back depth, and the horizontal lines distinctly show a downward “V”, indicating there is not enough back crotch length. This is easy to tell, because if I make any movement other than standing still (bending, sitting, etc), the waistline wants to pull down in back.
What went wrong?
I think there’s a couple things I could have done differently.
- I ignored the front crotch seam until very late in the process. I now realize I should have done this sooner, together with the back crotch seam. I think I will now have to revisit/redo some parts of the fitting process once I get the crotch seam back in shape.
- I made changes without a clear idea of what the alteration was doing, and what the outcome would be. I kind of winged it by just deciding to pin out the excess fabric in front. That got me into trouble.
- I made too many changes at once in this muslin. Once I did try fixing the front crotch, that led me into changing the back crotch, which led me to taking a tuck. All of them together makes it very difficult to fix the true problem. Instead, I should have backed up once I realized that the front crotch change had unexpected effects.
Time for a Lifeline
On the gameshow “Who Wants to Be a Millionaire”, contestants could ask for a lifeline.
I’m choosing “Ask an Expert”. I’ve sent this last set of photos to Sarah Veblen, who offers paid consulting via her website. She’s already told me that I’ve made too many alterations, and at least one isn’t helping. I’ll be working with her to get her suggestions for what to do next.
Another lifeline is “Ask the Audience.” If you have any suggestions to make, I’d love to hear them!

Hey Michael…Boy, do I admire your tenacity:) And I certainly remember fitting experiences like yours, in which an apparently endless string of great ideas and supposed moments of clarity would dissolve in the few seconds it would take to try on yet another disappointing muslin…which did NOT take mere seconds to come up with. The worst of it all was the sense that instead of learning anything from all my efforts, I was mostly just cramming every larger tangles of brambly ideas into a bag that wasn’t itself getting any bigger…sheesh!
As for advice, I applaud your decision to get Sarah’s help! Esp. since it sounds like a back-to-square-one moment, which is what I always did, too. Fixes on top of fixes just compound errors; I think I did learn that about fitting. So best of luck with Sarah’s help; I always really enjoyed working with her on articles (we never did any fitting together.)
If your interest in figuring all this out persists (mine didn’t, once I had a pattern, that was THAT for the why!), I’d recommend two things: Check out Don McCunn’s classic book on pattern-making for some clear-headed and innovative back to basics thinking about fabric on bodies. He’s right there in SF, though basically retired from teaching; still posts a lot, though: http://how-to-make-sewing-patterns.deofsf.com
The other, offered with caution, is to check out and share the misery with this gargantuan thread at the cutterandtailor forum: http://www.cutterandtailor.com/forum/index.php?showtopic=4063&page=10
The link starts deep into it, but at an interesting point in this guy’s travails, for which he sought advice from tailors, because he had some training in that area, and was starting from a custom (self-) drafted pattern, and wanted, as they all seem to want over there, to think of drafting as a fitting tool…yikes! Anyway, the point of dragging this up here is that much of the advice he gets has to do with shaping the fabric (wool, of course) with ironwork as the only real way to get simple pant shapes to fit complex body shapes, which has never appealed to me since I make mostly non-woolen pants, but it’s quite instructive nonetheless, about how difficult it really is to deal with leg curves and angles. Also, every time I see the OP’s muslin problems, I’m reminded of yours! I can’t make myself read the whole thread, but I doubt you wouldn’t find some gems in there, since you’re so currently occupied with the same issues.
I DO hope you get this trouser stuff sorted soon…so you can get back to sewing, and writing about, shirts:)
Very best wishes!
David,
Yes, I do hope I get this sorted out soon! I definitely have some shirt-making projects that are sitting on the back-burner waiting to be made. I quoted you out of your book on my previous blog post because I read that and it spoke directly to me. You did warn me about having alterations turn into a car wreck of each alteration leading to something worse, not better.
I have Don McCunn’s book – it was my first book on the subject of patterns, and it really explained the role of seams and darts in shaping fabric into three dimensions.
I will look at the Cutter & Tailor discussion thread. Though I accept that ironwork is very valuable in the world of tailoring, I agree with you that I’m not making every pair of pants from wool and so can’t depend upon that to solve all my problems. I see ironwork as something that can take an already well-fitting pattern, and make it fit great. But then again, I’m not a tailor so what do I know.
On the subject of shirtmaking – I still owe you a demonstration of how I turn collar points. I am reading your new book – I follow a process similar to the home-sewing approach you described, but not exactly. I may take the time to make a video of my technique to console me in the midst of my pants disaster.
Just one comment on the Cutter & Tailor thread you referenced – it seems like the forum members have made the OP feel bad about the quality of his work AND about asking for help on the forums (http://www.cutterandtailor.com/forum/index.php?showtopic=4063&p=43042)
THAT is a dramatic demonstration why I do not like the Cutter & Tailor forums.
They ARE often a sticky bunch; it can get painful! And there seems to be endless confusion with terminology. But there are also lots of gems being strewn around (sort of randomly).
I haven’t tried it myself, but I really like the idea in McCunn’s book (IIRC!) that a pants pattern (for anybody) should start with a well-fitted skirt basic pattern from the waist to the hips, and then the legs should be cut to simply fall smoothly from that hipline, with enough room between the legs and below the crotch so there’s no dragging, and you can sit down and climb stairs! That would wind up looking like a nicely draped vintage trouser, with pretty wide legs and not at all tight in back. And it still doesn’t really deal with the protruding calves and forward hips that some postures have.
I think the main problem we all have these days comes from wearing and seeing jeans looking great quite tight and form-fitting. But THAT comes from the fabric gradually molding to the form…you’ve seen all those jeans pix with nobody in them but still looking like there is? So, where is the perfect point between tight and draping freely and smoothly? I don’t think there is one; it’s an either/or thing. Form-fitting comes mostly from there being no ease at all so the body itself smooths things out, but that’s much tighter than most would want their everyday pants to fit.
Another problem I always feel with your muslins is that the fabric itself is simply too soft and light to do anything but wrinkle. That might seem an advantage because it’s so merciless every problem cries out for attention. But some added weight from real bottom-weight fabric would definitely be more realistic, IMO.
But I should shut up and wait to read about what you learn from Sarah!
I think it’s McCunn’s book you’re referring to. It starts out with skirts, and that was where I learned that a skirt and a pant are really the same basic pattern. The pant merely has a crotch seam and legs.
As for the muslin fabric – yes, it is merciless in terms of showing every flaw. I’m very curious to see what a real pair looks like.
I’ve sent the requested info to Sarah – this blog post came out of some of the homework – and we’ll see what advice I get. I’ll write down some notes to myself as to what I would do next, to see how it compares to her advice.
Could you copy the crotch curve from a pair of better trousers or well-fitting pants, and use that template as a guide or shape sherpa?
I could (still) do that, but I chose this route because I wanted to learn by doing. One thing I did learn from this project is that none of the pants I have really fit me very well; I would have to hunt down a pair of pants (from a thrift store) that does.
I suggested months ago that you get someone to help you and that you post on Cutter and Tailor. They’ve always been decent to me.
Stoting Stitch,
You are certainly welcome to say, “I told you so.”
Hello Michael,
I second the post for the person who say to copy from a well fit pants. This have worked for me so far. However, finding a pair of pants that fit well for any man is a problem. The “tush” aka butt. Most men, have a somewhat flat tush (dh) No offense to anyone. This in turn, creates another issue with the waist. I like to think of waist to butt ratio. Or balance. Not sure if this is making sense.
I favor your idea of going to thrift stores and try on pants, walk about, sit, bend and do the most movements you will do normally. Take them out for a spin.
Yes, I know you would like to learn from the experience of doing and not copy from someone’s else.
It has worked for me. So, I will stick to that until a live sewing instructor will appear in my area.
Hope this help
I really admire your commitment to getting a perfect pattern….. I am female – tall and a tad “fluffy” and it has always been a struggle for me. I cannot purchase pants (or rarely) as they are inevitably too short in the straddle. I found I got the best fit when using a Burda pattern – the European fit has a long back crotch and short front. I actually have a pair of pants which I bought and which fit me perfectly – I am so tempted to take them apart to use as a pattern but think I will first try drafting from them in their RTW condition. I do notice that there is a 6″ difference between the front and back crotch – 17″ back and 11″ front. Good luck – I look forward to your continuing progress.
Bryden,
Thanks for the encouragement.
I have been told by several people that Burda has the best men’s patterns. It sounds like a long back/short front crotch seam would work well for me, given the experience I’ve had with the Vogue pants.
David Coffin has a video tutorial on copying your favorite pants, keeping them intact: https://www.youtube.com/watch?v=8z5JADuZMTo
I have watched David Coffin’s video on Youtube – I also have his book on pants and the one on shirts…. About 10 years ago, when I was slimmer (sigh….) I bought a pair of pants which cost me $360 (ouch!) – my late husband helped me draft a pattern from these and it was very successful – unfortunately my dimensions are somewhat different these days. We turned them inside out and drew a chalk line where the crease was (grain line) and then drew perpendicular lines at various intervals along this – measuring out from the grain line to the seams on either side to establish the dimensions for the pattern….. I intend to follow a similar method on the current pair. Bryden
You have a lot of patience! Fitting is tough. Maybe if you have a pair of pants that fill well in one part you could use that to assess which way your adjustments should go. You may want to check out Sandra Betzina’s book on fitting. Her book is focused on fitting for women but she does cover pants and some tips there could be useful.
Sorry I can’t offer advice, it is hard as one really has to be present but I think you are doing great. From the photos, the pants look really good. As others have said, it is all a balance of compromises (unless you want to introduce more seams into the pants). Plus the fabric of the pants makes a different difference each time you make the pants. Super job!
OK, I said I can’t offer advice… but being a jewish mom I just can’t help myself…
One suggestion would be to take Jennifer Stern’s craftsy jeans fit class. I just realized that one issue that I am having that I am treating crotch curve shape and front/back rise as separate fitting issues but maybe one has to get the curve shape correct before doing anything else and this is often left for last. Anyway, good luck, you are doing an amazing job and you will be the coolest guy on the block when you sort out your pants fit!
Just a couple of thoughts that crept up and some observations after reading this blog.
Admiration
I second others who expressed admiration for your tenacity. Fitting pants can be extremely difficult, not in the last place because there are only a few seams to play with and there usually is no seam to manipulate where you would want one. So, indirect adjustments are common, which are prone to introduce other unwanted effects, a most frustrating affair.
Toile
A toile or sample to check a pattern should, special circumstances excluded, never be tight anywhere. Its purpose is to test the pattern, so the fabric must be able to fall and hang as it wants to and not be restricted by tightness. In addition, the material of a toile is often substantially thinner than the fabric the garment is to be made from. Thirdly, garment construction involves adding interfacing, facings, pockets, etc., all of which require additional space.
Zipper
I wouldn’t bother with a zipper, but just sew or baste the crotch seam approximately to where the zipper is supposed to end (or is it begin?) and close the centre front with a couple of pins at right angles to the seam allowance folded under. If the seam cannot be closed this way, something is wrong. This makes it much easier to open up this part, insert or take away as needed, without the prospect of much extra work prohibiting the action.
Scooping
Frankly, I’m a bit surprised by the recipe of (I’m exaggerating now): If there are fitting problems, scoop out the back crotch curve; if it doesn’t help, scoop even more. This alteration has an effect on several parameters that you would address separately in tailoring. Firstly, it decreases the seat angle. Secondly, it increases the basin diameter (the basin is the “bowl” of the trousers, which you can imagine if you hold open the trousers and look down inside; it is the place where your lower abdomen and pelvis will sit). Thirdly, as you have noticed yourself, it takes width away from the seat circumference. That same circumference that you have measured before so carefully and that forms the basis for most of the trouser pattern construction. In the fourth place, it may increase the basin dept and/or thoroughly distort its shape.
Tension
A couple of issues regarding the photographs took my notice. In the first series (IMG_2012.jpg, etc.) the seat line seems to run below the most prominent point of the buttock; it looks better in the second series (IMG_2042.jpg, etc.). The seat line should run over the apices of the buttocks and lie in a flat plane parallel to the floor. It isn’t, it is pulled upwards at the sides, towards just below the waistband, predominantly it seems the upper lateral part of the back. The pants cannot fall down to their natural position because of this. I would introduce more length and width there. The left hip seems slightly more developed than the right; this may or may not require adjustment. Perhaps the waistband is too constrictive, the tissues then simply escape from under it. It may be your choice to have that waistband there; in general I would also consider other options for the person with a prominent waist.
Skirt
I fully endorse the advice given in one of David Coffin’s posts about making a skirt first, silly as that may seem. It’s simple, all you need is a rectangular piece of fabric, pins and something to indicate where you want the waistline to be located: a length of elastic, cord or tape. You don’t even need a pattern (that only gives you a couple of darts and side seam curves anyway). You can easily determine where to take out what amount of waist indentation by folding and pinning. The fitting must be painstakingly done and scrupulously inspected though: a seat line should be drawn and that should be absolutely parallel to the floor everywhere. A line drawn at right angles to the seat line downwards at the apex of the buttock should be absolutely vertical, as should the side seams. The waist can be where you want it; at the end of the fitting session marks are made on the fabric where it sits. There are some caveats: It is quite possible that for a prominent waist you will need to add material to the front, and the side seam might need adjustment in a case of prominent thighs for it to fall correctly downwards.
The big advantage of this method is that it delivers a complete fit from the seat plane upwards in isolation, without any distraction from creases under the seat, or strange fitting legs, or whatever. It allows one to concentrate on this part exclusively. The pattern is tackled section by section: from waist to seat, from seat to crotch, from crotch to knee and from knee to ankle. As a next step one could make a pair of culottes, I suppose. To say that it is as easy as just drawing a crotch curve somewhere and a leg, and you have a pair of trousers, is however a misleading simplification.
Ironwork
Shaping has been mentioned as the way to introduce curvature in places where there are no seams. While shaping is easiest in wool or wool blends with high wool content, it isn’t impossible in, for instance, cotton. The jeans that have been mentioned, that assume the body shape of the wearer over time, are a case in point. It depends on the fabric and the weave how much effort is needed for shaping; in some fabrics it is extremely difficult or impossible. The industry also shapes, they have special machines to do that; the tailor uses moisture, heat and muscle power.
In very fitted garments, such as some underwear, more seams are introduced to enable the garment to follow the body contours much more closely than is possible in a conventional pair of pants. They are not just there for the sake of it, as every extra seam increases costs, but they serve a purpose.
Also remember that in non-stretchable fabric the back of pants below the seat and at the back of upper thigh can never fit extremely closely. There is always some surplus needed for the wearer to move the leg forward without binding; it is known as movement ease. The narrower the leg and the less room it offers in front of the knee, the more movement ease at the back is necessary.
Walter,
Thank you for your very detailed and helpful comments. If I had to guess, I’d say you are a professional tailor. Thank you for taking the time to comment on the blog.
Just some comments on the scooping. There is a reason behind it; the scooping creates more front-back space for what you call the “basin”. I can see the effect of increasing the scoop by watching the vertical lines become more parallel (as you mention in your comments on skirt fitting). It does have all the side effects you point out; in terms of reducing circumference, width is added at the side seams to maintain circumference. (I haven’t done a very good job at keeping the circumference in check, but intend to revisit closer to the end of the fitting process). The real concern I have about the scooping is that it does decrease the seat angle; I don’t know what the negative effects of that are but I think it may have to do with vertical ease for sitting/bending.
The waist band is indeed where I’m choosing to put it. It’s true I have a “prominent waist” but I’m not sure I am open to other waistband placements.
Thank you for the comments on toile (I hadn’t considered the extra bulk necessary for a finished garment), and especially on ironwork. David Coffin mentions it in passing in “Making Trousers”, but there is a fuller discussion in the 2015 edition of “Classic Tailoring Techniques for Menswear” by Roberto Cabrera (pg. 205). The instructions there describe ironwork to make the side seams and inseams gently mirror the “S” curve of a man’s natural posture (forward at the thigh, backwards at the calf). Perhaps that’s what you have in mind.