This will be the final post in the series on using Wild Ginger’s PatternMaster software to edit my pants pattern. I’m currently making a wearable muslin based on the pattern, but I’ll save that for my next article. (You can see sneak peeks of my progress on my Instagram feed).
Altering the Side Seams
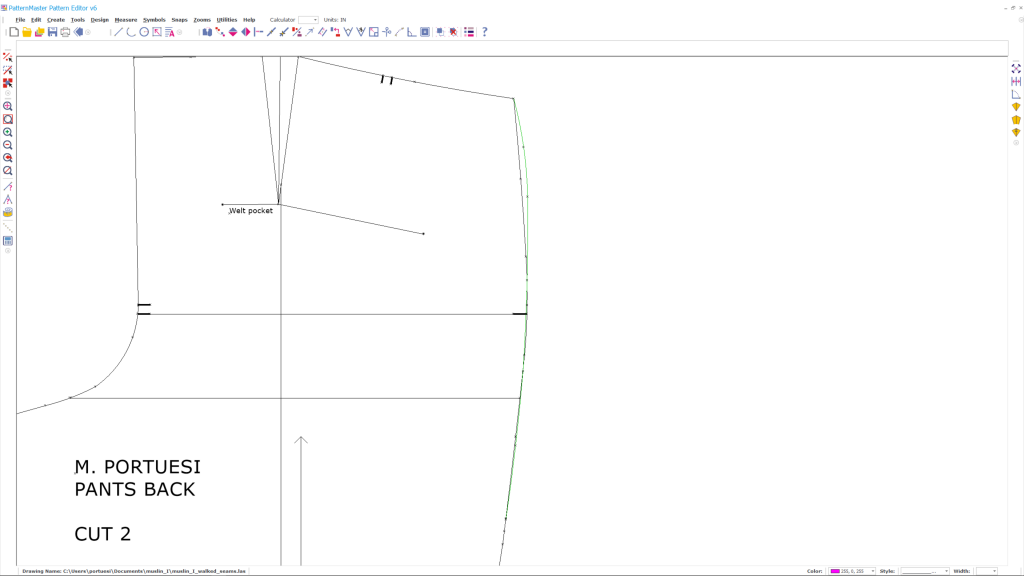
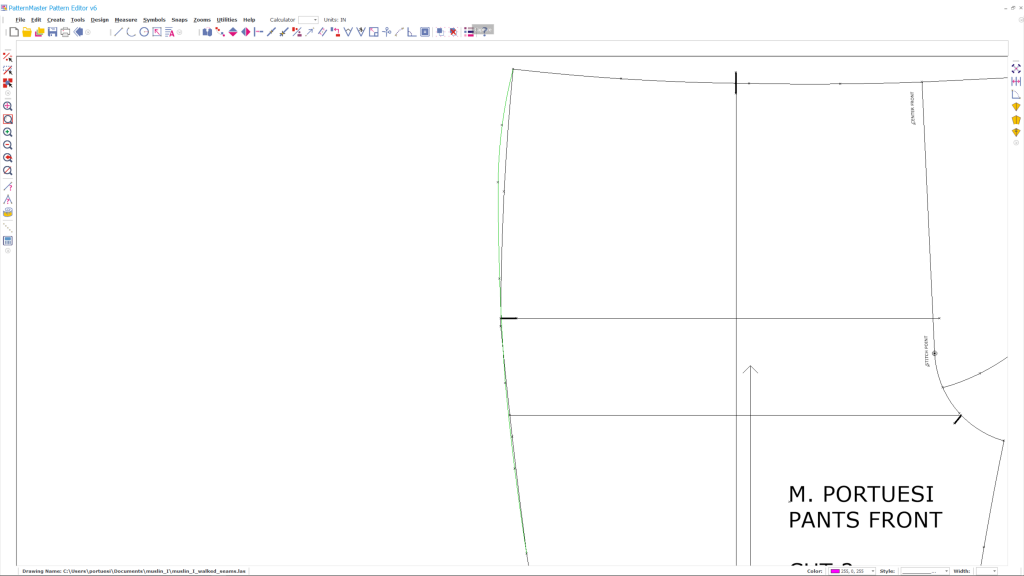
As I noted last time, the pants are still too snug at the widest part of the hip. It is easy to draw a new curve to widen the side seams in Pattern Editor. This was a bit of guesswork, not having the hip curve from a physical ruler to trace against. I just tried to draft a nice curve that would add to the seam. I also took the opportunity to smooth out a kink in the old side seam, right where you see the notch in the screen shots below.
The green curves show the new side seam line.
I transferred the same curve from the front to the back piece so the seams would align nicely.
Drafting the Front Slash Pockets
I drafted the front pocket facing by tracing a pocket pattern from David Page Coffin’s Craftsy class, Pant Construction Techniques. (He also includes the patterns on the DVD with his book, Making Trousers).
Ironically, even though DPC’s pattern is already in a digital form (PDF), I still had to trace it due to file format incompatibilities. Wild Ginger doesn’t support import of PDF or Adobe Illustrator files, just image formats such as JPG and PNG. What I did was open DPC’s pattern in Adobe Reader, take a screenshot, import the screenshot into Wild Ginger’s Pattern Editor, then trace over the screenshot with Pattern Editor’s drawing tools as I’ve discussed in previous articles.
In this screenshot, the pocket opening on the front pant piece is blue, the facing is purple, and the curve for the pocket bag is in green. These are the patterns as traced from DPC’s templates; the next task is to adapt them to the side seams and waist seams of my pattern pieces.
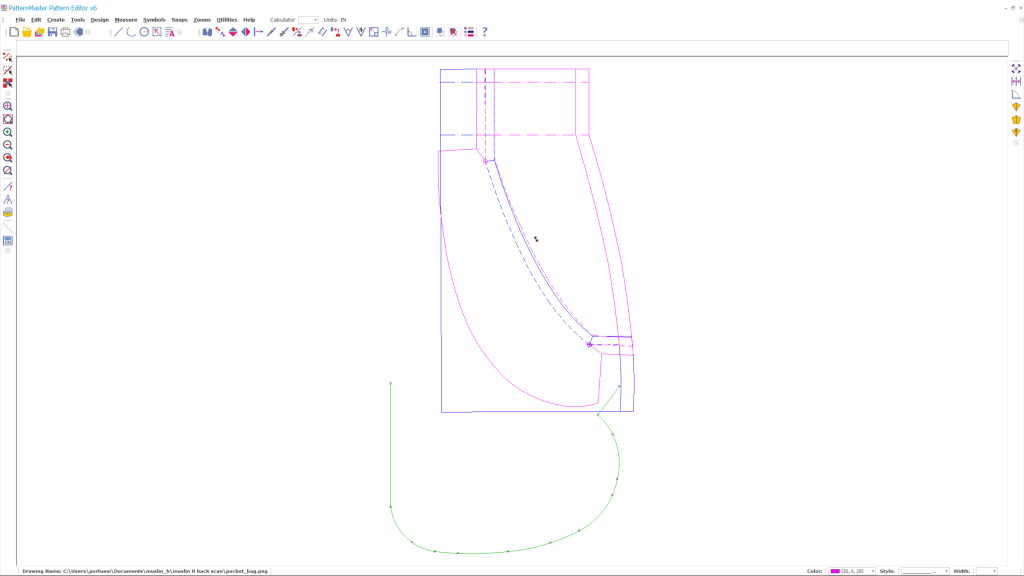
The blue piece (pocket opening) is aligned to the front pattern piece.
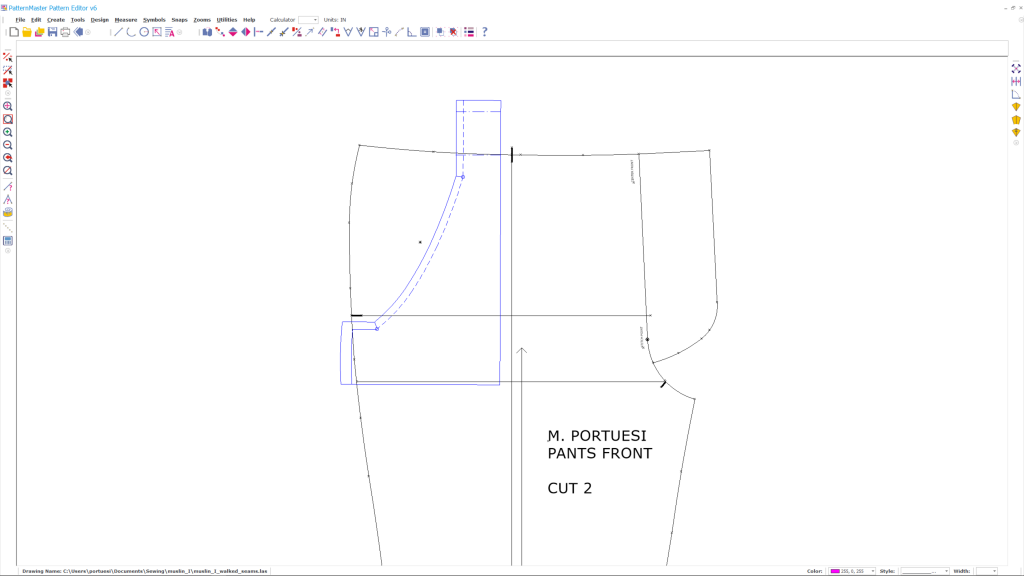
The extra lines are removed, and the pocket opening becomes the new seamline on the front piece.
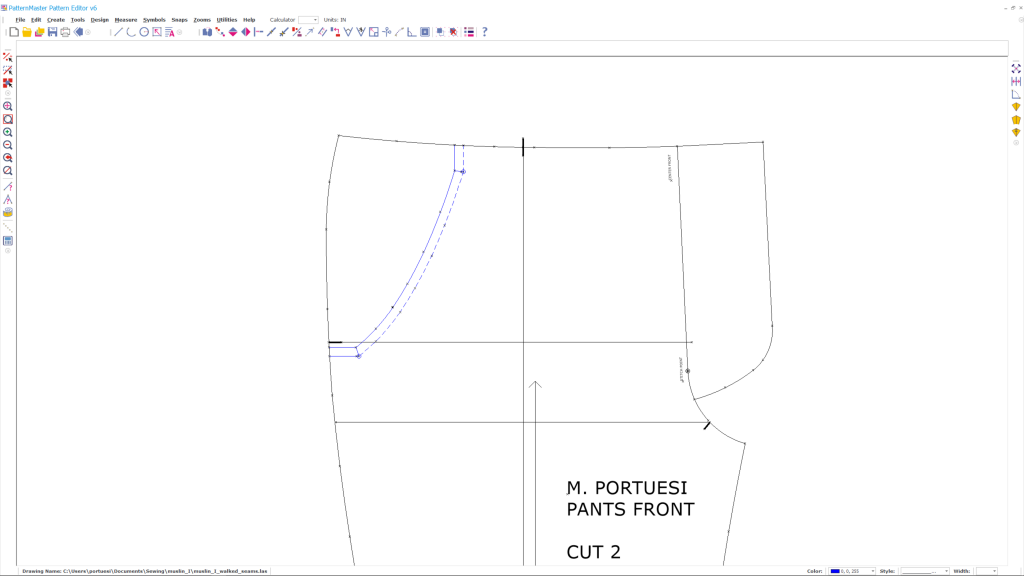
The facing (in purple) is aligned with the front pocket opening.
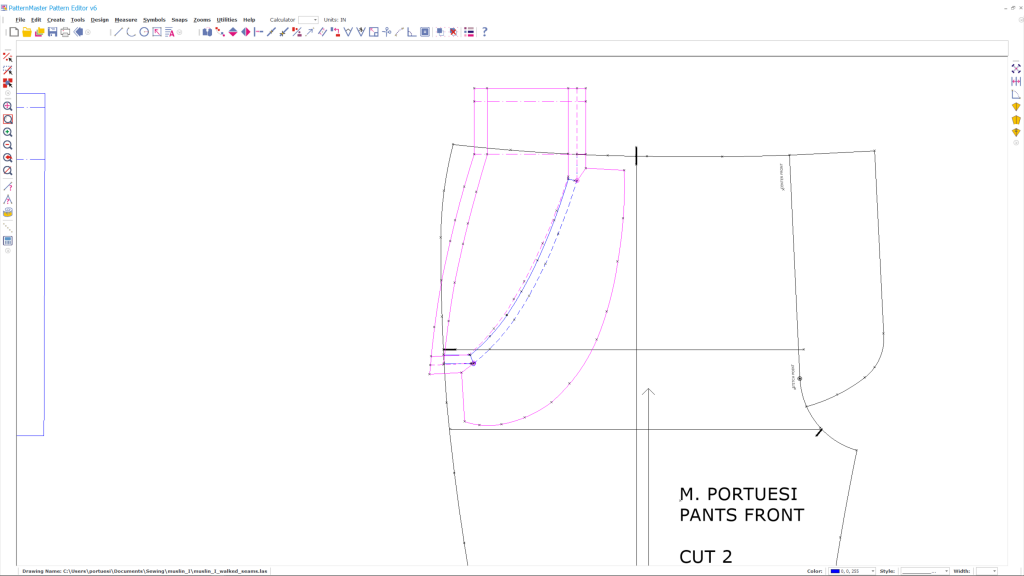
The waistband and side seam curves from the pants front are drafted onto the facing. This completes the facing.
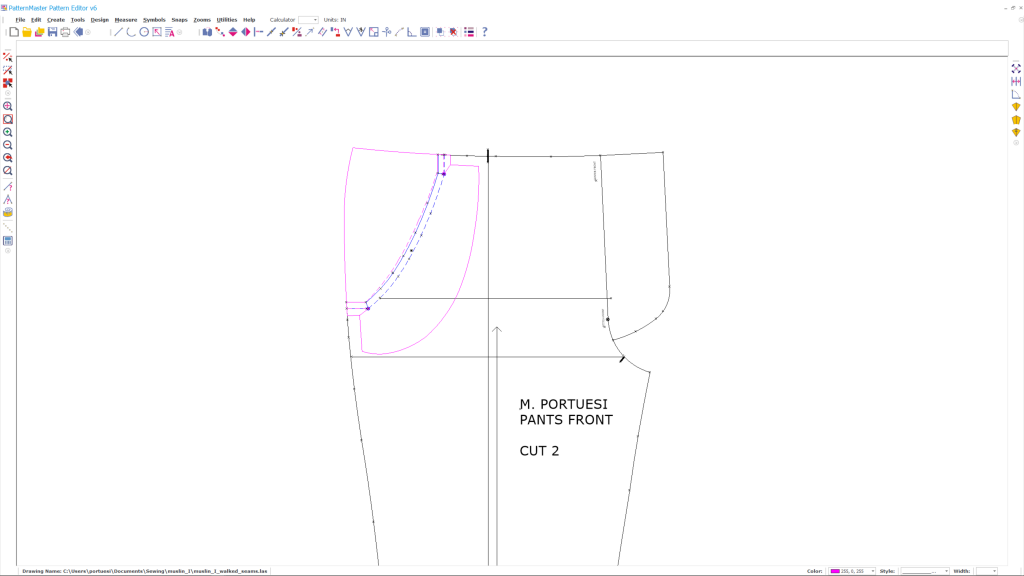
Next, the pocket bag (in green) is dropped into place, and waistband, side seam curves, and fold lines for the pocket bag are established.
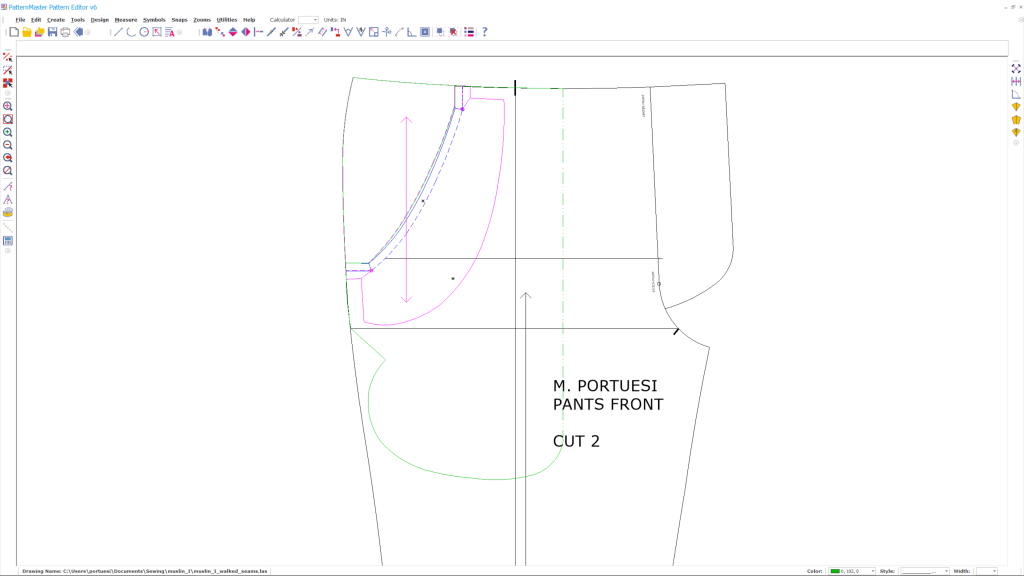
Here are the final pocket pieces. I reflected the pocket bag on itself, and cut the pocket opening where it attaches to the pants front.
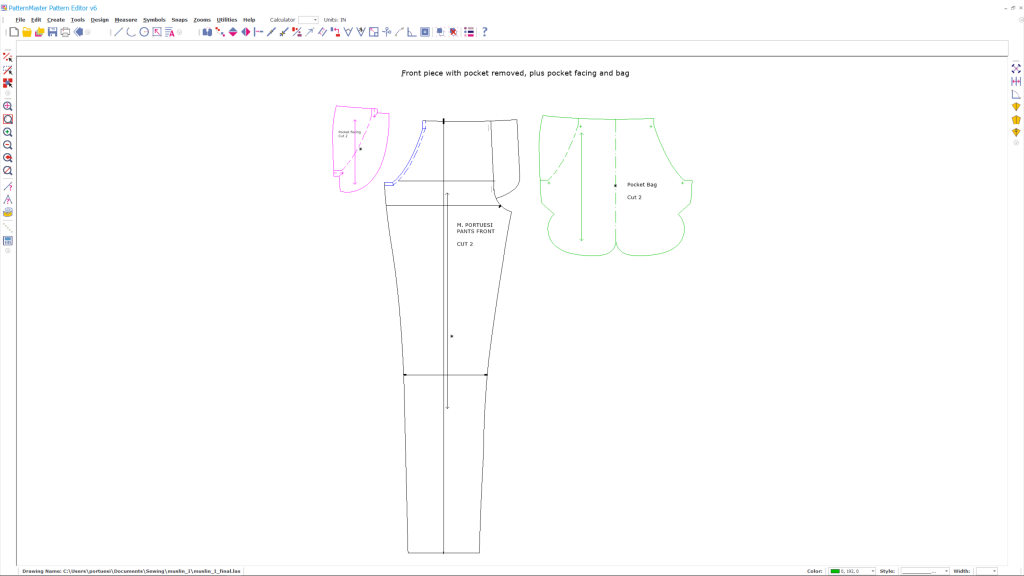
Final draft and printout
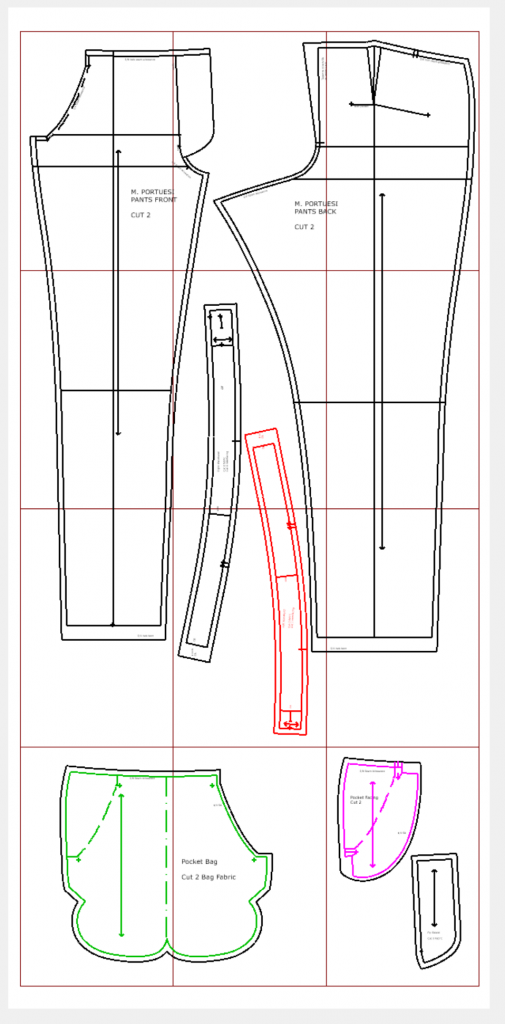
For the final printout, I added seam allowances. This is super-easy to do with Pattern Editor’s Offset and Intersect tools.
I used 3/8″ seam allowances in most areas, except the crotch seam and the front pocket openings. The front pockets use a 1/4″ seam allowance along the opening for the slash pocket. The crotch seam uses 1/4″ along the crotch curve, but opens up to 1 inch of seam allowance as it goes up to the waistband. This is customary in men’s tailored trousers as it allows the pants to be altered at the back seam as the wearer gains or loses weight.
Wild Ginger’s Pattern Editor allows you to lay out the patterns, as they will get tiled across sheets of paper. So I experimented with the layout that would require the least amount of trimming and taping. Where a pattern piece doesn’t cross a paper edge, there’s no trimming or taping needed. I am willing to use more sheets of paper to avoid trimming and taping. That’s a luxury you get with PatternMaster that you don’t get with downloadable PDF patterns.
This print layout uses 12 sheets of 11×17 paper, with a total of 7 vertical and 8 horizontal seams to tape, for a total of 15 seams.
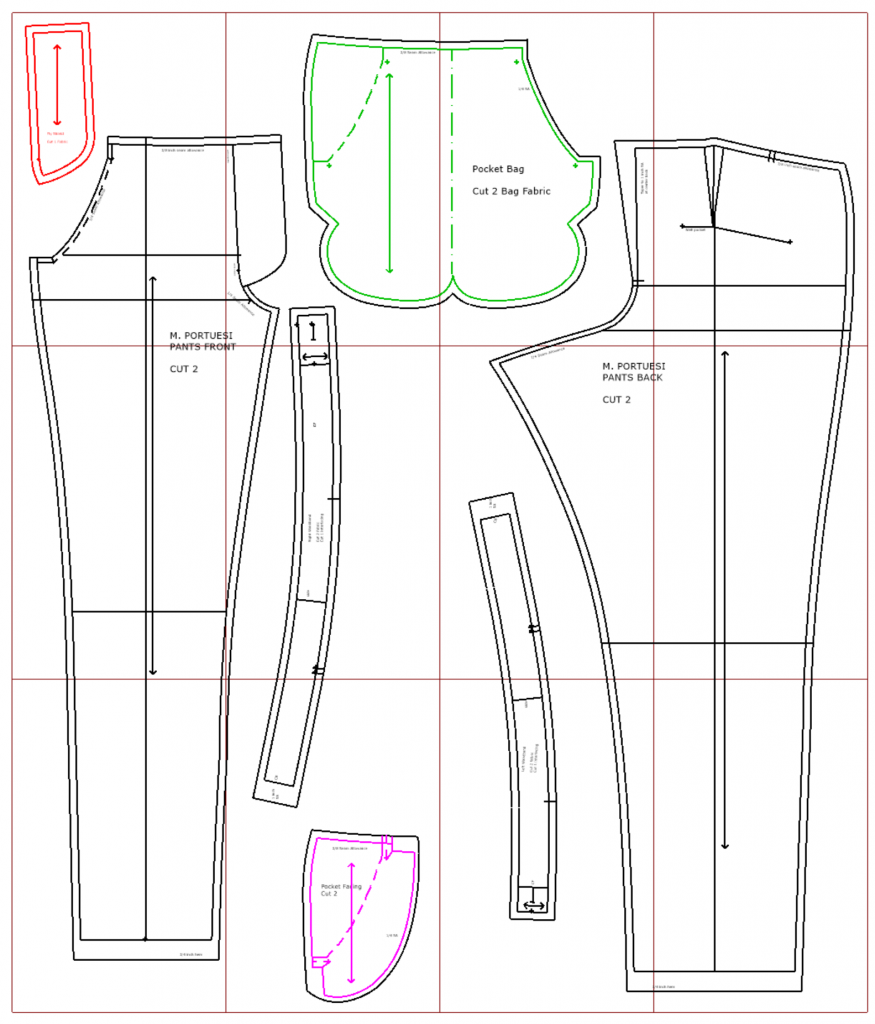
The following print layout also uses 12 sheets of paper, but has only 7 vertical and 6 horizontal seams, for a total of 13 seams to tape. This is the one I went with.
Wearable Muslin “I”
For the wearable muslin, I’m using some gray twill fabric I purchased a while back from Fabric Outlet in San Francisco. I used it to make a previous muslin of Thread Theory’s Jedediah Pants pattern, which didn’t work out. I have enough left to make another full pair of pants.
I’m using two pocketing fabrics. One is some white cotton broadcloth, and the other is a light gray plaid print, both from Stonemountain and Daughter Fabrics in Berkeley, CA.
Next Time
I get to work on the pants muslin.
I, too, had mucho trouble with Wild Ginger software. After a bit, I asked for my money back.
I wouldn’t say I am having mucho trouble with the software. But (a) it has a steep learning curve for the Pattern Editor at least, and (b) it has a lot of glitches you have to work around.
I really ought to write a detailed review of this software to put it in proper light.
The pocket bag looks a little off. You have drafted a strange angle coming off the side seam. It should be a compound curve and not a severe angle. You might compare your bag pattern to another one in your pattern stash. Other than that, your pattern looks good, and good that you have a deep knowledge in working with computer software, most home sewers would have given up a while ago. Also you lamented not having a hip curve ruler to draw in a new hip curve; I remember when I was training on some industry computer pattern making software, they had a tool bar, and one of the tools was a hip curve! Any chance your’s has one?
John,
Are you referring to the little inch-long angle that juts out from the side seam and meets the bottom curve? That’s a David Coffin innovation, which he covers in “Making Trousers”. The angle is intended to create a well in the pocket to keep coins from falling out when you sit down.
I’ll take another look in Wild Ginger, but the basic tool for creating curves is an arc tool that lets you click the endpoints, then adjust the midpoint to create the curve – very similar to most drawing tools. Perhaps I can make a feature request.
I think I agree that a lot of home sewers would have given up with Wild Ginger a long time ago. Catina Ferraine (who did the tutorial hangouts) mastered the software because she has professional patternmaking experience; I persevered on the basis of my computer skills. Without one or the other, you might have a hard time dealing with Pattern Editor. I’m not sure about the style portion of the app that auto-drafts patterns from measurements; that may be much more approachable.
I have been following your progress with interest…. will you use the Wild Ginger programme again?
With front pockets, have you considered having the pocket bag go through to the zip/centre front? this gives a smoother front, and for those of us “blessed” with curves (sigh….) it does hold the tummy flatter….
Yes, I do plan to use Wild Ginger more. I have two shirts that I want to copy and turn into shirt pattern blocks in Wild Ginger.
I didn’t think it would be a good idea to make the pocket bag go all the way to center front, especially given the bulk at the zipper fly. I’ve never seen it that way on RTW pants, though nobody says we have to do it the RTW way.
The pocket bag to zip fly is often used on pleated pants. As you can probably deduce, it would hold in the pleats and keep them from opening up. Voila! Smooth fronts! And yes, there is some bulk at the point of insertion; you would use as sheer a fabric as possible for the bags.
Fascinating, thanks for the info! It’s unlikely I’ll be making pleated pants fronts anytime soon, unless I advance to the point where I do client work. But that’s useful to know.
Pocket bag to centre front/fly – this is often done in ladies trousers…. certainly in the high end RTW…. It actually gives better support to the pocket as well as giving a flatter front…..
Not sure if I should mention this now after your tracing work, but you can export or convert pdf to jpeg. I’m not on my dektop right now, so can’t tell you exactly how. I have DPC’s trouser book and would be happy to convert the files and email them to you if needed.
Cheers, Sarah