Yesterday, I discussed the construction details of the wearable muslin for my gray Bonobos-clone chino pants.
So, how did the wearable muslin turn out? It’s time to take a look.
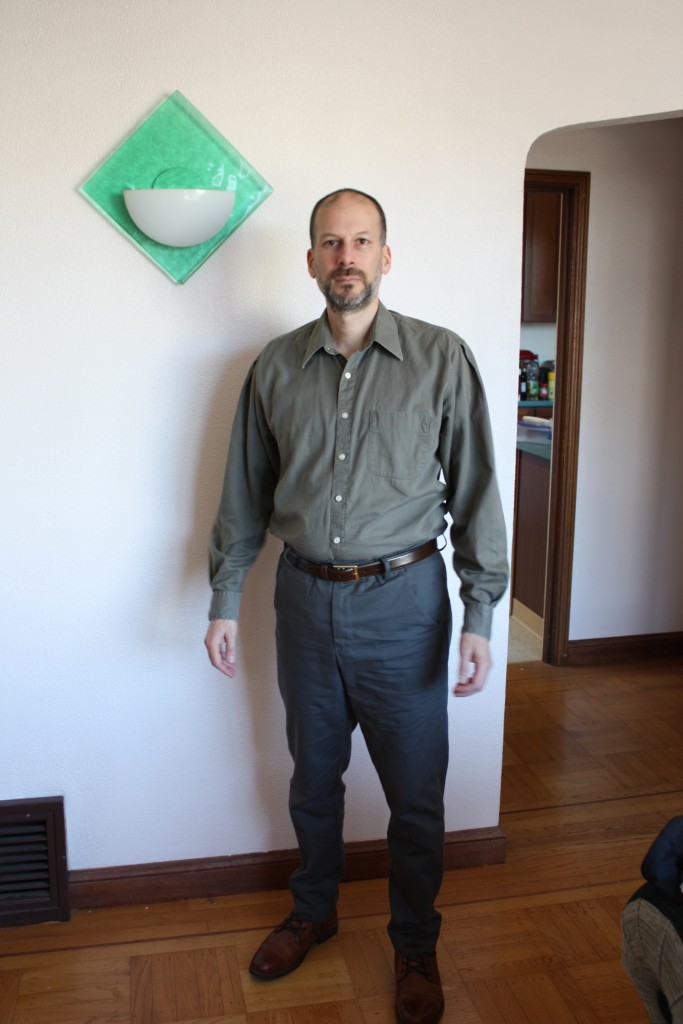
Waist
To my great surprise, the finished pants ended up with too much circumference at the waist, by about 1 1/2 inches or so. You can see it in the above photo right around the belt; the pants are bunched up. I can’t wear them without a belt, otherwise they fall off.
I’ve been slowly putting on weight through the rounds of fitting and construction. If anything, I was concerned the waist would be too snug!
I think the too-large waistband may have been present in the muslins, but I wasn’t aware of it because the muslins were all too snug at the hip. When I finally added the proper ease into the hip area, the too-large waistband became an issue.
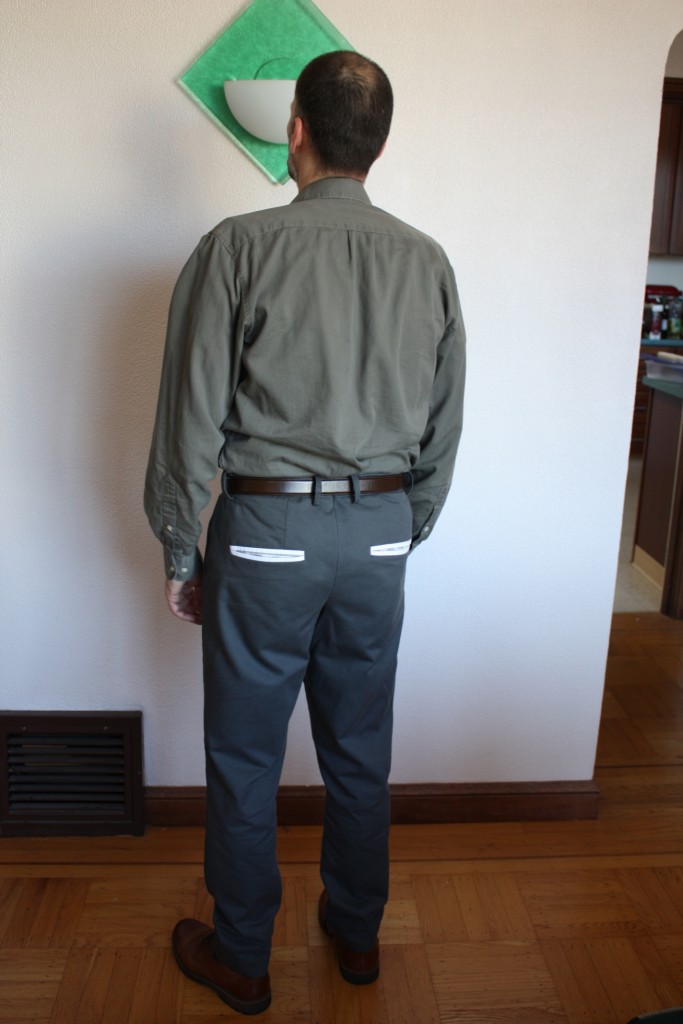
Pants Back
Here’s a view from the back.
First of all, I’m surprised by how poorly the shirt (a Perry Ellis RTW) fits. Remind me to toss it into the incinerator after this blog post. I need to take more photos of myself with the camera; it exposes fit issues in a way nothing else does.
I’m mostly happy with the back, but again the waistband is a bit bunched up from the extra ease there.
Welts
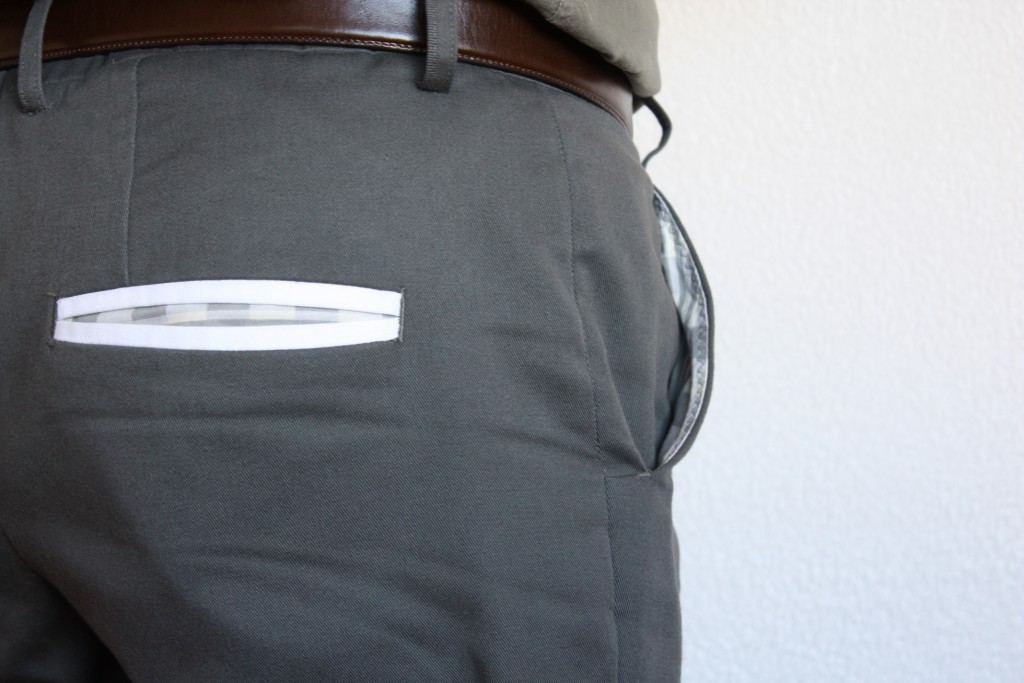
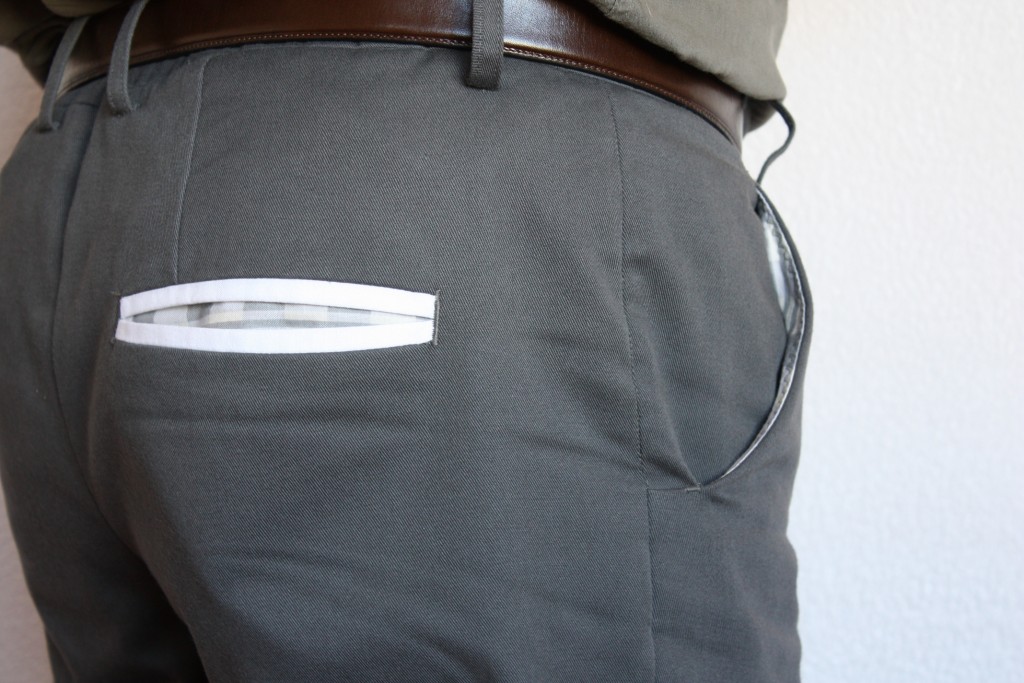
The white welts certainly make a statement; it’s amazing how just one detail can completely define a garment. I’m not sure the welt pockets are a successful experiment. For one, the welts “pop” against the gray a bit too much; they basically scream, “Look at my behind! Just LOOOK at it!!!!”
Secondly, they greatly limit the kinds of shirts I can wear with these pants, since the welts clash with most shirts that aren’t solids. So this isn’t a very versatile item to have in my wardrobe. Still, I can wear these pants with a plain white T-shirt, or perhaps a solid colored polo. Also, I think this is more of a weekend pant; though I wore it to work this past week, it is a bit strong for the office.
I may also consider raising the pocket welt by one-half to one inch. It’s 3 1/2 inches below the waist, which is the maximum suggested by Roberto Cabrera’s tailoring book. I basically didn’t want to have to shorten the dart.
Center Back Seam
Before we move on, I want to show you an outtake for the above photo.
There’s an unusual dip at the center back seam, caused by too much fabric pooling in that area.
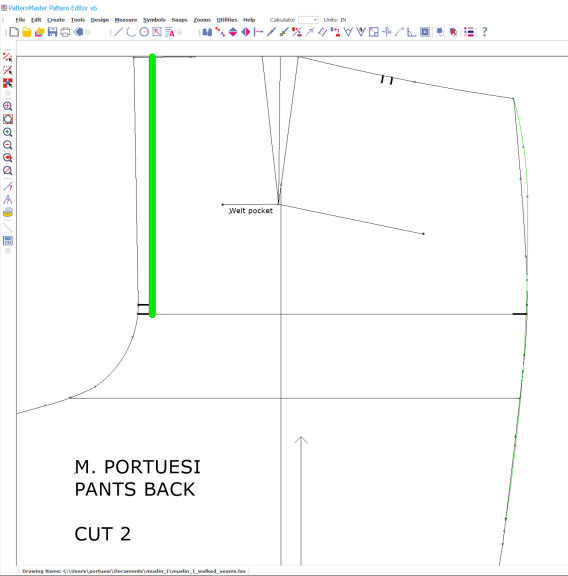
I think there’s a glitch in the center back my pattern. While working on the pattern in Wild Ginger, I noticed that through endless revisions of the crotch curve, the center back seam had gotten so straight that it actually went past the grain line and turned slightly inward to the center back. Compare the center back seam line to the green line I drew in, which lies along grain.
I think I can fix the pant by opening the center back seam, and restitching it along a shallower angle. This will also take out some of the excess waistband ease. The corresponding change will go into the digital version of the pattern in Wild Ginger for the next pair of pants.
Pants Fronts
Here’s a closeup of the pants fronts. Though I pressed the pants immediately before the photo shoot, they still wrinkled by the time the camera snapped the photo. There is still a bit of excess fabric at the bottom of front crotch, but as you can see here it is noticeable only by a fit nerd (like me).
And yes, the belt loops are too long.
Hem and Break
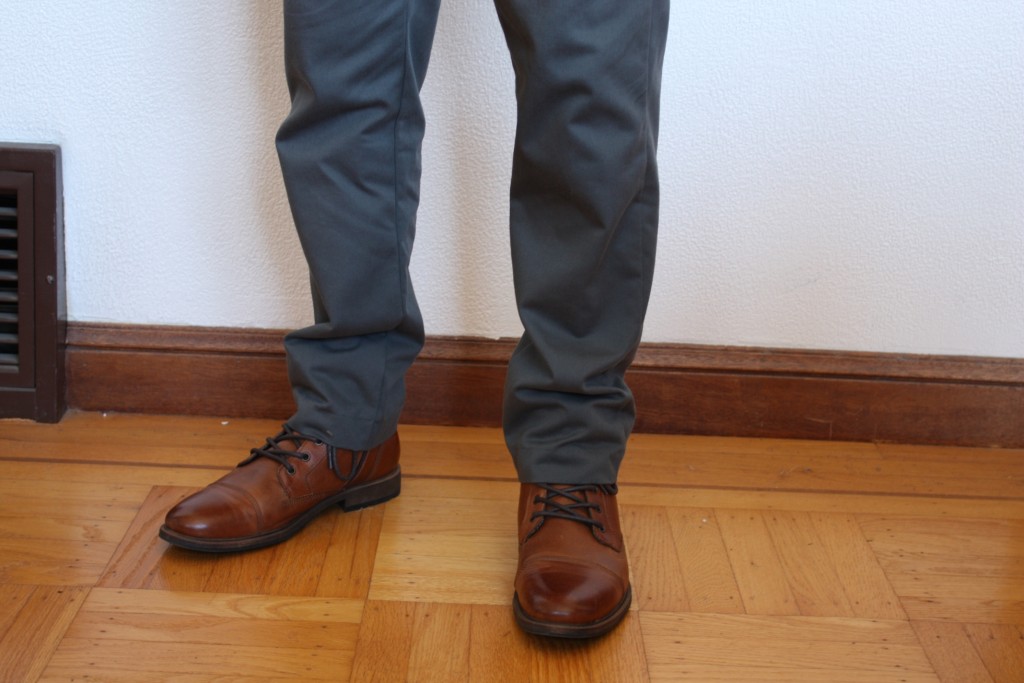
I deliberately chose a hem length to get a good break. The pants taper and are pretty narrow at the hem, as is the current style for men’s pants these days. The narrow opening causes them to catch on the tops of the chelsea boots in the photo, rather than fall nicely.
Comfort
The pants are very comfortable to wear! Other than the waistband being too large, I feel like the pants match the contours of my body. I won’t say it feels like I’m not wearing pants at all, but there’s no cutting, binding or tightness while wearing them.
Where to from here
My next pair of pants will have the following changes:
- Angle out the center back seam a bit, based on what works for the gray pants.
- Take in the side seams right at the waist, tapering to the current amount of ease at the wide hip.
- Look at raising the welt pocket and shortening the back darts a bit to keep the pocket from going through the dart.
- Perhaps look at removing a bit more fabric from the front crotch curve. But maybe not.
This pair of pants is the culmination of a years worth of effort, including acquiring the necessary fitting and pattern-drafting skills to alter the pattern to fit my body. They still need some work, but they are quite wearable.
Finally, I also appreciated the opportunity to work through the pants construction techniques in David Coffin’s book and Craftsy class. I’ve enjoyed putting them to work and appreciating them in a way that a mere printed page or video demonstration doesn’t allow.
I’d like to move onto the next pair, partly to refine them further but also because I need pants to wear! I will return to pants-making, but it’s back burner for now. Time to get some other projects out of my system.
Next Time
Not Pants.

These are looking pretty darn good – looking forward to seeing the next version. I agree that the welts are a nice idea but I don’t think this is the perfect version of the idea (if that makes sense). they might work better with a button and loop but right now the “pop” distracts from the pants. Well done though, your pattern is really coming together.
Thank you! I said that next project will be “not pants” but I keep thinking about how the next pair will turn out.
Oh yes, the camera. No matter how much I try to use mirrors, the camera has a better view. I thought my latest pants were good, until I saw the back via the camera.
You’ve made huge progress. Like you, I’ve learned is that the design and prep is a major part of the fun.
Best wishes
Sue C
Thank you! It’s really true that “the camera doesn’t lie.”
So exciting! Isn’t it nice to have a pair of pants that feel good on? For some reason I have problems with making the waistband too big too, I think it’s somewhat of an art to get the fit right.
You and me both, Meg – I struggled through the challenge of getting the crotch curves fitted, but simple things like the waistband and side seams can be just as challenging.
Looking good, Michael! Next time I bet you could shorten the dart by ½ to even ¾ inch and never notice. Plus, or either, overlap the welt over the dart tip by the same amount with no problems. What I’d do with these trousers to improve the fit is take them in at the back side seams, tapering from around the knee level. A LOT more work than just doing it at the CB but MUCH nicer results, worthy of all the effort you’ve already put into them. Raising the hems a bit would easily improve the break. And pant-fabric flaps, applied like a shirt-pocket flap, i.e., just above the opening, not inserted into it, would neatly “subtle-ize” your too-obvious welts.
David,
I’m not seriously intending to use the center-back to improve the fit of the pants, but there is fabric pooling up there – I noticed it during daily wear so it’s not just a fluke of the photo shoot. I think it makes to take in the CB seam a bit at that point to remove the excess fabric.
Interesting that you suggest raising the hems – I deliberately chose that height but you are right that the knees would look a little cleaner with a higher hemline.
And finally, the pant-fabric flap idea is genius. It would make the welts less obvious without killing their character. Thanks for all the suggestions!
Congratulations on tackling pants. They seem like a fitting Jenga. Your patience and fortitude are inspirational.
I like the concept of contrasting welts, perhaps in a dark red, or something with minimal intensity contrast.
As for “looking”, with or without beacons, there really is no crime in that.
“As for “looking”, with or without beacons, there really is no crime in that.”
LOL!
I have some brown twill fabric, and perhaps some red welts would work really well for such an arrangement. Adding character without intentionally standing out the way the white ones do.
Thanks for the words of encouragement.
Nice pants! These are really your own creation now. I don’t think any of the original pattern is left. You inspired me to keep tweaking the pants pattern I am working with.
Wil,
The only thing left of the original pattern is from the calves to the hems.
I’m thrilled to be an inspiration to you. I get so much inspiration from other male sewists in the blogosphere, so I’m happy to be giving to others as well.
I’m so in awe of everything you’ve worked through. I would have given up long ago. Like everyone else, I vote for shortening that back dart. Then your coworkers will all be commenting about your perky tush! :)
Yeah, the dart does need to be shortened. I pretty much knew that before starting this particular pair, but I had to see it in fashion fabric before being sure.
I wish I didn’t have so many other projects competing for my attention, because I would also love to press forward with another pair!
Congrats. I am sure you are your worse enemy. I admire your tenacity. You inspire me to do better with my pants fitting. I say, nevermind the waistband.
You are progressing nicely. If you were my student i would give you an A( my nursing students rarely get A’s from me)
Funny thing. I am just getting ready to cut a pair of pants with similar color. Never had anything gray before…
Thanks for sharing. Have a great weekend
I think gray is a color you see more often in menswear, so not surprising you may not have had anything like that before.
And I agree with you that I can be my own worst enemy – sewing can be a deadly hobby for perfectionists. I’ll choose to accept your “A” grade and take it with me into my next project.
Thanks for following along.