Dear Blog,
Today I finished my prototype telescope caddy, and got it ready for a night under the stars this coming weekend!
Last time, I discussed how the extra-heavy eyepieces would prove too much for Velcro to hold the caddy onto the side of the telescope.
I altered the design to use a new idea for a suspension mechanism: A “cap” that covers the top of the telescope. The inside-facing side of the cap provides the support needed to suspend the outward-facing side.
Patterns and Cutting
Some things I needed to do:
- Draw a pattern piece for the back side.
- Add seam allowance to the front side piece.
- Redraw the pattern pieces for the bellows pockets, this time to better fit the eyepieces.
- Measure out two additional oilcloth strips to seam the inside to outside-facing piece.
After all the pattern alterations, I measured and cut all the pieces from the oilcloth. (Click or tap photos for larger versions).

Pocket Construction
In my patterns, had allowed a half-inch of hem at the top of each pocket, so I could fold it down and topstitch to finish the top pocket edge.
But I had purchased some 3M 8910 sew-on reflective tape online this week, to use on projects like this one. I used the reflective tape to bind and finish the top pocket edges, so the pockets will be easy to locate in the dark with even a dim flashlight.
Note use of the teflon foot with the oilcloth.
FInished pockets, ready to attach to body of caddy.
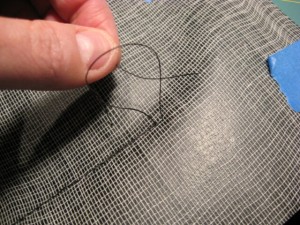
I have no type of removable marker that will leave an impression on oilcloth. A china marker will do the trick, but my trusty ArtBin is filled with graphite and charcoal pencils, and little else. Crayons didn’t leave a mark either. So I marked the locations of the pockets with blue painter’s tape.
This worked well, except I left the tape on overnight and adhesive residue from the tape stuck to the oilcloth. Some Goo Gone took it off, but it was still a bit of an annoyance.
The pockets went on without trouble, and the eyepieces all fit nicely. The only thing that I didn’t work out was a way to nicely reinforce the pocket edges. I’m using nylon upholstery thread, which is like sewing with rope.
Edgestitching the pockets into place.
I pushed one end of the thread tails through to the wrong side with a needle, then tied off the line of stitching.
Tying off thread tails on wrong side of fabric.
The pockets all fit the eyepieces the way they were supposed to.
Assembling the Hanging Cap
Next, I had to attach inside-facing piece to outside. This involves joining them with a top seam made with 1 1/4″ strips of oilcloth. I used 1/4″ seam allowances throughout the project, as well as an extra-long stitch length due to the heaviness of the upholstery thread.
The biggest challenge of the top seam is getting the joining strip to ease around curves. Oilcloth does not ease the way normal fabrics do; what I did was to set the machine to its lowest speed, sew one stitch at a time, raise the foot, hand-ease the fabric, then sew the next stitch. Fortunately none of the curves were very long. It came out a little puckery, but who cares.
Tryout and Adjustments
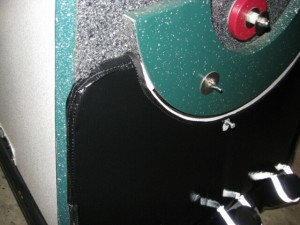
Time for the moment of truth. I put the caddy on the telescope and tried it out. One problem made itself very apparent; the inside of the caddy covered a teflon bearing, replacing the slick teflon surface with sticky oilcloth instead. This greatly impaired the movements of the telescope.
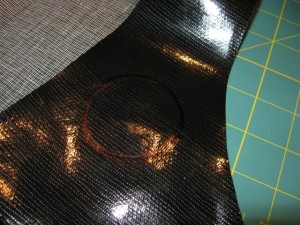
I traced and cut a hole in the oilcloth to expose the teflon bearing disk, and made a few more nips and tucks to better fit the scope. I learned that you can write on oilcloth using a Sharpie marker.
On tryout number 3, I discovered a new problem; the weight of the eyepieces is enough to pull the oilcloth out of shape and make the entire caddy sag. Since the caddy relies on some fairly precise fit in order to avoid getting caught in the telescope bearings, this is a bit of an issue.
Finishing Touches
I decided to try to deal with the stretching/distoration problem by binding all the edges of the scope with some black binding tape I had in my stash. The stitches to attach the binding will act as “stay stitching” to help keep the oilcloth from stretching, especially along the top where most of the weight is borne by the caddy. I also topstitched the seam allowances down inside the top of the cap.
Seam allowancess are top-stitched securely into the narrow band along top.
Attaching binding tape along all outside edges.
Here’s the finished project, for now. You can see the reflective tape glowing in the photo.
The binding could have turned out nicer – I encountered a few skipped stitches applying the binding over seams. But it is functional and ready for testing. The eyepieces cause the caddy to droop noticeably, but it is working. The sides of the caddy interfere minimally with the movements of the telescope.