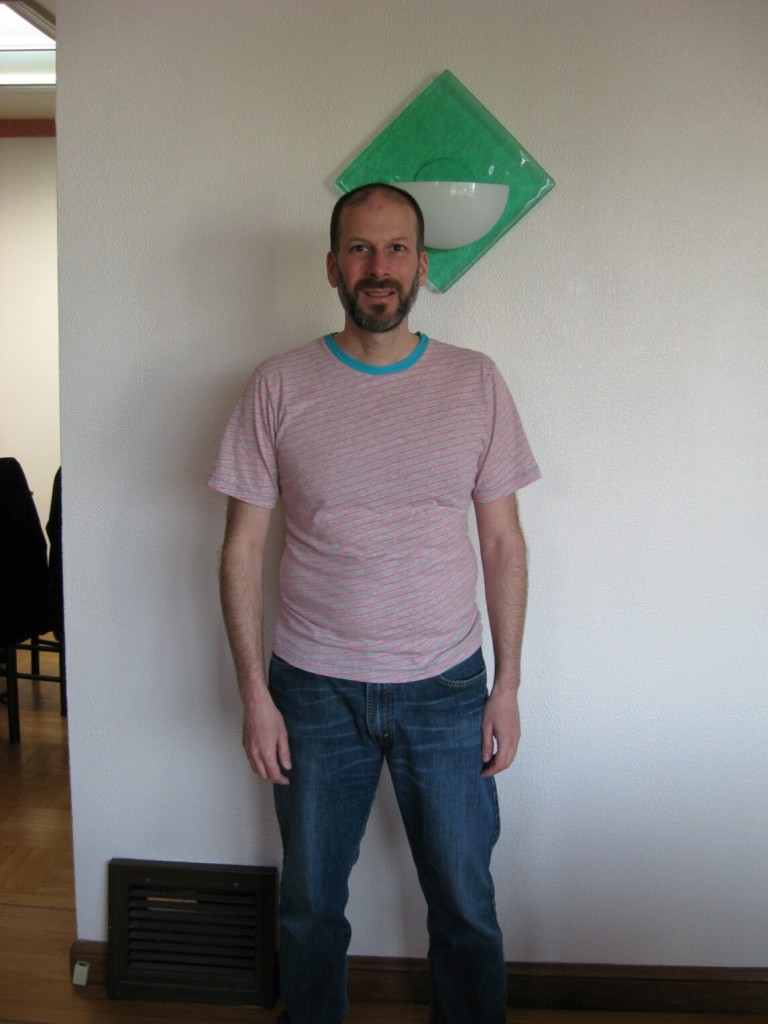
Here it is – the finished T-shirt!

I accomplished the goal of adding just enough extra width around the chest to make it fit without being too snug or baggy. It’s still too tight in the waist. It would be easier to widen the pattern some more, but it would probably be better to work on narrowing myself.
I like the slanted stripes and think they are a nice twist on a normal striped T-shirt. I’ve learned that when it comes to sewing, many times you can just ignore a mistake and call it “fashion”.
Some things I could do differently on the next shirt:
- Find a different fabric for the collar. I used simple jersey fabric. You’re supposed to stretch the collar out a bit as you attach it to the neckline, and I did that, but the collar still ended up wilted and crumpled. Problem is, finding good rib knit in a variety of colors to match is a difficult task.
- I could try a different collar treatment, such as binding the neckline rather than attaching a collar. That’s what BrianSews! does in his video T-shirt tutorial on YouTube (Part 1 and Part 2). I could also try a V-neck collar, which looks nice but might be a bit tricker to assemble.
- I should find better quality knit to work with. The gray/pink fabric is very thin and off grain. Sadly, that quality is what’s on most of the bolts in the “T-shirt knits” section at the local fabric shop.
Right now, my knits/serger projects are on hold pending final outcome of the coverstitch return (more on this soon). So I will be focusing on the springtime button-down shirt next.
This website is a good source for knit fabric, but don’t you live in SF? -there must be some awesome fabric shops around!
http://www.marcytilton.com/
Yes, I live in San Francisco!! There’s several nice stores here. Fabric Outlet, where this grey-pink striped fabric came from, has lots and lots of bolts of T-shirt knits. I think they’re leftovers from garment manufacturing runs. Some of them are good quality, but some of them are very tissue-thin and difficult to work with.
But I admit it – I’m a cheapskate and I’m looking for a good deal. There are places where you can get quality knit – Britex is an obvious example. I have some knits I purchased at Britex that are looking for an appropriate project, but they weren’t cheap, even when I purchased them on their 30% off sale.
Hi Michael, I found you on PatternReview.com. You replied to a comment I made on a thread about encouraging a guy to sew.
Nice job on the T!
FabricOutlet has some good stuff. My husband Martin and I are both into sewing and also live in the San Francisco Bay Area, in San Mateo. We agree with you about Britex prices. We prefer Stone Mountain and Daughter in Berkeley and PIedmont Fabrics in Oakland, but we also buy a lot of fabric online and always shop for fabrics when we take trips.
Thank you for the compliment!
I haven’t been to Berkeley or Oakland for fabric shopping, mostly because I would be taking BART and it would be a bit of a hassle. But I have seen Stone Mountain and Daughter mentioned several times elsewhere, so perhaps I should take a look. I’m trying to avoid fabric shopping right now because my stash is full!
I also like Fabrix on Clement Street. It’s a great place to get knit fabrics super-cheap. I have a huge cut of navy blue cotton pique knit I bought there for next to nothing, waiting for me to start the polo+rugby shirt project.
Are those knits poly blends though? I try to avoid polyester although a little bit of lycra is ok with me, for the stretch. In general I’m trying to make more woven garments.
To my knowledge, nearly all the T-shirt jersey knits I’ve picked up from Fabric Outlet are 100% cotton. I’ve done a few prior projects with cotton/lycra blendes. The extra body and recovery makes for a nice T-shirt. And I’ve also done a Hawaiian-style T-shirt with nylon lycra, for fun.
I also try to stay away from polyester. My first button-front shirt was done with a cotton-poly bedsheet (the white/blue pattern you see in the photos), which didn’t turn out too bad! And I’ve bought some cotton-poly shirting from JoAnns by mistake, which will probably get used up testing out another pattern.
Tee shirt collars:
1. The best fabric for collars is a 1×1 rib knit, not the same jersey or interlock that you use for the shell. Problem is finding a perfect color match. Check your own tees, you’ll see that the collate are ribbed, and the body has a less pronounced rib pattern on the right side.
2. Rule of thumb for collar length: 90% of neckline. So if your measured seam line of the front and back neck is 20″, cut the collar at 18″ plus seam allowance. This should give you enough draw in with no puckering or gathers when finished.
3. Collar seam is often placed at the shoulder seam to eliminate a seam bulge at center back.
4. A nice finish is to coverstitch or twin needle the collar seam, either splitting the stitch at the seam line or using a very narrow double line just below the seam line.
Good rib knit, especially in matching colors, is often hard to find at the places I shop so I’ve used the same jersey on the collars. It definitely isn’t as nice; the jersey collars don’t keep their shape.
Thank you for taking the time to share these tips, especially the items about collar length and finishing. Please keep them coming!