When I left you all at the end of Part 2, I had just printed out a pattern I digitally traced in Wild Ginger’s Pattern Editor. I left you with the impression I was ready to cut out fabric and start sewing.
That was when I encountered The Problem.
The Problem
I figured it would be a good idea to take the prinout and compare the pieces to the original tissue I scanned into the computer. This would be a sanity test to see just how faithful the digital version is, compared to the original. I overlaid the tissue atop the printout, and lined them up.
And – they didn’t match.
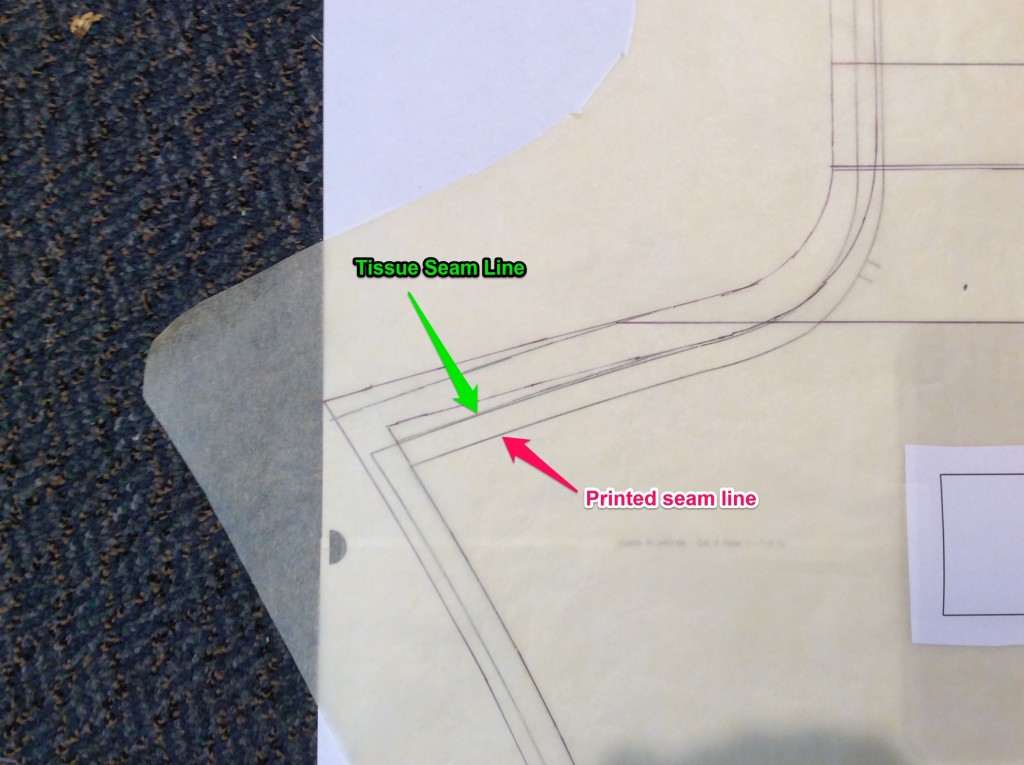
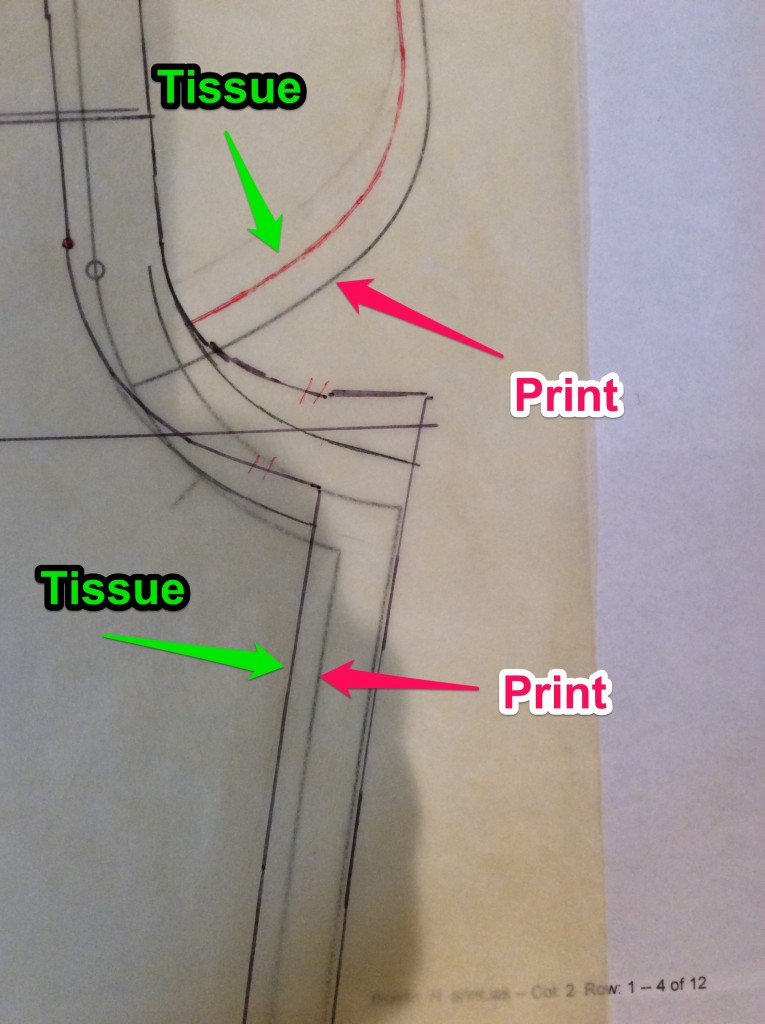
Let’s take the back pattern piece, and align the tissue and the printout at the bottom hem and the grainline. Right away you can see a discrepancy – the printed pattern seamlines are about 1/8 of an inch narrower than the tissue.
Moving up both patterns to the crotch point, the seamlines on printout are about 3/8 of an inch below the seamlines on the tissue.
And finally at the waistband the discrepancy is also about 3/8 of an inch.
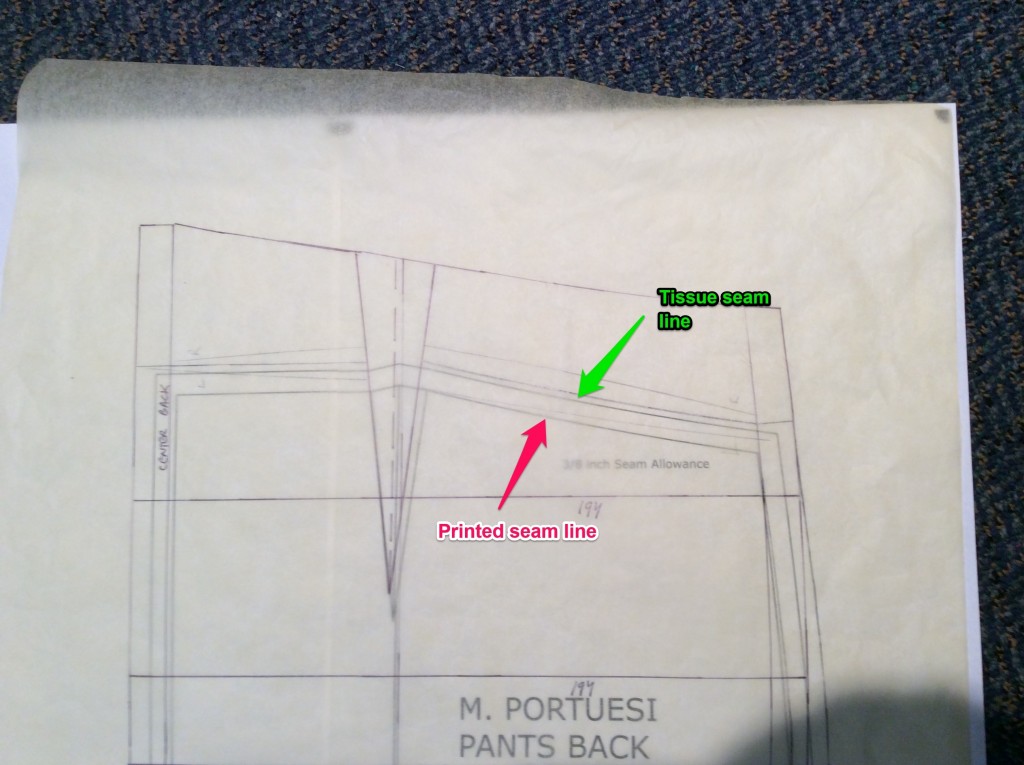
I encountered the same problem with the front piece – the seam lines on the printout were way off compared to the tissue.
I wasn’t expecting a perfect concordance, but this discrepancy was severe enough to alter the fit. Clearly it wasn’t acceptable.
I was sad to see this terrible result, especially after the work I put into scanning and tracing the pattern. But I was also happy I took the time to double-check before sewing an actual garment. I would have been massively confused by the incorrect fit.
What Happened?
I posted my question to the Wild Ginger thread on PatternReview and got some helpful responses.
Maybe it was the Printer
One simple answer is perhaps the printer is performing some sort of reduction on the printout to fit the drawing to the page.
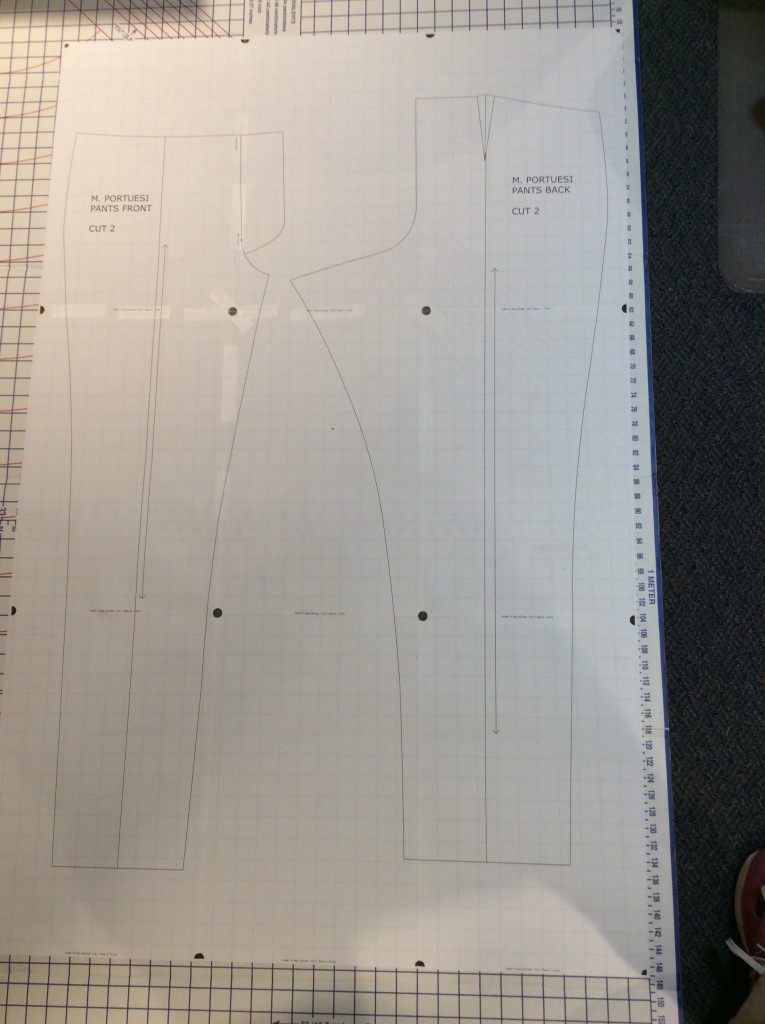
I tested this theory by drawing a 20-by-20 inch square inside Pattern Editor. I made it large to force it to print across several pages, as the pattern printed. I taped together the four pages and measured.
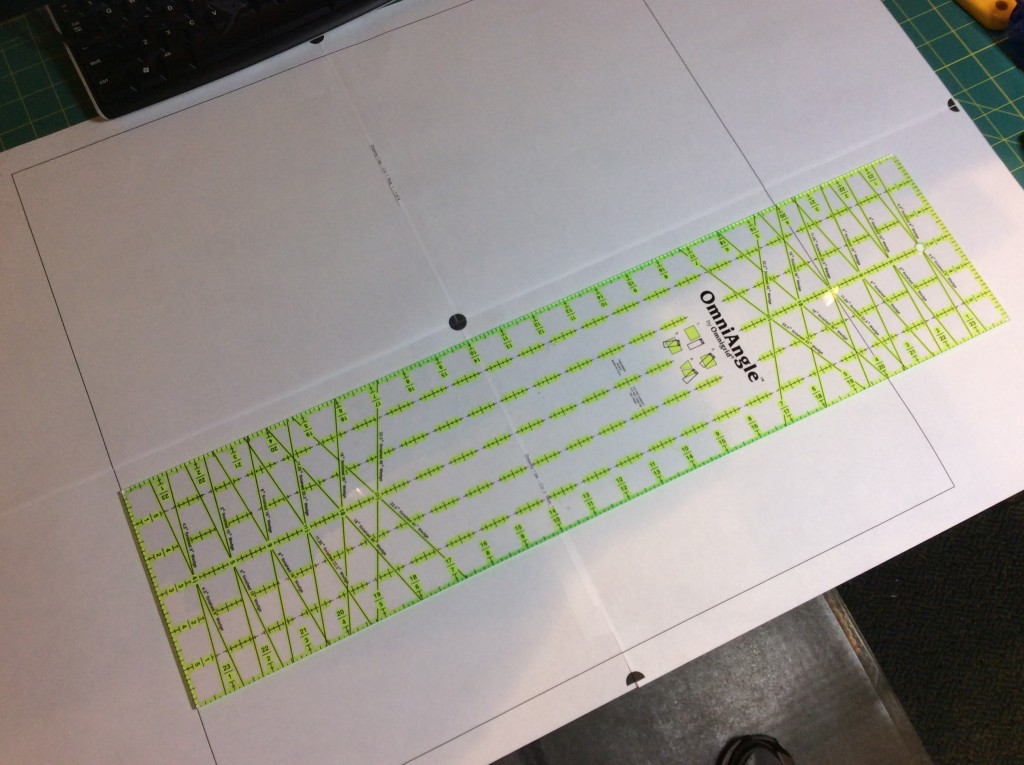
My quilting ruler said the square on the printout was still 20 inches wide. So the printer wasn’t the source of the problem.
Maybe it was the Scans
Another source of error might have crept in when I stitched together the scans in Inkscape. So I went back to the Inkscape files and took a closer look.
Sure enough, when I looked closer (at 150% zoom) I saw places where the individual scans didn’t quite overlap properly. To get them to overlap just right, you have to rotate them very finely so the grain lines on the scan line up with Inkscape’s on-screen grid. You also have to carefully nudge them so that each piece aligns well with all of its neighboring pieces.
With the zoom factor turned up, I very carefully fine-tuned the alignment of the scans, using the horizontal and vertical alignment lines on the patterns as a reference.
And maybe it was the Alignment Box
When I imported the composite image into Pattern Editor, it thought the 2-inch alignment square was approximately 30 inches wide on both pattern pieces. So the “Calculate and Scale” command scaled down the pattern image by a factor of 15. I’m thinking that if it down-scaled the drawing that dramatically, there was more chance for it to “overshoot” and make the result a little smaller than the original paper pattern.
I discovered the precise size of the 2-inch alignment box you trace over the scan is crucial. It makes a difference even if you draw your lines to the inside or outside of the scanned lines. That’s enough to affect Pattern Editor’s scaling accuracy.
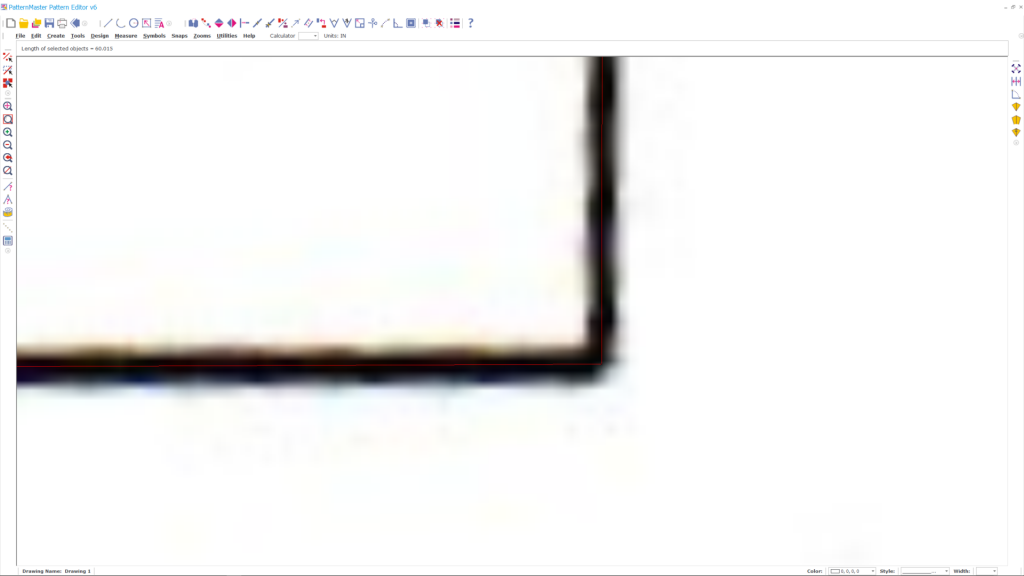
I went back to make sure that the square I drew over top the scan went right through the very center of the printed lines. Again, zooming up an extreme amount was helpful to obtaining a precise result. This screenshot shows the black line of the scan, and the (very thin) red lines running right through the middle. (Click or tap to supersize).
With those two problems addressed, I adjusted the lines and curves of my digital pattern to match the revised scans. I made a test printout, this time without bothering to add new seam allowances and waistbands.
The revised pattern block aligns much, much better with the original tissue pattern.
The back waistband:
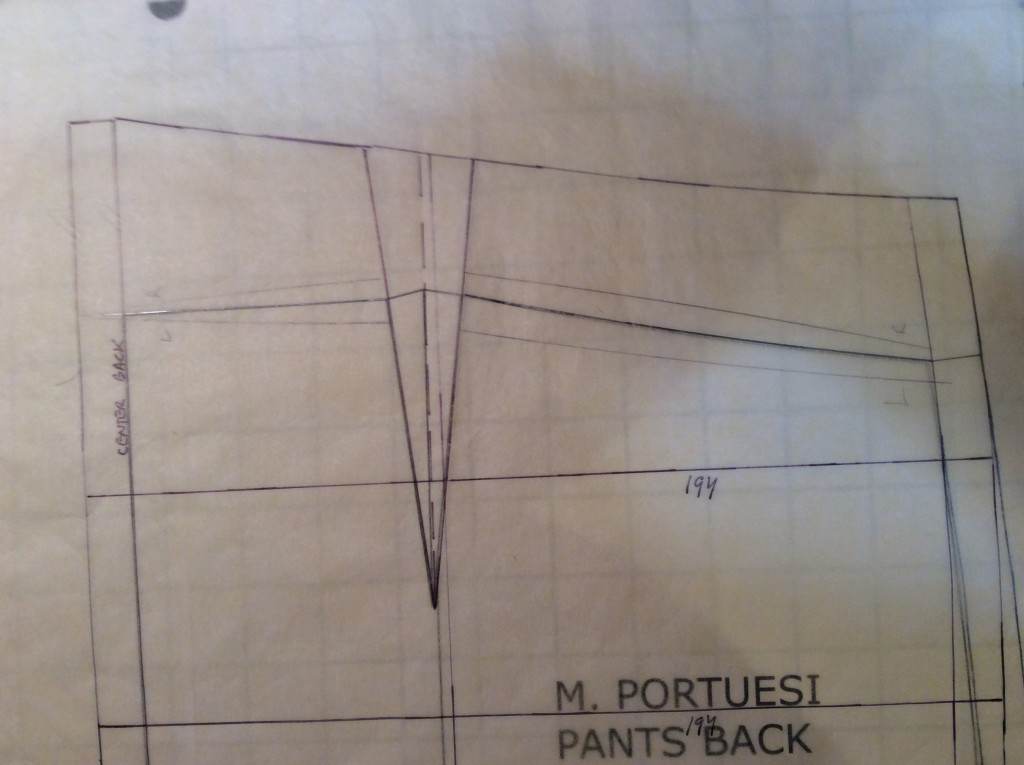
The back crotch seam:

And the front of the pant.
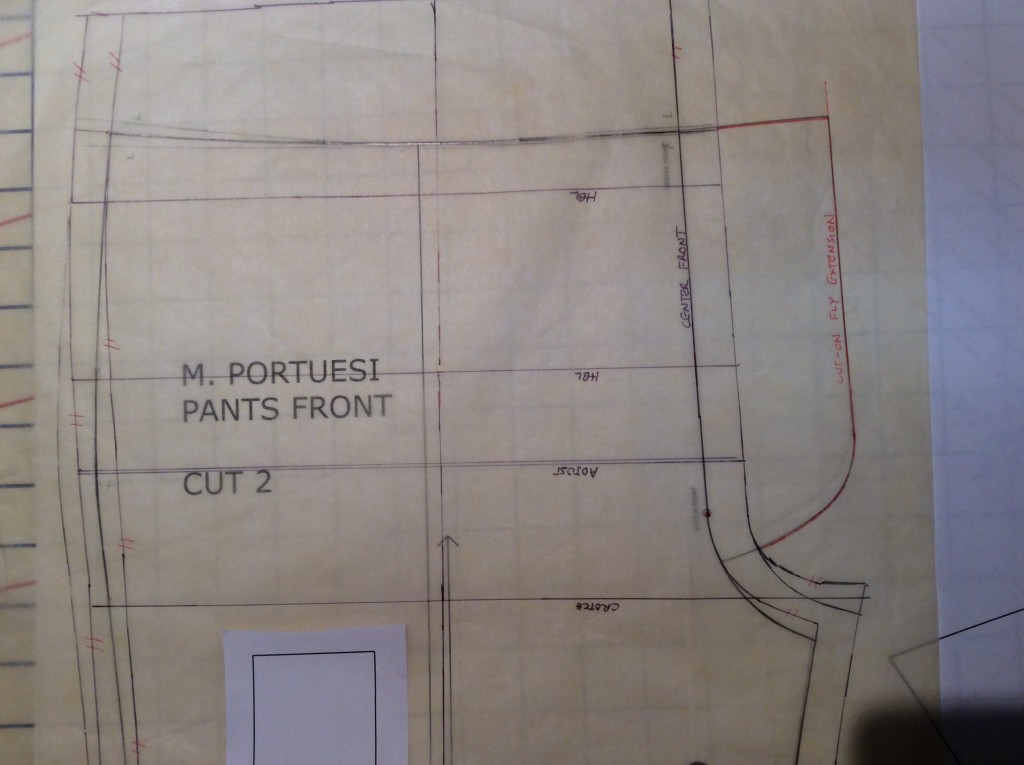
There is still a small discrepancy on the side seams and inseams at the lower portion of the leg, less than 1/8 inch. That’s perfectly alright by me.
Lessons Learned
Here’s the lessons I learned that nobody taught me:
Always compare the printed pattern trace to the original. I recommend you do this by measuring the original pattern with a ruler, then comparing against the measurements displayed in Pattern Editor. Avoid measuring the hardcopy printout, in case unintended scaling by the printer is the source of your troubles. If you click on an item in Pattern Editor it tells you how long it is, whether it is straight or curved. Select several items and it tells you the total length of your selection.
Pay careful attention to alignment when combining scanned pattern pieces. Any errors here can cascade and produce a composite scan that doesn’t faithfully match the original pattern. It helps to draw the grainline along the entire pattern piece, as well as several alignment lines perpendicular to the grainline; this helps align things when the pattern is chopped up into smaller pieces by the scanner.
Draw the alignment box carefully. By drawing through the center of the scanned lines, you ensure your alignment square is as close to 2 inches in real life as you can get. Errors here literally get magnified by Pattern Editor’s “Calculate and Scale” tool.
What’s Next
I’m going to draft a new waistband, walk and true the inseams and side seams, put in proper alignment notches (I missed notches on the waistband first time around), and digitally draft some pockets.

Hi
You have courage and patience to draft your own pants. Can’t wait to see how the pants will fit on you after this. Hope you will find the fit and more…
As for me I finally took the time to make a muslin for my craftsy pants class by Sandra Betzina. A invisible zipper, help with the fit, and numerous adjustments later. I will use the vogue pattern again. Next time I will add pockets. Like you I am still learning. It appears that I finally conquer pants fit. Now, if I just find the perfect material for a blouse…
Keep up. I enjoy reading your adventures on fitting, and drafting.
Thanks for sharing
Josie
Thanks for the encouragement. Did you get Sandra Betzina’s Craftsy class on pants fitting or construction? I got the construction class, but I’m curious to hear what people think of the fitting class.